![]()
Click the back button to return to the previous page or use the Table of Contents.
Authorise Interim and Actual Payments
After an Interim or Actual payment has been generated, it must be authorised before the payment is made.
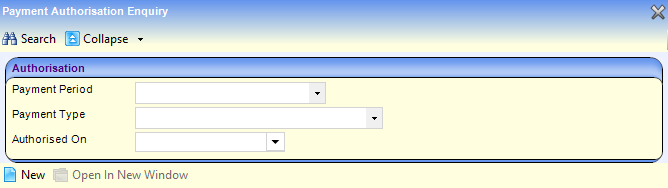
- Select Focus | Early Years | Authorise Payments to display the Payment Authorisation Enquiry screen.
- Click the New button to display the New Authorisation screen.
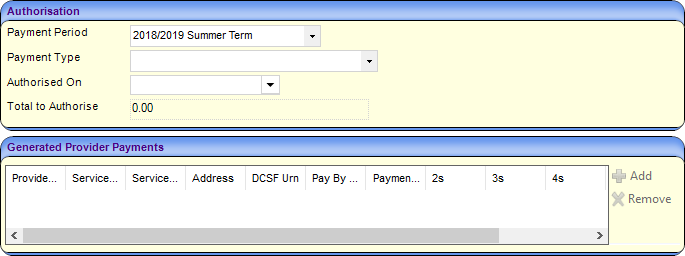
- Select a Payment Period.
- Select INT – Interim Payment or ACT - Actual Payment from the Payment Type drop-down.
- Select an Authorised On date.
- Click the Add button on the Generated Provdier Payments panel to display the Select Payments to be Authorised window.
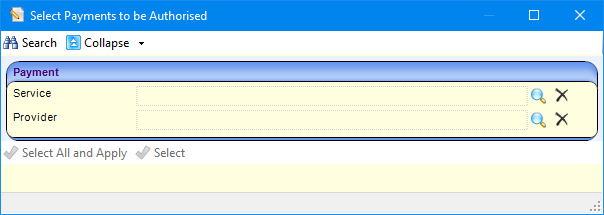
- If required, click the browse button to select a Service or a Provider.
- Click the Search button to list the providers who have Interim or Actual payments that have been generated but not authorised for the selected Payment Period.
- Click the Select button to select the highlighted payment or the Select All and Apply button to select all of the listed payments.
Selected payments are displayed on the Generated Provider Payments panel. The Total to Authorise displays the total of all payments included.

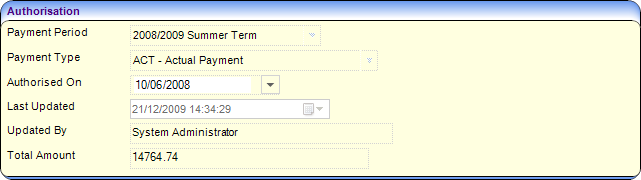
- Click the Authorise button to authorise the payment and display the Authorisation screen.
View Authorised Payments
- Select Focus | Early Years | Authorise Payments to display the Payment Authorisation Enquiry page.
- If required, select a Payment Period, Payment Type and Authorised On date.
- Click the Search button to list the payments.

- Select the required payment and click the Open In New Window button to display the Authorisation screen.