![]()
Define Grades and Age Mapping Bands
Grades used in Better Start Assessments are defined in the v4 Client using PULSE.
The Local Authority can update gradesets and define age mapping bands to enable reports to be produced to identify which children need support in particular areas.
Add a Memo for a Grade
A memo can be added to provide a long text description against a grade. This enables providers to produce reports for parents that describe the grade that their child has achieved.
- In the v4 Client, select Focus | Aspects Management | GradeSets to display the Gradeset Definition Enquiry screen.
- Enter the required search criteria and click the Search button to display a list of matching gradesets.
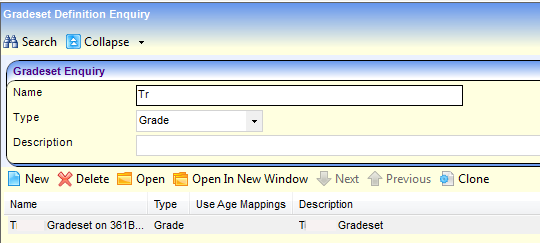
- Select the required gradeset and click the Open In New Window button to display the Gradeset Definition screen.
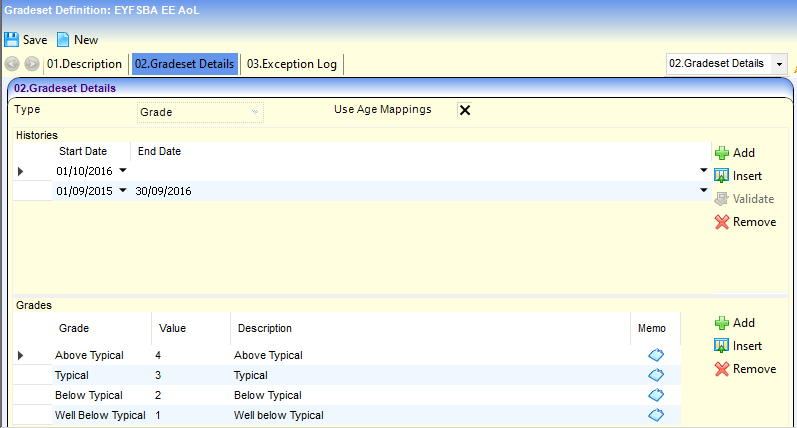
- Click the Memo button adjacent to the required grade in the Gradeset Details panel to display the Memo dialog.
- Record the required details and click the OK button.
Mapping Grades to Bands
Children can be placed into bands based on their age at the assessment date when they were given a particular grade. Once children are categorised, reports can be produced to help to identify children who need support in certain areas.
The Local Authority needs to define the age range for each band for a particular grade, by selecting an age mapping code.
- In the Gradeset Definition screen select the Use Age Mappings check box to display a tick. The age mapping fields are displayed.
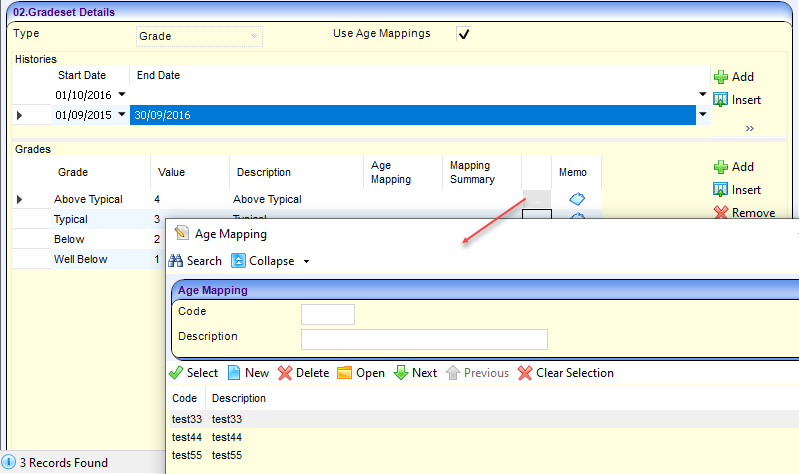
- Click the button adjacent to the required grade to display the Age Mapping dialog.
- If required, enter search criteria and click the Search button.
- Highlight the required Code and click the Open button to display the Age Mapping Details for the code.
Alternatively, click the New button to create a new codecreate a new code.
- In the Age Mappings Details, click the New button.
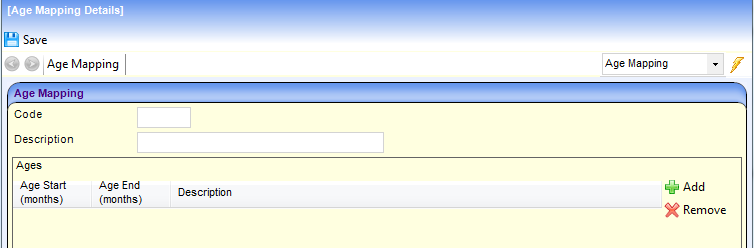
- Enter a Code and Description.
- Enter one or more age ranges with descriptions:
- Click the Add button.
- Enter an Age Start (months) and Age End (months) and a Description.
Age ranges cannot overlap.
- Click the Save button.
- If required, update the age ranges for the code:
- Click the Add button to add a new age range or click the Remove button to remove an age range.
Age ranges cannot overlap
-
- Click the Save button.
- Click the Select button.
- Click the Save button.