![]()
User Group Permissions
User Group Permissions control group access to all web services, web methods, menu routes and menu links into the business processes. User Group Permissions work in tandem with User Group Processes, where the user selects the desired business process and the system sets the privileges accordingly. Click the link in the Links panel to switch between the two methods.
User Group Permissions are accessed in the v4 Client via Tools | Permissions | User Group Permissions.
From the User Group Permissions Editor page, you can control access for individual user groups to the various areas of v4 Client and Online.
Permissions are divided into four main areas:
- All Secured Services - These are the permissions to data items displayed within the panels.
- All Secured Menu Routes - These allow access to the data items in the Focus and Tools menus.
- All Secured Menu Links - These are links from the Links panel to other areas.
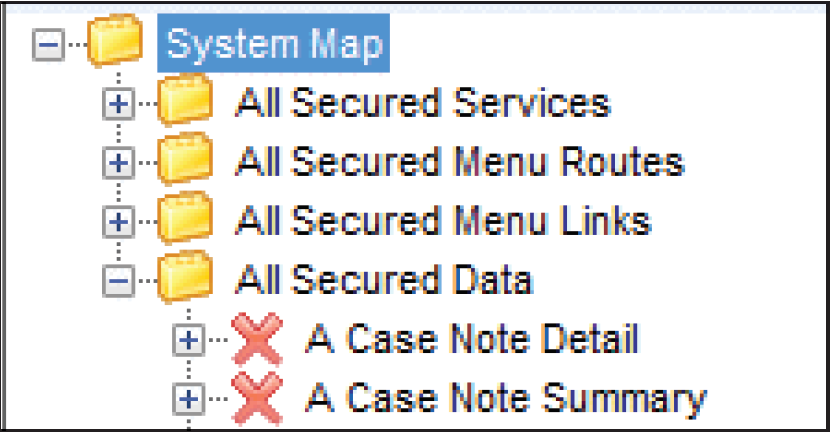
- All Secured Data - These are related to data item security and require a higher level of permissions at field level.
Assign Permissions
Assigning permissions has three stages, selecting a group, selecting a data group and assigning permissions to individual data items.
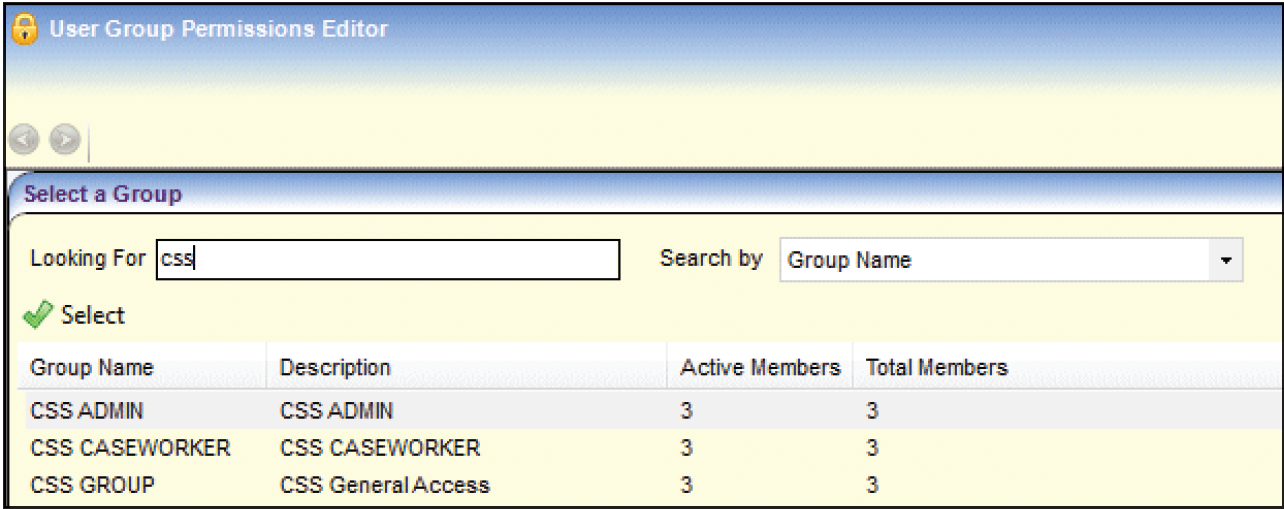
- Select Tools | Permissions |User Group Permissions | User Group Permissions Editor to display the Select a Group panel.
- Enter at least one letter in the Looking For field.
- Click the Search By drop-down and select one of the options to display the group list.
- Highlight a record and click the Select button to display the Permissions Editor panel.
All data groups are displayed in a tree view. Each main data group is indicated by a folder icon. Double click a folder or click the plus sign to expand the group. Double click an expanded folder or click the minus sign to collapse the folder.
- To assign run permissions to all the data items within a data group, highlight the data group then click the Permit Run button.
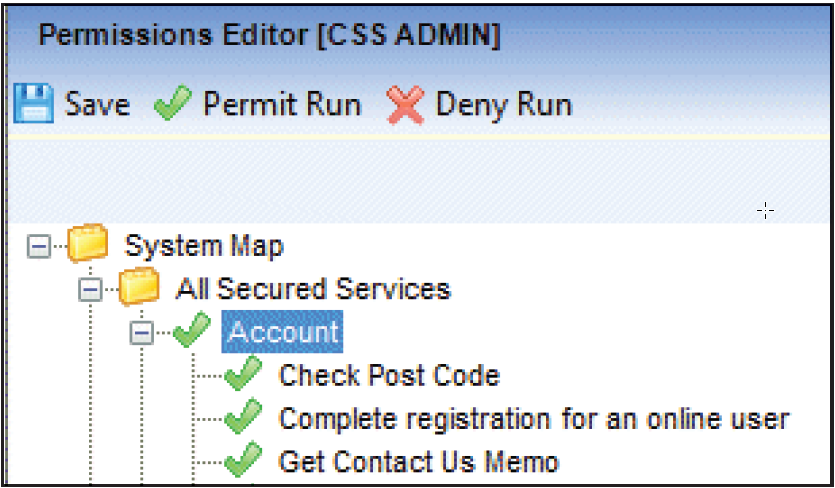
- To deny permissions to all the data items within a data group, highlight the data group then click the Deny Run button.

- Click the Save button to save the permissions.
Assign All Secure Data Permissions
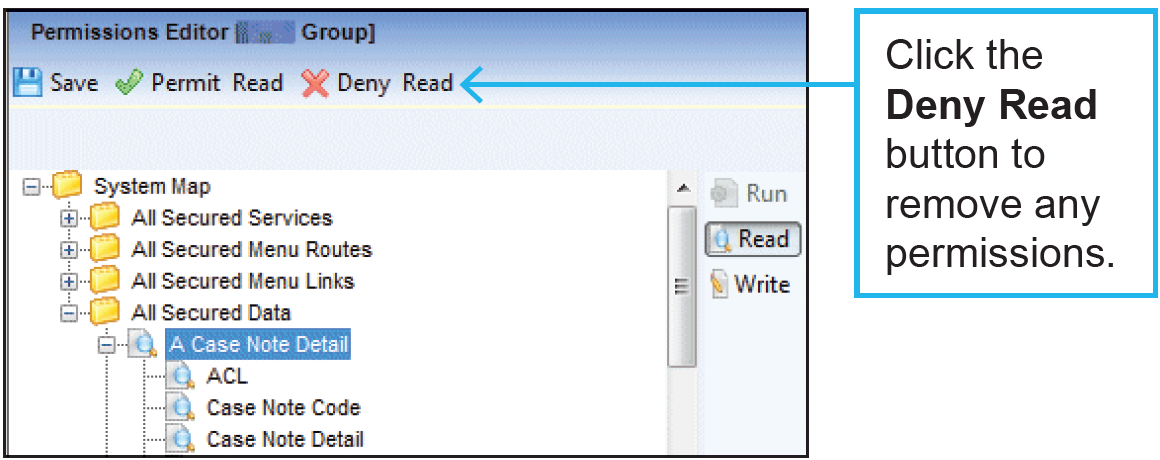
All Secured Data items require a higher level of permissions at field level. There are two levels, Read and Read/Write.
To assign read-only permissions to all the data items within an All Secured Data group:
- Highlight the data group.
- Click the Read button to the right of the navigation tree.
- Click the Permit/Read button..
- Click the Save button to save the permissions.
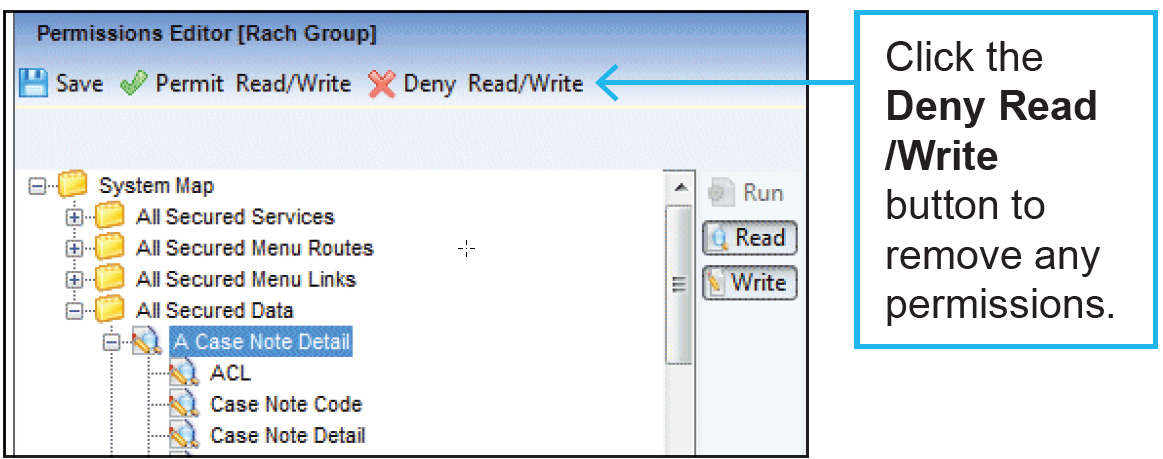
To assign read/write permissions to all the data items within an All Secured Data group:
- Highlight the data group.
- Click the Write button to the right of the navigation tree; the Read button remains activated.
- Click the Permit Read/Write button.
- Click the Save button to save the permissions.
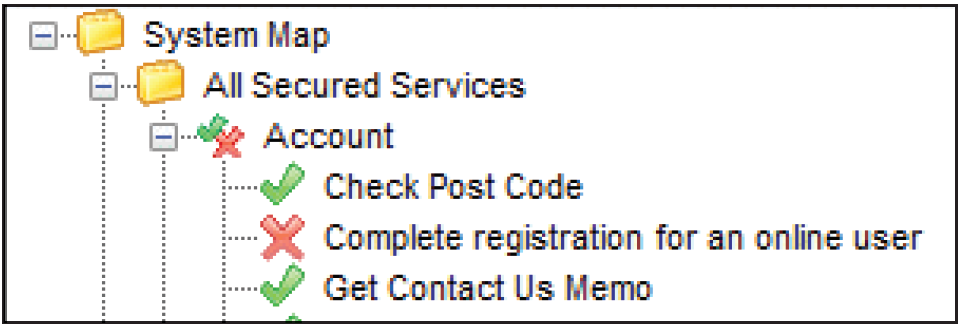
Permit/Deny Permissions
Permit/Deny permissions (a tick and a cross next to the data item or the data group) occur if both permit and deny permissions have been assigned to data items within the data group.
In the All Secured Data group, the Permit/Deny icon is the same as the Read/Write icon on the data items