![]()
The instructions on this page were different in the following release(s):
3.80
Administration in v4 Client
Release Note for Autumn 2023 (3.81)
File types that can be uploaded to a File question on a SEND portal form are now definable
New field 'Information Due Deadline (Days)' added to SEND Portal Form Definition
Form submitter's email address & child/young person's DOB to show in Form Details in SEND Portal Management area
Bulk un-authentication of caseloads for Professional Portal users
Using the SEND Portal Form Builder
The form builder functionality enables each local authority to define questions to be used in form definitions, according to their own individual requirements.
A bank of existing questionsquestions is included to assist you with creating forms. New questions can be added to the bank of questions. A question can only be edited if it has not been used in a previous form definition.
- SEND Portal Form Definitions
Created in Tools | Administration | Form Builder | SEND Portal Forms | SEND Portal Form Definitions. -
- Search for a Form DefinitionSearch for a Form Definition

To search for an existing form definition:
- If required, enter a full or partial Form Definition Code or select a Form Definition Filter. Only a ‘Live’ form definition can be viewed on the Citizen or Professional portals.
- Click the Search button to return all forms based on the selection criteria. Alternatively, clicking the Search button without a code or filter returns a list of all form definitions.
- Select a form and click the Open or Open in New Window button to display the Form Details page for the selected form.
- Create a New Form DefinitionCreate a New Form Definition
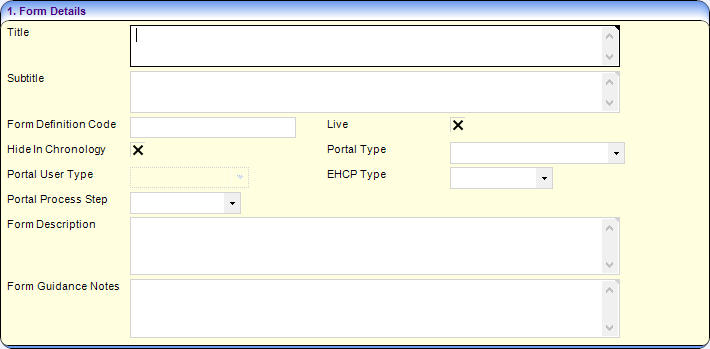
The SEND Portal Form Definition page enables local authorities to create SEND Portal forms which are available on the Citizen and Professional portals for parents, carers, young people and professionals to complete, regarding special educational needs and disabilities (SEND).
To create a new SEND Portal Form Definition:
- Click the New button to display the SEND Portal Form Definition page.
- Enter details as required.
- Click the New button to display the SEND Portal Form Definition page.
- Clone a Form DefinitionClone a Form Definition
You can duplicate (clone) and then amend an existing form definition. Cloning creates a copy of the original form definition, showing the existing Form Definition details. You can change the details to reflect the new form definition and modify the questions required. If a question has previously been used in a form definition that has been saved to a student’s chronology, it cannot be amended.
To clone a SEND Portal Form Definition:
- Double-click the required form definition to display its details.
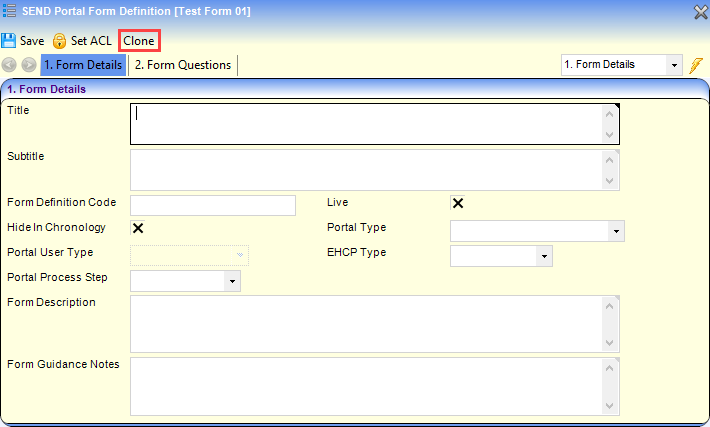
- Click the Clone button to make an editable copy of the form definition.
- On the Form Details panel, make the required changes to the cloned form definition. It is recommended that you re-name the Title and enter a new Form Definition Code to assist identification.
- If required, you can amend the questions and the question groups in the Form Questions panel.

If a question has previously been used in a form definition, it cannot be amended.
- Double-click the required form definition to display its details.
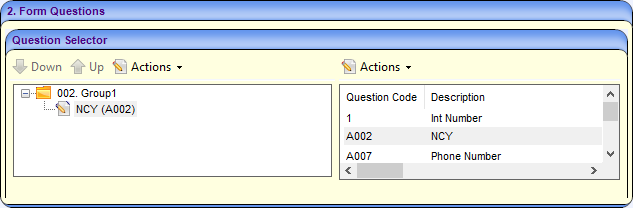
- Create and Populate Question GroupsCreate and Populate Question Groups
After creating questions and adding them to the questions bank, they must be added to question groups. Each question group relates to one page on the portal.
The following procedure shows how to create question groups to which you add those questions.
- In the Form Questions panel, select a question.
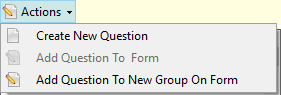
- Click the Actions button and then select Add Question to New Group On Form to display the New Group dialog.
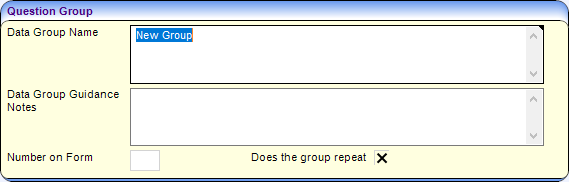
- Enter details as required.
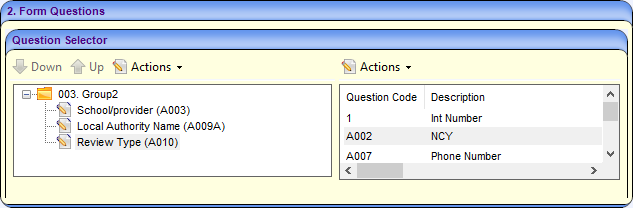
- Click the Save button to add the question to the new question group. The new question group is displayed on the left-side pane on the Form Questions | Question Selector panel.
Repeat the steps to add additional question groups.
After adding the required question groups, you can assign additional questions to the new groups by:- Use ‘drag and drop’ to copy a question from the question bank on the right-side pane to the question groups on the left-side panel.
- Highlight both the question group and the required question.
- Click the Actions button.
- Select Add Question to Form or Add Question to New Group on Form.
You can only use a question once on a form. If the same question is used on a different SEND Portal form at a later date, the answer will be pre-populated.
For example, if you have a question called ‘Social Care Status’ used on form A, then you re-use that question on form B for the same child, form B is pre-populated with the answer from form A.
- Move Questions and Question GroupsMove Questions and Question Groups
Individual questions can be moved up or down in the question order. However, a question group cannot be moved. If you wish to change the position of a question group, you must change the Number on Form. This means that all subsequent numbers will need to be changed.
To move a question:
- On the Form Questions | Question Selector highlight the question in the left pane.
- Click the Up or Down arrow.
If you wish to move the question to another group, use the drag and drop functionality.
- On the Form Questions | Question Selector highlight the question in the left pane.
- Edit Questions and Question GroupsEdit Questions and Question Groups
Questions can be edited, if they are not used on any previous forms. If the question has been used on a previous form, it cannot be changed. You can, however, select the Answer can be inherited multiple times check box, so future version of this question can record multiple answers.
To edit a question:
- On the Form Questions | Question Selector double-click the question to display the SEND Portal Question Definition dialog; you can edit the question from either pane.
- Make the required changes. The Question Code cannot be changed.
To edit a question group:
- On the Form Questions | Question Selector highlight a question group on the left pane.
- Click the Actions button and select Edit Group.

- Make the required changes to the Question Group dialog. If you change the Number on Form, the following message displays:
Do you want all groups to be renumbered?This operation will remove any conflicts and gaps. But it may affect related quick reports too.
It may also affect panels which currently have the same number assigned, changing them to an incorrect order.
Please double check the group numbers after this operation, if you answer ‘Yes’. - If you said yes to automatic renumbering, check the numbering order is correct after saving.
- Delete Questions and Question GroupsDelete Questions and Question Groups
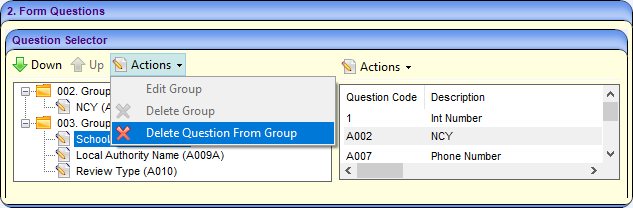
To delete a question:
- On the Form Questions | Question Selector, highlight a question on the left pane.
- Click the Actions button and select Delete Question From Group.
To delete a question group:
- On the Form Questions | Question Selector, highlight a question group on the left pane.
- Click the Actions button and select Delete Group.
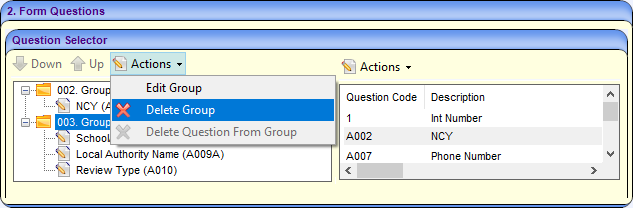
There is no message to confirm that you wish to delete the group! The group and all questions are deleted immediately. If a group is deleted in error, close the page without saving.
- Search for a Form DefinitionSearch for a Form Definition
- SEND Portal Form Question Definitions
Created in Tools | Administration | Form Builder | SEND Portal Forms | SEND Portal Question Definitions. -
- Search for Question DefinitionsSearch for Question Definitions
The Question Definitions are the Question Codes and the Descriptions that are used when creating form definitions for a SEND Portal Form Definition.

To search for SEND Portal Question Definitions:
- If known, enter a full or partial Question Code or Description.
- Click the Search button to return all questions based on the selection criteria. Alternatively, clicking the Search button without a code or description returns a list of all questions.
- View Question DefinitionsView Question Definitions

To view SEND Portal Question Definitions:
- Select a Question Definition to display the SEND Portal Question Definition [<Question Code>] page.
It is not possible to make any changes to the question definition if it has been used on a previous form.
- Select a Question Definition to display the SEND Portal Question Definition [<Question Code>] page.
- Define Question DefinitionsDefine Question Definitions
New SEND Portal Questions Definitions are created in the SEND Portal Form Definitions. A new form definition can be created containing new questions, or an existing form definition can have new questions inserted.
The Form Questions panel enables you to define the questions to be used in the form definitions. Existing questions can be used or new questions can be added to the bank of questions to be used in the form definition. Existing questions can only be edited if the question has not been used in a previous form definition.
The Form Questions | Question Selector panel is the foundation of the form definition. It is a two pane panel which is either:
- pre-populated in the left pane for an existing form
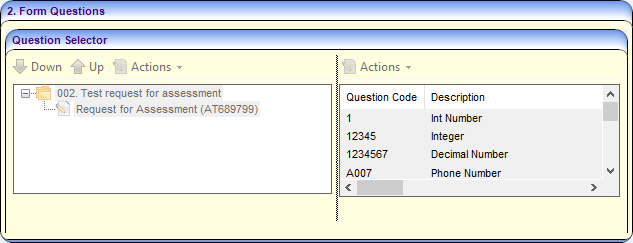
- blank for a new form
The right pane (i.e. the question bank) lists all available questions, where you can define additional questions. The question bank also contains EHCP questions of the same data type used in the SEND Portals.
To create additional questions:
- Create a new or open an existing SEND Portal Form Definition.
- On the Form Questions | Question Selector panel, click the Actions button.
- Select Create New Question to display the SEND Portal Question Definition dialog.

- Enter details as required.
When entering a Question Code, do not paste any values in to this field. This can leave a carriage return in this field, which can cause unwanted results when using forms that have these questions on.
Additonally, you cannot start codes with the letter Z, as these are used elsewhere.Answer can be inherited multiple times: It is advised that this is only used where it is necessary to inherit multiple answers as it requires additional steps (choosing the questions) each time you create a form. It is also advised that this is not used with the ‘repeating groups’ functionality to avoid complications of data later down the line.
- Repeat the steps until you have defined all the SEND Portal questions you want to add to the list.
Question Data Type Answer Description/Example Text Inserts a text box. Use with Answer Maximum Length field. Integer Number Only accepts whole numbers. Please see Important Note below. Decimal Number Only accepts decimal numbers. Yes/No Inserts a tri-state checkbox, i.e. tick, cross, blank. Date Only accepts a numerical date in dd/mm/yyyy format. Image Upload an image in .jpg, .jpeg, .gif, .bmp, .png format.
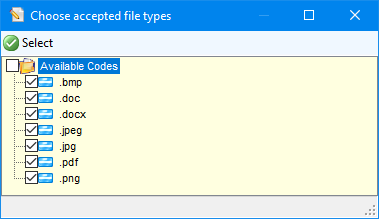
File Upload a file in one of the following selectable formats:
It is advisable not to use the Integer Number Data Type to capture phone numbers, as a leading zero (0) at the start of the phone number is omitted. If you would like to capture phone numbers, it is advised you use the Text Data Type.
- pre-populated in the left pane for an existing form
- Delete Question DefinitionsDelete Question Definitions
To delete a SEND Portal Question Definition:
- Select a question definition and click the Delete button. The following message is displayed:
Are you sure you want to delete this question? - Select Yes to delete the question definition. A message at the bottom of the screen informs you that the question has been deleted successfully.
You cannot delete a question that has been used in a previous form.
- Select a question definition and click the Delete button. The following message is displayed:
- Search for Question DefinitionsSearch for Question Definitions
Forms that are created on the EHCP Form Builder are not available on the SEND Portal. However, the EHCP questions that are available in the question bank may be used on a SEND Portal Form Definition.
SEND Portal Management
The SEND Portal Management page is accessed in the v4 Client via Focus | Services | SEND Portal Management. It enables online forms that have been submitted via the Citizen Self Service portal or Professional Portal to be reviewed by the local authority teams. Partially completed forms are not displayed on the SEND Portal Management page.
When a Special Educational Needs and Disabilities (SEND) form is submitted via the Citizen Self Service portal, any child who has not been successfully matched to a student, or who has been successfully matched but for who there are differences (conflicts) between some details of the incoming child and the matched student, is processed via v4 Online | Portal Back Office | Data Transfer. The incoming students are listed under the SEND Dummy Base.
- Select v4 Client | Focus | Services | SEND Portal Management to display the browse list.
- Use the search filters to reduce the number of visible forms.
- Select from the following options:
- Search For Portal FormsSearch For Portal Forms
By default, when a user enters the SEND Portal Management area, only forms that can be actioned are displayed, i.e. those with a status of either Opened or Not Opened.
To search for a Special Educational Needs and Disabilities (SEND) form:
- Click the Search button to display the forms according to the search filters.

- Click the Search button to display the forms according to the search filters.
- Review Portal FormsReview Portal Forms
Before you can action a form, it must have been processed via v4 Online | Portal Back Office | Data Transfer.
To review a Special Educational Needs and Disabilities form:
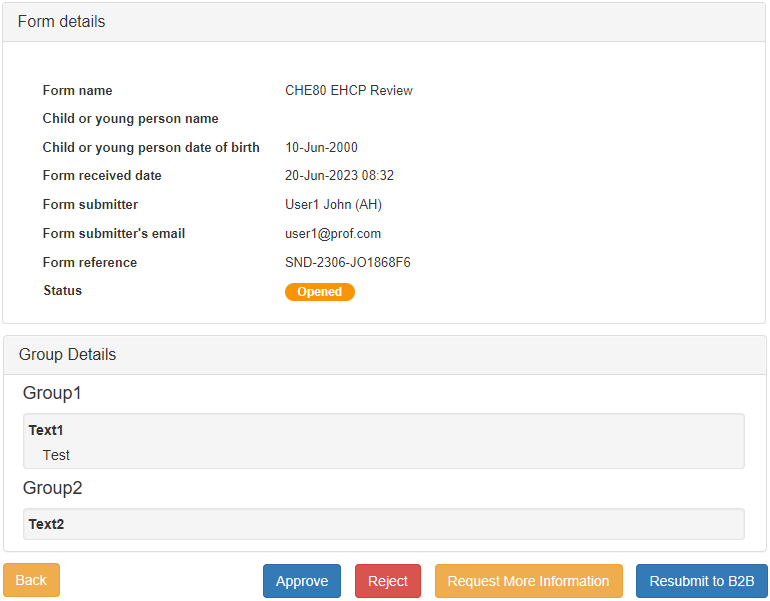
- Click a record to display the Form Details page.
The form can be approved, rejected or more information can be requested. A form can also be returned to B2B.
- Click a record to display the Form Details page.
- Approve Portal FormsApprove Portal Forms
A Special Educational Needs and Disabilities form is approved in SEND Portal Management.
- Select a form to display the Form Details page.
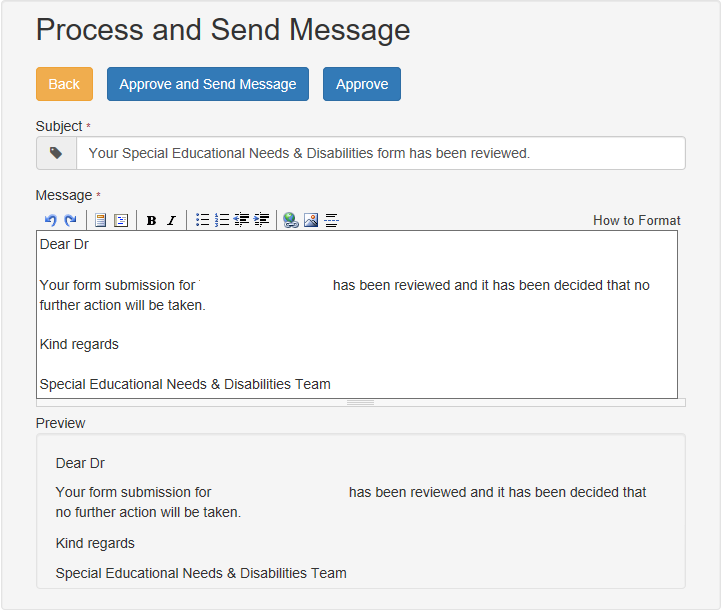
- Click Approve to display the Process and Send Message page.
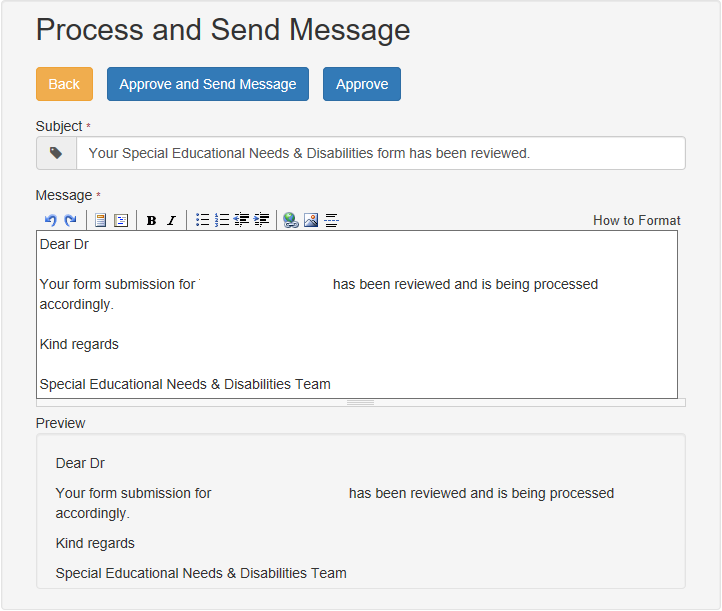
- If required, make changes to the default message.
- Click Approve and Send Message to display the Sharing Forms dialog.
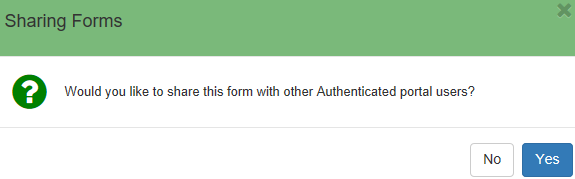
- Click Yes to share the message if required.
- Select a form to display the Form Details page.
- Reject Portal FormsReject Portal Forms
A Special Educational Needs and Disabilities form is rejected in SEND Portal Management.
- Select a form to display the Form Details page.
- Click Reject to display the Process and Send Message page.
- If required, make changes to the default message.
- Click Reject and Send Message to inform the applicant that it has been decided no further action will be taken.
The parent or carer is unable to respond directly to the local authority’s rejection of their form. Therefore, the LA will have to specify in their message how the form submitter should respond in order for them to reply to the LA, if they wish.
- Select a form to display the Form Details page.
- Request More Information for Portal FormsRequest More Information for Portal Forms
Additional information regarding the form can be requested in SEND Portal Management.
- Select a form to display the Form Details page.
- Click Request More Information to display the Process and Send Message page.

- If required, make the changes to the default message.
- Click Request More Information and Send Message to request more information. A confirmation message is displayed.
The parent or carer is unable to respond directly to the local authority’s request for additional information. Therefore, the LA will have to specify in their message how the form submitter should respond in order for them to supply the LA with the information.
- Select a form to display the Form Details page.
- Resubmit SEND Portal Forms to B2BResubmit SEND Portal Forms to B2B
Sometimes a child or young person will not be correctly matched in B2B and therefore their form will need to be resubmitted to B2B. For example, If the data processing team discarded or rejected the incoming student record (for whatever reason) in Portal Back Office, but the SEND team knew it was a student they needed to process, then the SEND team can use the Resubmit to B2B functionality so the student can then be reprocessed accordingly.
The form can be resubmitted in the v4 Client via Focus | Services | SEND Portal Management.
- Select a form to display the Form Details page.
- Click Resubmit to B2B to resubmit the child.
- A confirmation message is displayed.
- The data is then processed via v4 Online | Portal Back Office | Data Transfer. The incoming students are listed under the SEND Dummy Base.
- Select a form to display the Form Details page.
- Download FilesDownload Files
If a form has been submitted that contains a file question, the file can be downloaded before any action is taken.
The file is downloaded in SEND Portal Management.
- Select a form to display the Form Details page.
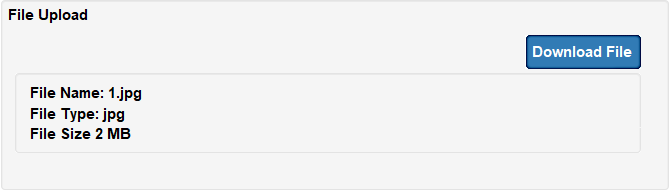
- Click the Download File button to display the File Download dialog.
- Select a form to display the Form Details page.
- Search For Portal FormsSearch For Portal Forms
ACL’s set at the Form Definition level are not applied in the SEND Portal Management area. This is so that incoming information is not missed. These ACL’s are applied if the form is approved to appear on a Student’s Chronology in v4 client.
Student’s Chronology
ACL’s set at the Form Definition level are not applied in the SEND Portal Management area. This is so that incoming information is not missed. These ACL’s are applied if the form is approved to appear on a Student’s Chronology.
The SEND Portal form is added to the student’s chronology after the following processes have been completed:
- A parent, carer or young person submits a SEND Portal form on behalf of a child or young person to the local authority via the Citizen Portal.
- A verified professional user submits a SEND form on behalf of a child or young person to the local authority via the Professional Portal.
- If required, the child or young person is processed via B2B (Portal Back Office); they are matched to a student and any conflicts are resolved.
- The SEND Portal form is assessed by the SEND Administrator in the v4 Client via SEND Portal Management. An approved message is sent to the professional user’s account.
The SEND Portal form can be viewed in the v4 Client via Focus | People | Students | ChronologyChronology.
It is possible for both parents to have a Citizen Portal account and submit the same form for a child to the local authority. After the forms are approved, they both display as an event on the child’s chronology.

Clicking on the Date link displays the read-only SEND Portal form details.
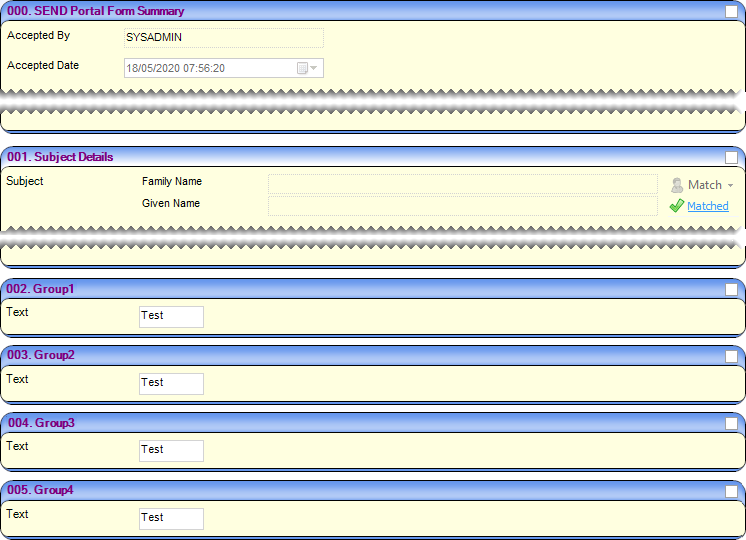
Apart from the Summary, the panels in the v4 Client are the same as the steps in the Citizen Portal, as designed in the Form Builder.
- Panel 000 is a summary of dates for the SEND Portal form process.
- Panel 001 is automatically inserted as the Subject Details.
- Panel 002 is Step 1.
- Panel 003 is Step 2.
- Subsequent panels would be represented by subsequent steps
- The final step in the Citizen Portal and Professional Portal is always the Summary; this is not displayed in the v4 Client version.

- Creating New SEND Portal Forms From Student’s ChronologyCreating New SEND Portal Forms From Student’s Chronology
When an approved SEND Portal Form from the Citizen Portal is added to the student’s chronology, it is read-only. Occasionally a parent, carer or young person may wish to make changes to a form. This can be achieved by creating a new SEND Portals form in the chronology.
To create a new SEND Portal form:
- Click the New button at the top of the chronology.
- Select New SEND Portals.

- Choose the required SEND Portal Form Definition from the list.
The displayed form is a duplicate of the form that was submitted on the Citizen Portal, but the inherited answers can now be edited. Inherited answers have a green outline around them.

- Make the required changes to the form.
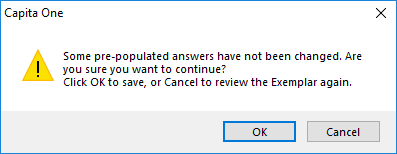
- Click the Save button.
If some answers have not been changed, the following message is displayed:
- Printing SEND Portal FormsPrinting SEND Portal Forms
You can output a SEND Portal form as it is displayed on the screen either as a Word document or a PDF. The v4 Client does not print directly, instead, a Microsoft Word or PDF file is created by the v4 Client and then you can use Word or Acrobat Reader to send the document to your printer.
A check box on each panel header enables you to include only the panels you require in the printout.

To print a SEND Portal form:
- Open a SEND Portal form.
- If required, select the check box on individual panels to display on the printout.
The Subject Details are automatically included, but these can be removed before printing. - Click the Print button to display the Print Window dialog.

- Click Print to preview the document in the chosen application eg Word.
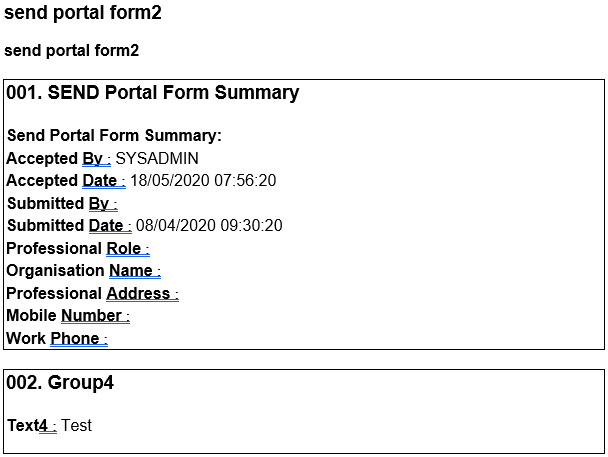
The headings displayed on the printout are in numerical order and not the same as the panel numbers, so although you may have selected Panels 1, 2, 10 and 20 the printout shows 1, 2, 3 and 4.
- Select the print option within the application to send the document to your printer.
- SEND Portal Print OptionsSEND Portal Print Options
- Data Panels
Click on the plus signs to expand the tree to view the questions within a panel and select or deselect as required. If any one question is checked then the panel check box is also activated.
You can Select All or Deselect All panels - Document Type
Normal:
The default which prints the selected contents of the SEND Portal form.
Notes:
Prints a blank page after the contents of each selected panel have been printed; the blank page is entitled Notes [Description of the Panel].
Guidance:
Prints guidance notes in italics which appear above the details of the panel. If guidance notes have not been entered on the Form Details, on the Form Definition, this radio button is not available. - Case Note
Case notes are not required for SEND Portal forms. - Document Format
You can print the document in MS Word or PDF format. The default is WORD. - Bookmark
Bookmarks are not required for SEND Portal forms. - Page Break
Select the check box if you wish to insert a page break after each panel. - Changing the Font Type and Size
You can change the format of the printouts in the CCSGenericPrintSettings.ini file, which is located in the same folder as the CCSEnterprise.exe. This .ini file enables you to edit the font type and font size for: -
- Panel Title
- Sub-Title.
- Inserting a Logo
When a SEND Portal form is printed, you can insert a logo on the plan.
Add a logo as a .jpg to a directory on your local workstation. Then open the CCSGenericPrintSettings.ini in the Children's Services System folder and enter the Logo Path section as follows:
-- Logo Path
LOGOPATH=D:\LOGO\print_logo.JPG
- Data Panels
Portal Sharing
A key component of SEND enables users of the different portals to share information. The local authority can control which portal users involved with a child can see SEND information. This includes information that is coming into the local authority and also information going out to other organisations and parents.
The Portal Sharing functionality is available in the v4 Client via Focus | People | Students | Student Details | Involvements | EHCP Assessment Involvement.
The Portal Sharing panelpanel enables you to record details of any portal users. You can also indicate whether that person has been authenticated to view forms and files uploaded via the Citizen or Professional Portal.

To add a portal sharing user:
- Click the Add button to display the Portal Sharing [New Portal User] dialog.
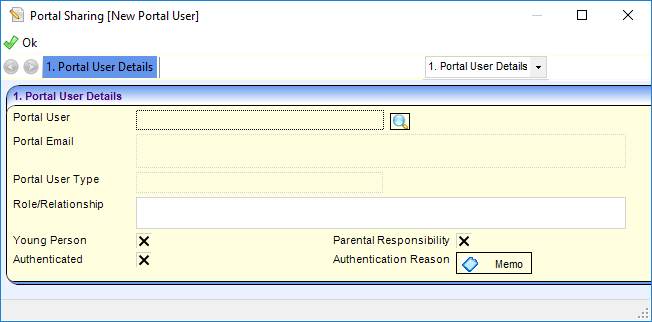
- Enter details as required.
Recording Information Requested
The Information Requested panelpanel is located on the student’s EHCP Assessment Involvement. This panel enables you to record details of any information that has been requested. This includes details about the portal user who information has been requested from.
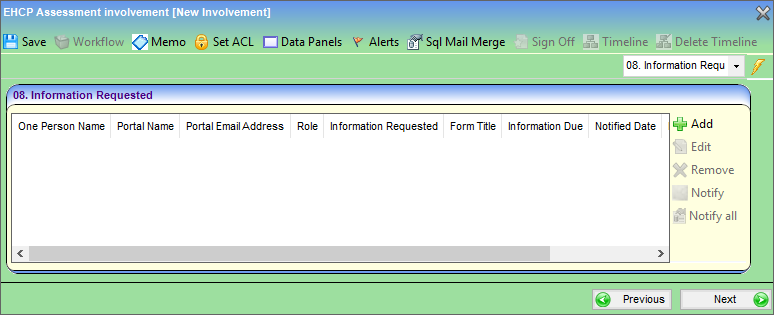
To add details about requested information:
- Click the Add button to display the Information Requested [New Info Requested] dialog.

- Enter details as required.
Information Due date is pre-populated on a students involvement based on Information Due Deadline (Days) (date the Information Requested record is created + number of days entered for Information Due Deadline (Days) on the form definition.
Alerts
Portal messages (alertsalerts) are set up in the v4 Client via Tools | Administration | Alert Definition. They are used to keep parents, young people and professionals informed about SEND processes, e.g. if a person has been authenticated as a portal user or to request additional information. Only authenticated portal users on a child or young person’s EHCP assessment involvement can receive portal messages.
Two types of alerts can be set up for portal messages:
- Trigger
A portal message is sent when a specific action occurs (the trigger). - Scheduled
A portal message is sent at a pre-defined time.
Elements of an alert:
| Trigger Alert | Scheduled Alert |
|
|
To set up an alert:
- Select New to display the Alert Definition [New Alert Definition] page.
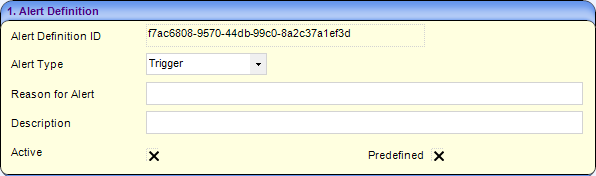
- Select either Trigger or Scheduled from the Alert Type drop-down.
- Enter details as required.
Active is checked when the alert is activated, after it has been saved. The Activate button cannot be used to activate a new alert.
- Select from the following options:
- Field Selection (Trigger Alert)Field Selection (Trigger Alert)
- On the Trigger Alert panel, select an Alert Based On context:
- Involvements – Portal Sharing or
- Involvements – Info Requested
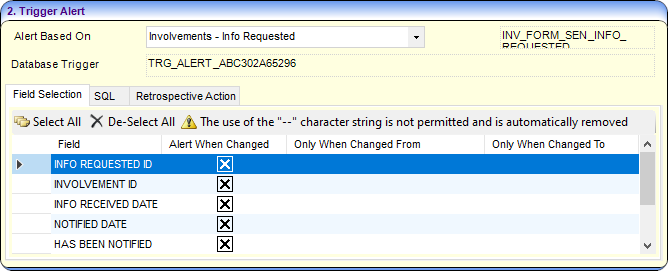
- Select the Field Selection tab to display all of the fields according to the context selected in the Alert Based On drop-down list.
- Select the Alert When Changed check boxes of the fields that, when changed, will trigger a portal message.
- On the Trigger Alert panel, select an Alert Based On context:
- SQL Query (Scheduled Alert)SQL Query (Scheduled Alert)
- On the Scheduled Alert panel, enter the SQL Query. You can only use Select statements and you cannot include parameters in the SQL Query field.
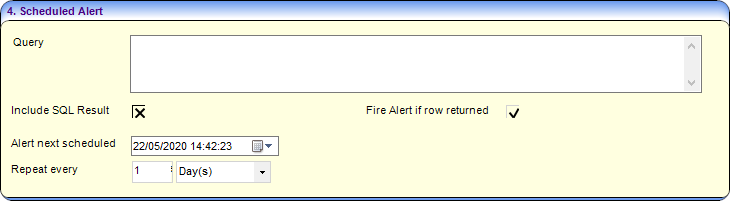
- Enter details as required.
- On the Scheduled Alert panel, enter the SQL Query. You can only use Select statements and you cannot include parameters in the SQL Query field.
- Field Selection (Trigger Alert)Field Selection (Trigger Alert)
- Select a recipientrecipient.
- On the Alert Definition page, go to the Recipient List panel.
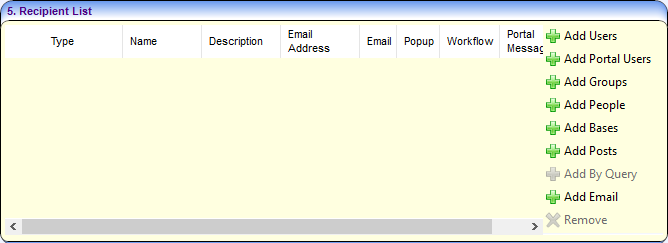
- Click the Add Portal Users button to display the Portal User Enquiry dialog.
- Search for and select the required portal user(s).
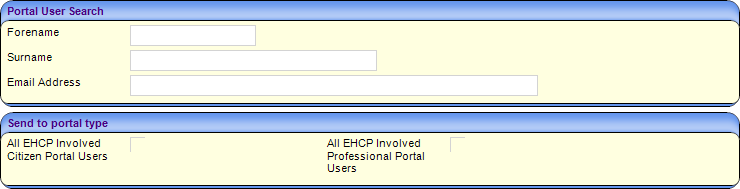
- If required, select the check box on the Send to portal type panel to send the message to all EHCP involved users.
This displays the following message:
The recipients of this alert will be authenticated <Portal/Citizen Portal/Professional Portal> users that are on a child or young person’s EHCP Assessment Involvement.
Depending on your selection of users, the Recipient List panel displays as:

Recipients can be removed by highlighting the row and clicking the Remove button.
- On the Alert Definition page, go to the Recipient List panel.
- Setup an actionaction.
To define an action for a portal message alert:
- On the Alert Definition page, go to the Action panel.
- Select the Portal Message section.
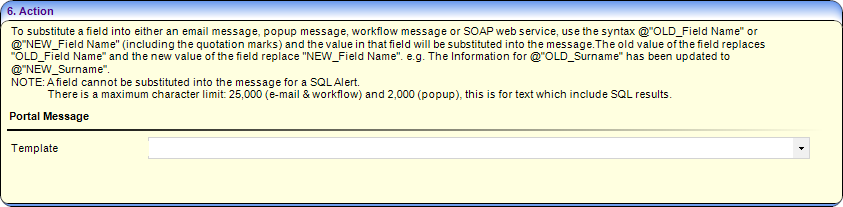
- Select a Template from the drop-down.
- Click the Save button.
The following message is displayed:
Do you want to activate the alert? - Click the Yes button; this activates the alert immediately.
- The Activate button at the top of the page changes to Deactivate.
Bulk Unauthentication
This option allows LAs to search for a Professional Portal account and unauthenticate them from their caseload in bulk. This helps to save time compared with unauthenticating them on individual involvements for each student record.
The Portal Sharing functionality is available in the v4 Client via Focus -> Services-> SEND Portal Professional Bulk Unauthentication.

- Search for and select the required account.

- Click Bulk Unauthenticate to unauthenticate the user from their caseload.
WARNING: Ensure the correct Professional Portal account has been selected before unauthenticating them.