![]()
Configure the Provider Portal
- Select Administration | Site Setup | Configuration to display the Manage Configurations screen.
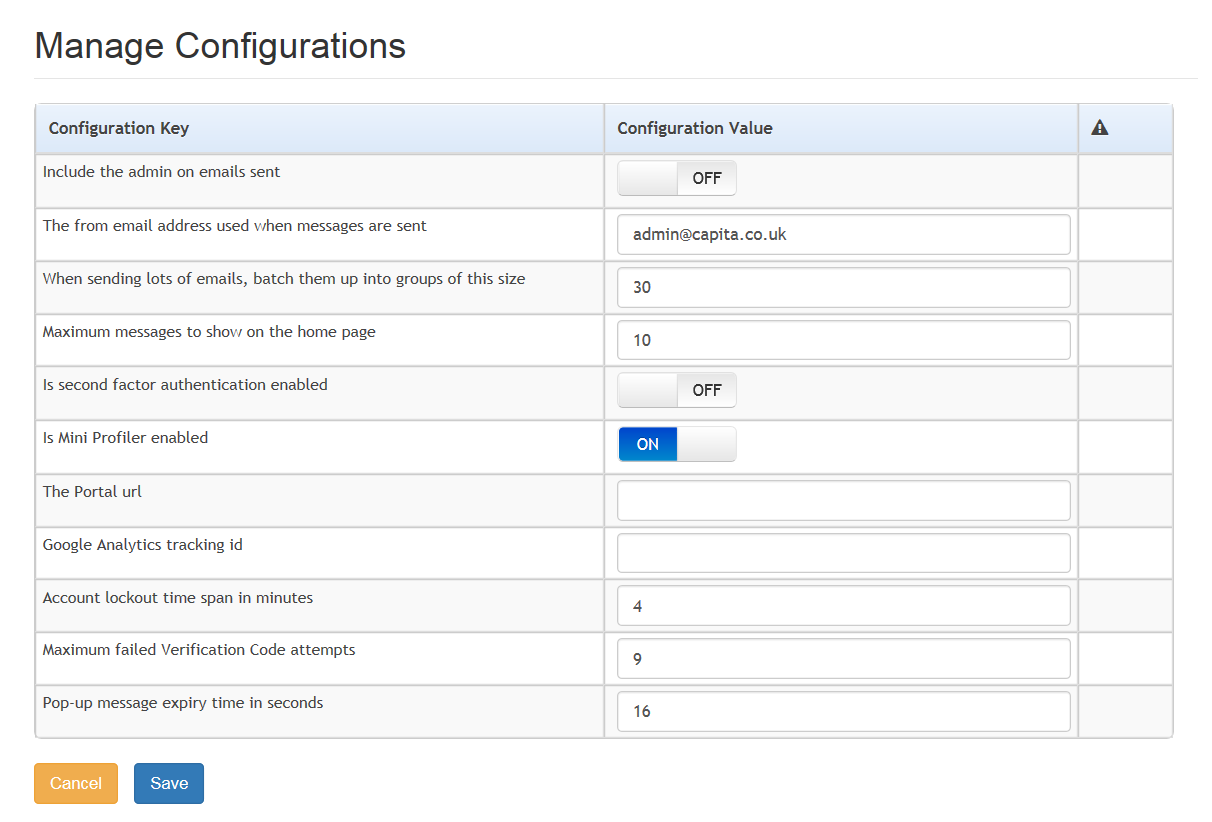
For each Configuration Key, change the Configuration Value, if required:
- Set Include the admin on emails sent to ON.
- Enter an email address for: The from email address used when messages are sent.
- Enter a number for: When sending lots of emails batch them up into groups of this size.
- Enter the number of Maximum messages to show on the home page.
- Set Is second factor authentication enabled to ON.
- Set Is Mini Profile enabled to ON.
- Enter The Portal url.
- Enter the Google Analytics tracking id.
- Enter the Account lockout time span in minutes.
- Enter the Maximum failed Verification Code attempts.
- Enter the Pop-up message expiry time in seconds.
- Click the Save button.
For more information regarding portal configuration, refer to the Technical Guide: Deploying and Configuring the One Provider Self Service Portal for Local Authorities