![]()
Timelines
What is a Timeline?
A timeline is a set of predefined activities that a caseworker or administrative officer follows when dealing with a particular type of involvement, e.g. sending letters, recording decisions, etc.
Timelines are connected to involvement forms. When you enter a date in a timeline activity, it automatically fills in the linked date field on the involvement.
Timelines are process flowcharts with a beginning and an end, showing the flow of activities as a series of connected boxes.
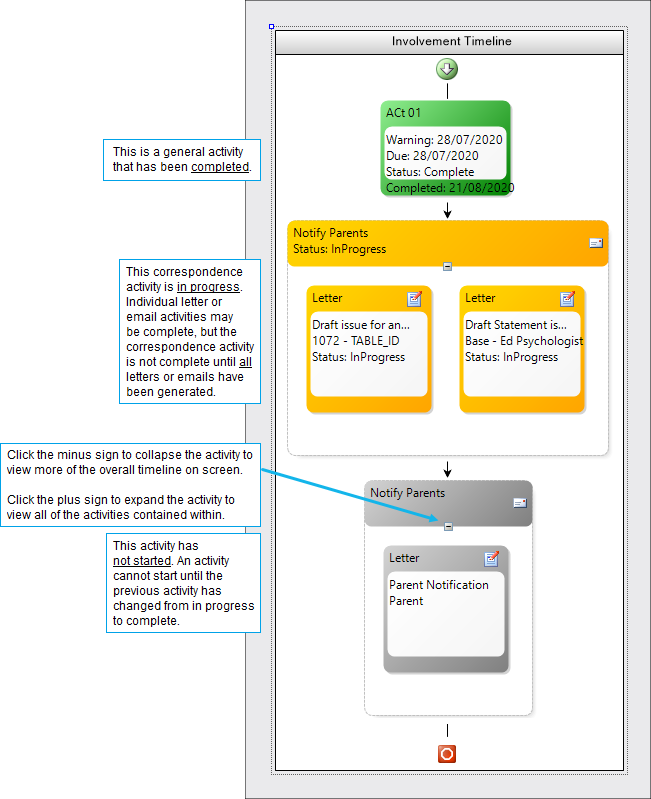
The timeline design tool supports the addition of multiple branches whose ‘route map’ is determined by customisable user questions/answers. For example, at the end of an SEN assessment, the user can be asked by the timeline whether they want to issue a draft statement or a note in lieu. When the user responds, the workflow follows the correct branch.
Pre-defined Timelines
Pre-defined timelines are supplied by One appropriate to the SEN process; these are associated with a SEN Assessment Source and Assessment Type.
If required, you can edit or create your own timelines from scratch.
Timelines can be created by dragging and dropping workflow activities into the workflow designer, allowing additional activities to be carried out individually, in parallel with other activities or in a specific sequence.
Timelines are linked to Involvements
A timeline is designed once but re-used many times by associating an instance of it with an involvement form.
To use a timeline, it must be associated with an involvement, as follows:
- Create a new involvement, or
- Select an existing involvement without a timeline.
When a timeline is associated with an involvement, it is given a start date and its activities are displayed for completion as Workflow Messages on the caseworker’s or admin officer’s Home Page after the number of pre-defined days has elapsed.
Although it is optional to link a timeline to an involvement, it is necessary to do this for a timeline to function correctly with an involvement.
Linked Fields
When an activity that is linked to a field within an involvement is completed, the completed date entered on the timeline populates the corresponding linked field in the involvement.
However, if a date has already been entered in a linked field on the involvement, then the timeline linked activity is completed, the date entered on the involvement will be overwritten by the completion date of the linked timeline activity.
Use the Timeline Designer
Use the Timeline Designer via Tools | Administration | Timeline | Timeline Design to:
- Import a timeline template (a file in .XOML format).
- Create a new timeline from scratch.
- Edit an existing timeline.
- Clone an existing timeline.
Import a Timeline
This procedure describes how to create a new SEN timeline by importing a timeline definition file, which has a .XOML file extension.
- Select Tools | Administration | Timeline | Timeline Design to display the Timeline Enquiry page.
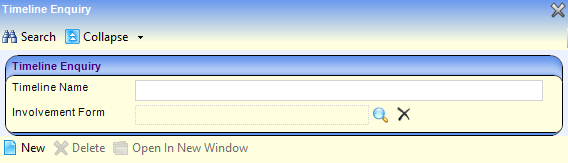
- Click the New button to display the New Timeline page.

- Click Import to display the Open dialog.
- Browse for the .XOML timeline definition file you want to import then click the Open button to display the imported timeline in the Workflow panel.
- Enter Timeline Name and a Description, if required.
- Enter the Involvement Forms panel:
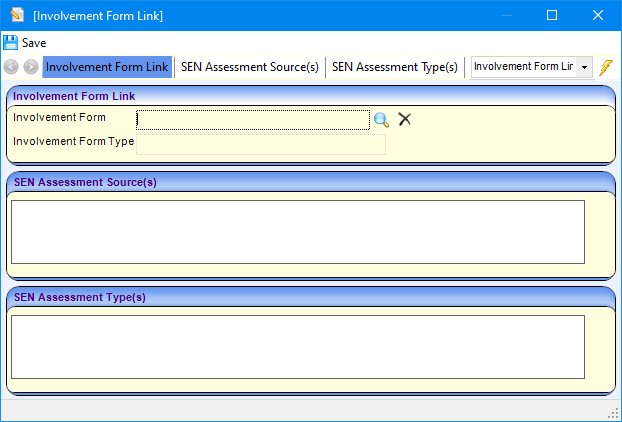
- Click the Add button to display the Involvement Form Link window.
- Click the Search button to display the Involvement Form Enquiry window.
- Select the required Form Type then click the Search button to display involvement forms of that type.
- Highlight the required involvement form then click the Select button.
A timeline must be linked to one or more involvement forms
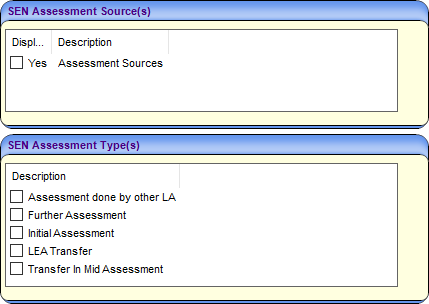
If the involvement form you are linking the timeline to is an assessment involvement form, you can filter the use of this timeline/involvement link by Assessment Source or Assessment Type fields, by selecting the relevant checkboxes in these panels. - If required, edit the timeline in the Workflow panel.
- Click the Save button in the New Timeline page to save the timeline/involvement form link.
Create a new Timeline
To design a new timeline:
- Select Tools | Administration | Timeline | Timeline Design to display the Timeline Enquiry dialog.
- Click the New button to display the New Timeline dialog.
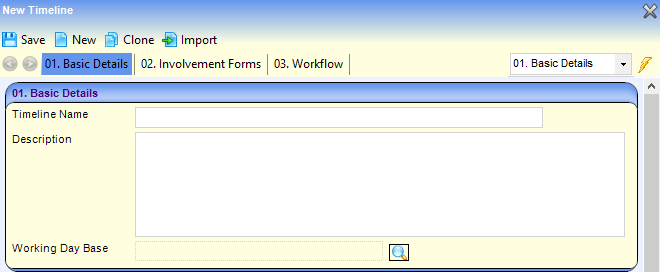
- Complete the fields in the Basic Details panel:
- Timeline Name: Must be alpha numeric, cannot contain any symbols.
- Description: Free text field.
- Working Day Base: Not required for SEN.
To create a timeline, you must add one or more involvement forms.
- In the Involvement Forms panel, click the Add button to display the Involvement Form Link window.
- Click the Search button to display the Involvement Form Enquiry window.
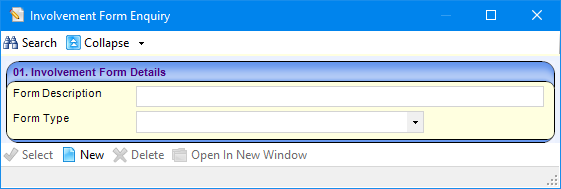
- Enter search criteria in Form Description and Form Type then click the Search button to display the search results.
To retrieve all involvement forms, click the Search button without entering search criteria.
- Highlight the Involvement Form you want to add to the timeline then click the Select button.
- Select the Assessment Source(s) and Assessment Type(s) as required, then click the Save button.
- Click the Save button to add the involvement form to the New Timeline dialog.
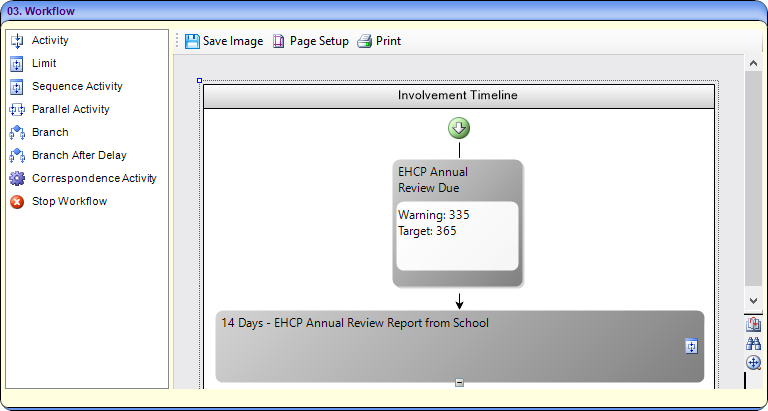
- In the Workflow panel, drag and drop Workflow Activities onto the Involvement Timeline. Any number of activities can be used to create a timeline.
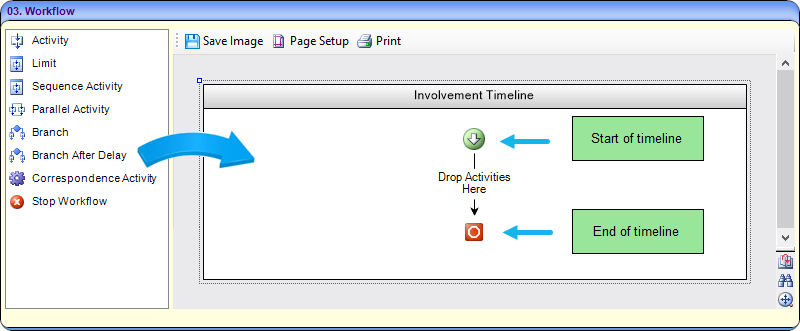
When you drag a workflow activity onto the timeline, green plus symbols
 show where you can drop the activity.
Workflow activities consist of a number of different properties:
Activity Designer Properties 
Activity Adds a single activity directly to the timeline or inside a parallel, sequence or branch activity 
Limit Defines maximum days in which a group of activities must be completed 
Sequence Activity Adds a group box, places activities that are to be carried out one after the other into the sequence box 
Parallel Activity Adds a group of activities that are to be carried out in parallel, but enables them to be completed in any order 
Branch Defines multiple routes through the timeline 
Branch After Delay Defines multiple routes through timeline (preceded by reminder message) 
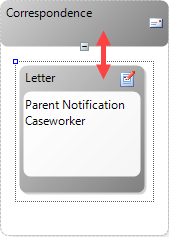
Correspondence Activity Generates outbound correspondence, e.g. email or a letter at run time. Letters are based on templates in the Communication Log. 
Stop Workflow For Branches only! Terminates the timeline - To enter the relevant details for the selected activity, double-click the activity’s shaded header area to display the Activity Properties dialog, for example:
- Select the panels in the Activity Properties dialog. The panels that display depend on the activity you select.
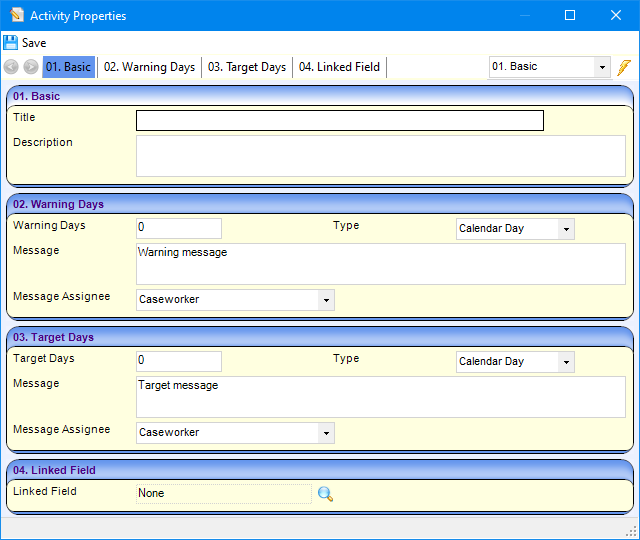
When specifying the number of days for a task, you should always use calendar days.
- Click the Save button.
Link a Timeline Activity to an Involvement Field
You can link a timeline activity to a field on the linked involvement using the Linked Field activity property.
If a field is not linked to a timeline activity, no workflow messages are produced.
- Double-click a timeline activity to display the Activity Properties dialog.
- Click the Search button in the Linked Field panel to display the Choose a linked field dialog.
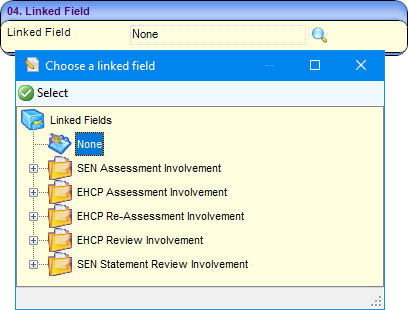
- Select the required date field you want to link, then click the Select button to return to the Activity Properties dialog.
- Enter the other fields as required, for example Warning Days and Target Days. Workflow messages are produced based on the number of days passing for an activity and can either be:
- Warning Days - what is coming up that you need to attend.
- Target Days - what activities have been missed.
- Click the Save button to return to the New Timeline dialog.
A link icon appears in the top right corner of the Activity box. When the activity is completed via the timeline, the corresponding field on the involvement is updated. However, if a field is edited on an involvement it is not updated on the timeline.
Use Timelines to Generate Correspondence
Use Correspondence Activities in the timeline design to generate emails and letters, e.g. to professionals, from templates stored on the communications log and saved as linked documents for that student. Correspondence activities can generate letters from templates based on either quick reports or Crystal reports.
A letter generated using a quick reports template can be edited before it is saved.
- Double click the timeline activity to display the Activities Properties dialog.
- Select the Recipient Role. You can choose from the following options:

- Person: A person search loads at runtime, i.e. when the timeline is used in an involvement.
- Parent – Joint: Where those with parental responsibility for the student share the same address, any letters that are generated are automatically addressed to both parents.
- Parent – Individual: One letter is produced per parent/carer, irrespective of whether there are multiple parents living at the same address.
- Base: Recipients prefixed with Base, e.g. Base - Ed Psychologist, are linked to the student’s base.
- Inv: Recipients prefixed with Inv, e.g. Inv - Ed Psychologist, are linked to the student’s involvement.
- If required, select the Response Required check box. This specifies that a response from the recipient is required. After the letter has been sent to the recipient, the activity is not completed until a response has been received and logged.
- If required, select the Reminders check box. You can set up first and second reminders to be sent based on the number of days after the original letter has been sent, i.e. Days until sent. Also, you can include a Report Template, which is sent as an attachment.
A workflow message is received when the date for the first reminder is reached for a particular activity. The date for the second reminder is calculated when the first reminder is sent. - Click the Save button.
Service Manager’s View
A service team manager can view timelines that have been associated with an involvement for their team members.
- Select Focus | Services | CSS Services Teams Workload to display the CSS Service Team’s Workload dialog.
- Highlight the required team member, e.g. an assessment officer, to display their involvements that have a timeline attached, in the Involvements panel.
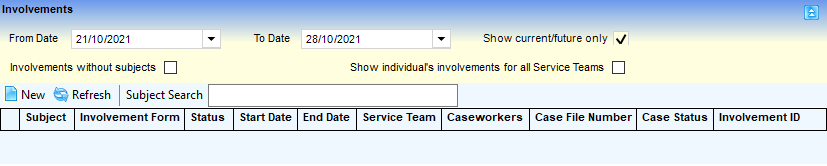
- To open the involvement in the Timeline Details panel, click the subject’s name link in the Subject column.