![]()
The instructions on this page were different in the following release(s):
3.74
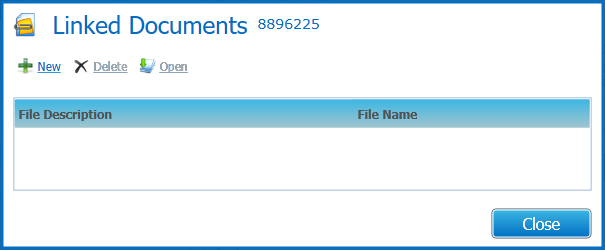
Linked Documents
Release note for Summer 2021 (3.75)
Linked documents or linked files are related documents, letters or reports etc. A document can be linked to a particular entity.
A linked file, for example, could be one of the following:
- a report attached to a Communication Log item
- a scan of a signed paper contract to the equivalent Transport contract record
As well as linking documents, you are able to choose if you want the linked file to be uploaded to the database, making it available for other users.
The maximum size for an uploaded file is 150 MB. This is set via the CCS Enterprise Server Configuration Utility | Application Servers tab. The default is 15 MB, if no value is supplied. If the selected files size is greater than the permitted upload limit, the file can be linked, but it cannot be uploaded and the following message is displayed:
The file filename.txt that you are trying to upload is larger
than the maximum permitted size of 150 MB.
When a file is opened, a copy is stored in the Windows | Downloads area on the client PC.
When a file is saved, a copy is stored on the Users | Downloads area on the client PC.
These files are not automatically removed. We recommend that you regularly delete copies of files which are automatically retained on the client PC.
To manage linked documents:
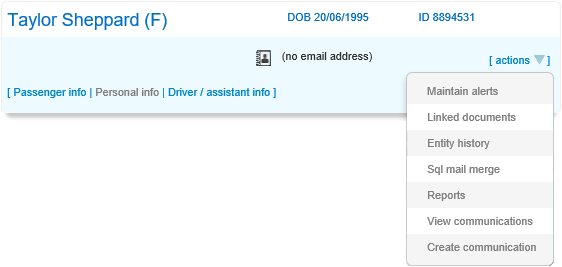
- In v4 Online, select the modulemodule where you wish to add the linked document.
CSS / Governors
e.g. CSS | My Involvements

Transport Back Office
e.g. People | Personal Info
A&T Back Office, Applications, Bases, Music Tuition or Training Manager
e.g. A&T Back Office | Students | All Students
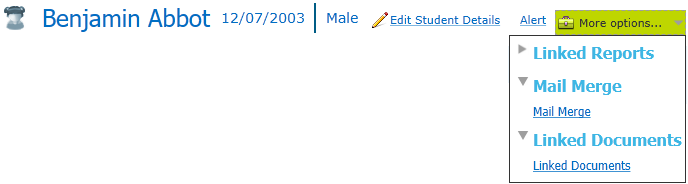
- Click the Linked Documents button to display a popup dialogdialog.
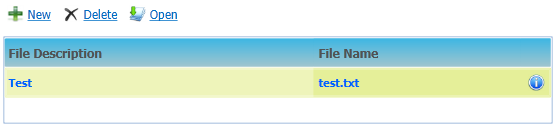
Existing linked files are displayed in the list.CSS / Governors
e.g. CSS | My Involvements

Transport Back Office
e.g. People | Personal Info
A&T Back Office, Applications, Bases, Music Tuition or Training Manager
e.g. A&T Back Office | Students | All Students
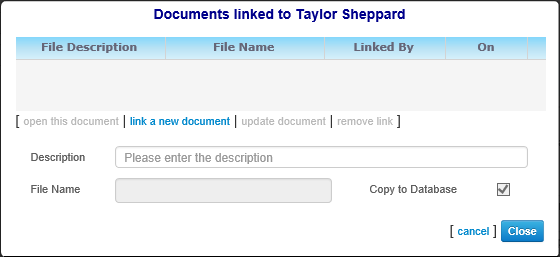
Choose from the following options:
Link a new document
Click the New button/hyperlink (link a new document hyperlink in Transport) to display a popup dialog.
CSS & Governors / A&T Back Office, Applications, Bases, Music Tuition or Training Manager
e.g. CSS | My Involvements / A&T Back Office | Students | All Students
Transport Back Office
e.g. People | Personal Info

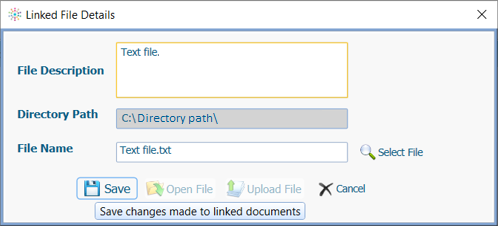
- Enter a description.
- Select a file to link to the record. The Directory Path is automatically populated.
- For modules other than Transport, when Save is clicked the following message is displayed:
Do you want to upload the linked document now?
Click the Yes button if you want to upload the document to the database.A linked file does not have to be uploaded when it is saved.
In Transport Back Office, the Copy to Database is automatically selected and cannot be changed.
Upload a document
CSS & Governors / A&T Back Office, Applications, Bases, Music Tuition or Training Manager only
Select a document that has been linked but not uploaded.
- Click the Open button to display the Linked File Details dialog.
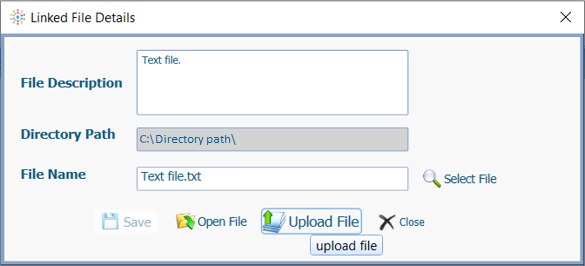
- Click the Upload File button to display the Open dialog.
- Upload the required file. The following confirmation message is displayed:
Linked file uploaded
Update/view a document
- Transport
If a linked document has been edited, it needs to be updated on the Linked documents dialog.
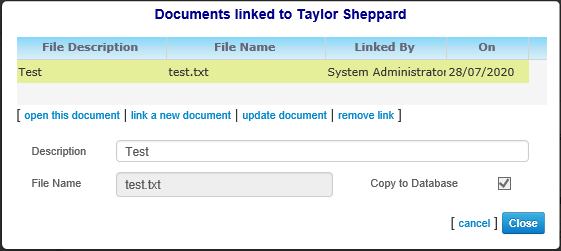
Select a document and click the update document hyperlink to display the Choose File to Upload dialog (Transport only).- Select the updated file.
- A message asks you to confirm that you wish to replace the original file.
- Click the Yes button to update the document.
- CSS & Governors / A&T Back Office, Applications, Bases, Music Tuition or Training Manager
- Select a file and click the Open button to display the Linked File Details dialog.
- Click the Open File button. The file downloads to a temporary directory.
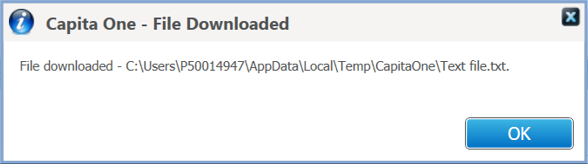
- Click the OK button to automatically open the document.
- Make changes as required.
- Save the file.
- Click the Select File button to re-select the edited file.
- Click the Save button.
A message asks you to confirm that you wish to replace the original file. - Click the Yes button to update the file.
Open a document (Transport only)
Select a document and click the open this document hyperlink to display the linked document.
If the document is edited, it will need to be updated via the update document hyperlink.
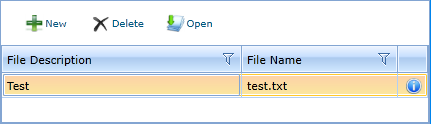
Remove a document
- Select a file or document and click the Delete buttonbutton (the remove link hyperlink in Transport).
The following confirmation message is displayed:
Are you sure you want to delete this Linked Document?
- Click the Yes button to delete the file or document