![]()
Services
The Services menu is accessed directly from the Focus menumenu.
This focus provides the functionality to add Service Details, create Categories, Providers and set up the link between the Service and Service Provider.
For costing and analysis purposes each Service can be included in a Category, assigned to a Provider and linked together. Such Services are used within Involvements, Provision and Exemplars.
Selecting the Service menu opens the Service Enquiry page.
- Service EnquiryService Enquiry
The Service Enquiry page provides fields in which to enter or select search criteria. A search may be made on DescriptionDescription and/or Service CategoryService Category. Alternatively, leave the search criteria fields empty and click Search. This will return a list of all Services in all Categories.
Entering search criteria and clicking Search will return a list of Services matching the criteria. Details of each Service can be seen in the lower panel by selecting the Open icon, you can then use the green up and down icons to move to the previous or next item.
You may expand or collapse the Enquiry Search Criteria panel by clicking the icon (the arrows on the icon will invert appropriate to the next available action). Clicking the adjacent down arrow gives you the option to Automatically Collapse following a search. This setting will take effect on all Enquiry pages.
Double clicking on an item in the list or clicking Open in New Window will open the details form in a new scrollable window. In all cases a Wizard is available allowing you to move through panel by panel using Previous (Alt + <) or Next (Alt + >) instead of scrolling, (Ctrl+Alt+>/Ctrl+Alt+< will take you to the last or first panel respectively). To return to a scrollable form click the Wizard icon again. Clicking Finish will save the record.
Selecting a Service opens the Service Definition page. To add a new Service click the New icon. This will display a blank page in which to enter new details.
- Service DefinitionService Definition
A Service record must have a Description comprises, Basic Details, ContactPoint CCS Provision Defaults and Additional DetailsAdditional Details. The information entered for a selected Service will be displayed; this may be edited. To add a new Service from the Service Definition page, click the New icon. This will display a blank page in which to enter new details.
Basic Details
Enter a Description of the Service and select a Service Category. A Service can be included in multiple Service Categories. Service Categories are defined in the Services | Service Category focus.
The Category allows you to filter Services when defining a Service Provider Link.
The Universal ServiceUniversal Service box indicates whether the Service is available to all children or whether criteria must justify its use. This checkbox must contain a true (tick) or false (cross) value; if the record is saved and the box is empty the save process will default it to True.
The Service Type is a DfE requirement for Crystal reporting.
ContactPoint CCS Provision Defaults
This panel allows you to set ContactPoint defaults for Send to ContactPoint and ContactPoint Sensitive Service Provision. If there are no entries in the Service Involvement/Referral Reasons panel of an Involvement or if the defaults for Send to ContactPoint and ContactPoint Sensitive have not been set, a new Involvement/Referral takes it defaults from the Service.
Additional Details (ICS only)
There are two fields to complete Unit and any Notes. The Unit field relates to how the Service is provided, ie Per Hour, Per Item, Per Month, etc. The Notes box allows you to enter relevant information in free-text format.
- Service CategoriesService Categories
The creation of Categories allows you to put Services into logical groups. Selecting this option opens the Service Category Enquiry page which allows you to search and open for edit the required Service Category details page or create a new Category. New Categories are automatically included in the Categories drop-down list. The drop-down list is available to the Service Enquiry page to use as a search criterion. It is also used in othere areas, eg Provision, where a Category or Categories must be selected. This list is populated on the Service Definition page.
Service Category Enquiry
The Service Category Enquiry page allows you to search for a known Category or add a new one.
A search is made on DescriptionDescription. Alternatively, leave the Description box empty and click Search. This will return a list of all Categories.
Entering a search criterion and clicking Search will return a list of Service Categories matching the criterion. Details of each Service Category can be seen in the lower panel by selecting the Open icon, you can then use the green up and down icons to move to the previous or next item.
You may expand or collapse the Enquiry Search Criteria panel by clicking the icon (the arrows on the icon will invert appropriate to the next available action). Clicking the adjacent down arrow gives you the option to Automatically Collapse following a search. This setting will take effect on all Enquiry pages.
Double clicking on an item in the list or clicking Open in New Window will open the details form in a new scrollable window. In all cases a Wizard is available allowing you to move through panel by panel using Previous (Alt + <) or Next (Alt + >) instead of scrolling, (Ctrl+Alt+>/Ctrl+Alt+< will take you to the last or first panel respectively). To return to a scrollable form click the Wizard icon again. Clicking Finish will save the record.
Selecting a Service Category opens the Service Category Definition page. To add a new Service click the New icon. This will display a blank page in which to enter new details.
Service Category Definition
A Category is a method of grouping Services and Providers. It also allows you to filter the search for Services.
The definition of a Category comprises a Category Code and a Description.
To add a Category, click the New icon. This will open a blank Category Code definition page.
Enter a Code, up to five characters, and enter a Description, this is a free text box in which to enter an appropriate description of the category.
For example:
- Code: SOCSV
- Description: Social Services
Click Save to make the Category available for Service Definition and for selection in the Service Provider Link focus.
- Service ProvidersService Providers
This area allows you to add and edit Service Provider records. Once added to the database a Provider can be associated with a Service in the Service Provider Link area, this allows costings of each Provision to be monitored.
Selecting the Service Provider menu option opens the Service Provider Enquiry page for you to edit an existing Provider record or add a new one.
Service Provider Enquiry
The Service Provider Enquiry page allows you to search for a known Provider or add a new one.
A search may be made on Provider TypeProvider Type, Charity Number and/or VAT Number (not relevant to CSS licence holders). Agency is the only type recognised by CSS Provision migrated records.
Search on Provider Type
To search on Provider Type, you must select a Type from the drop-down list and then click the browse icon at the side of the adjacent field to select an entity associated with the Type, for example, if the Provider Type selected is Agency, clicking the browse icon will display a list of Agencies from which to choose or clicking the browse icon for Provider Type Base will open the Base Enquiry dialog to search for the required Base. CSS Provision will only recognise Agency as a Provider Type.
A search will not filter on individually selected Provider Type or associated entity. Both fields must contain a selected value.
The Charity and VAT Number fields are free text fields in which to enter the appropriate number(s); this will narrow the search. Alternatively, leave the search boxes empty and click Search. This will return a list of all Providers. (Relevant to ICS licence holders only)
Entering a search criterion and click Search, this will return a list of Providers matching the criterion. Details of each Provider can be seen in the lower panel by selecting and clicking the Open icon, you can then use the green up and down icons to move to the previous or next item.
You may expand or collapse the Enquiry Search Criteria panel by clicking the double arrow icon (the arrows on the icon will invert appropriate to the next available action). Clicking the adjacent down arrow gives you the option to Automatically Collapse following a search. This setting will take effect on all Enquiry pages.
Double clicking on an item in the list or clicking Open in New Window will open the details form in a new scrollable window. In all cases a Wizard is available allowing you to move through panel by panel using Previous (Alt + <) or Next (Alt + >) instead of scrolling, (Ctrl+Alt+>/Ctrl+Alt+< will take you to the last or first panel respectively). To return to a scrollable form click the Wizard icon again. Clicking Finish will save the record.
Selecting a Service Provider opens the Service Provider Definition page. To add a new Provider click the New icon. This will display a blank page in which to enter new details.
Service Provider Definition
This page provides the facility to define Service Provider records, making them available for selection, where applicable, throughout the system.
To create a Service Provider record select a Provider TypeProvider Type from the drop-down list, then click the browse icon at the side of the adjacent field to select an entity associated with the Type.
For example:
Provider Type Select from… or Search Agency Select Agency list. These are defined in the CSS module. CSS Provision only recognises this type for migrated records. Base Base Enquiry to locate required Base Person Person Enquiry to find person by name, ID Type etc Post Post Definition Enquiry, based on Post Description and Reports to category. These are defined in the Organisation | Posts focus. Provider Early Years Provider Enquiry which covers Nurseries, schools with nursery facilities and Settings If the browse icon is selected and a Provider Type has not been selected the system will not display a dialog to select from or search.
The Charity and VAT Number fields are free text fields in which to enter the appropriate number(s). These numbers can be used as search criteria. (Not relevant to CSS licence holders)
Click Save to make the Provider record available for selection and to be associated with a Service.
- Service Provider LinksService Provider Links
This menu option allows you to create an association between a Service and a Service Provider. When this option is selected the Service Provider Link Enquiry page is opened allowing you to search on Provider, Service and/or Category.
CSS Licence Holders: A Service Provider Link is a prerequisite of a Provision record.
Service Provider Link Enquiry
The Service Provider Link Enquiry page is opened by selecting the Service Provider Links menu option. It allows you to first search for an existing association between a Service and Service Provider; if no link exists you may create one by clicking the New icon.
You can search on one or more of the four criteria fields. These fields are Provider, Service, Category and Charge Type (Lookup Table ID 1062). Clicking the adjacent browse icon or drop-down list allows you to select or locate appropriate items from the related Browse or Enquiry dialogs.
If a Category is selected first, the same Category will populate the Category field on the Service Enquiry dailog. A search will then return all Services associated with that Category.
Entering a search criterion and clicking Search will return a list of Provider Links matching the criterion. Details of each Provider Link can be seen in the lower panel by selecting and clicking the Open icon, you can then use the green up and down icons to move to the previous or next item.
You may expand or collapse the Enquiry Search Criteria panel by clicking the double arrow icon (the arrows on the icon will invert appropriate to the next available action). Clicking the adjacent down arrow gives you the option to Automatically Collapse following a search. This setting will take effect on all Enquiry pages.
Double clicking on an item in the list or clicking Open in New Window will open the details form in a new scrollable window. In all cases a Wizard is available allowing you to move through panel by panel using Previous (Alt + <) or Next (Alt + >) instead of scrolling, (Ctrl+Alt+>/Ctrl+Alt+< will take you to the last or first panel respectively). To return to a scrollable form click the Wizard icon again. Clicking Finish will save the record.
Selecting an existing Service Link opens the Service Provider Link definition page. To add a new Service Provider Link click the New icon. This will display a blank page in which to enter new details.
Service Provider Link
This page allows you to define a link between a Service and a Provider or edit an existing one. The link setup includes adding a Start Date and an End Date (if applicable), indicating the period for which the linked Service is available or from when it is available, and recording a Charge Type which will be applied to the Service.
The Services Provider Link page displays Provider Link Details, Provider Details and Contact Details of the Provider.
CSS Licence Holders: A Service Provider Link is a prerequisite of a Provision record.
Provider Link Details
Provider Name This is populated by clicking the browse icon and searching or selecting for a Provider, based on Provider Type, from the related search or browse dialog. Providers are defined in the Service Provider focus. Clicking the icon will clear the contents of the field. Service Name Services are defined in the Services focus, this field is populated by clicking the browse button and searching on the Service Enquiry dialog. Clicking the icon will clear the contents of the field. Start/End Dates A Start Date is mandatory and indicates from when the linked Service is available. If the Service is only available for a limited period an End Date must be entered. The date will be shown in dd/mm/yyyy format but can be entered in any format, eg dd.mm.yy, d.m.y, or by selecting from the drop-down calendar. Charge Type For example, Equipment or Equipment Hire. This is Lookup is populated in Tools | Administration | Lookups | Table ID 1062. Notes This is a free text box in which to enter relevant information. Provider Details
The Provider Details comprises of, Address, Email and Phone/Fax Numbers. The address may be automatically populated if stored in the database, alternatively, select an address using the Address Selector.
This is the official address of the Provider not an individual contact address.
Contact Details
The Contact Details panel will display contact information about the selected Provider. Contact Details can include, if applicable, Name, Gender, Profession, Address, Email, Names and contact Phone Numbers.
The information will vary according to the Provider Type and some will obviously not have contact information, eg Post. If, for example, the Provider Type is Person, the system will add the selected person as the default Contact; if the Provider Type is Base, the Head Teacher is the default Contact.
The Contact will always be a person.
These details may be changed; when the Contact is changed and the record is saved; it is stored in a separate database table. If the new Contact details are subsequently removed, the system will automatically reinsert the default Contact details.
Charging Details
The Charging Details panel allows you to define the unit cost or change an existing unit cost for a Provision Cost Type. It allows you to preview the results and of the proposed change and the affects of the update, in a printable report.
CSS licence holders: this is the only place in which to add or edit Unit Costs.
The list shows the Start and End Dates and Cost per Unit, Unit (per Day, Hour), the Hrs/Week Calculation (if relevant), whether INSET Days are included in the cost and a Description. If a Unit Cost is changed, a new row will be added to the list with a new Start Date and an End Date if applicable. An End Date must be applied to the preceding record.
The Delete icon enables you to delete a Unit Cost, but the validation check will not allow you to delete a Unit Cost if Provision records exist for the associated Cost Type.
To add Charging Details click the Add icon. This action will open the Charge Rate Dialog, in which to enter new cost details. The same dialog is opened in Edit mode, which will then show existing details. If a Unit Cost is changed in edit mode the original row will be updated accordingly.
Enter a Start Date. As amounts will vary from time to time this date is important. A calendar is available by clicking the down-arrow. If relevant also enter an End Date.
Cost per UnitCost per Unit must be entered and a UnitUnit selected. The Unit list is hard coded and cannot be changed.
Indicate in the HRS/Week CalculationHRS/Week Calculation box whether the charge rate is by hours per week.
Charge details for a Service Provider using a Unit of Annual School would, by default, exclude INSET Days from cost calculations; ticking the Include INSET DaysInclude INSET Days box allows Local Authorities to include these days as part of the cost calculation.
Click Save.
When a Unit Cost is Added or Edited, clicking the View Affected Provisions button will display a report allowing you to preview the affects of the change before saving the record. This report is titled "Provision Cost Amendment".
Provision Unit Charge Report
This report is opened when the View Affected Provisons button is clicked on the Charging Details panel in Service Provider Links.
It displays the Proposed Charge Amendments showing the Old and New Charge details.
For each affected Provision record the Affected Provisions section shows the Service Team and Base including the Subjects and Provision Start and End Dates.
The Print button will send a report showing the contents of the dialog to your defined printer. Export, Search and Zoom functionality is also available.
CSS Service Team Administration
The CSS Service Team Administration option enables you to create a new Service Team, edit or delete an existing one. It is accessed via the Focus | Services | CSS Service Team Administration menumenu.
A Service Team must be linked to an Establishment which represents a hierarchical Team Structure with Posts and Team Members. System Users (mapped to People within the People Database) will occupy those Posts over time. A hierarchy of Posts can be established.
When selected the CSS Service Team Enquiry page is opened.
A Service Team can be deleted if there are no records attached to it. If there are records attached to the service team, these must be deleted.
- CSS Service Team EnquiryCSS Service Team Enquiry
The CSS Service Team Enquiry is accessed via Focus | Services | CSS Service Team Administration. The page enables you to search for a specific Service Team or by clicking the Search icon you can view a list of all Service Teams.
Double clicking on a Service Team name or clicking Open will open the CSS Service Team Definition page in a new scrollable window. You may wish to add more codes to the lookups which are controlled on each lookup panel, eg Activity Types.
You can also click the New button to set up a new service team.
Clicking the Delete button enables you to delete a service team.
Deleting a record should only be carried out in accordance with the LA’s policies and processes with regards to data retention.
If a deleted service team is mentioned in another service team’s ACL, the ACL is updated for the remaining service team’s record.
When a service team is deleted, it is recorded in the audit trail via Tools | Audit Trail | Audit Trail.
The following service teams cannot be deleted as they are seeded services:
- SEN (ID – 9999999999)
- Exclusions (ID – 9999999998)
Delete a Service Team
A service team can be deleted only if no records are attached to it.
In order to delete a service team, permissions must be granted via Tools | Permissions | User Group Processes | CSS Administration | CSS Service Teams Administration.
To delete a service team:
- Select Focus | Services | CSS Service Teams Administration to display the CSS Service Team Enquiry page.
- Select the service team you wish to delete.
- Click the Delete button to display the Service Team Confirm Delete dialog. The dialog displays the number of records, if any, that are attached to a record type, e.g. Activity, Involvement, Case Note.
- If there are no records attached, click the Confirm Delete button.
The deletion is recorded via Tools | Audit Trail.
- CSS Service Team DefinitionCSS Service Team Definition
Records such as Involvements, Activities, Provisions, etc are owned by a specific CSS Service Team, and access is controlled accordingly. The CSS Service Team Administration menu option provides Service Team setup.
The first panel defines the Service Team displaying the Service Team Name, the Address and the facility to record an associated Telephone Number and Service Email address, whether the Service Team Involvements will be Excluded (default) or Included in Summary Reports and the Establishment to which the Service Team is linked. The values for Service Type and Organisation Name are provided by ContactPoint and are populated when the ContactPoint GetConfig routine is run. The Send to ContactPoint and ContactPoint Sensitive ServiceSend to ContactPoint and ContactPoint Sensitive Service flag may be set, if necessary.
Checking the Show Hearing Impairment and/or Show Visual Impairment boxes will enable the link to the HIVI details for the Service Team from an Involvement record.
Lookup Codes in the following areas can be set up once and then made available for use in multiple specific Service Teams: Communication Categories, Activity Types, Activity Focuses, Activity Target Groups, Activity Support Types, Provision Funding Bodies, Provision Reasons, Activity Time Categories, Activity Attendance and Service Categories.
Service Categories must be selected for the Service Team to be available for selection for Involvements and Activities.
The Activity Templates panel is specific to PULSE licence holders. If you try to add a template and your Local Authority does not hold a PULSE licence a message will be displayed informing you that you do not have a licence.
The Charge Type panel allows you to link a Charge Type to a Service allowing it to be independent of an individual Service Provider link. This also allows multiple Provision records linked to a Charge Type for a specific Service, to be maintained easily in bulk. Charge Types are defined in Services | Provision Charge Types.
Save the record.
Functionality at the top of the page includes: allowing you to add the Involvement to Set ACL, control Data Panels, and Clone the current Service Team. This will create an exact copy of the original; this may then be modified with a new name for identification purposes and minor adjustments to lookups and categories, if necessary.
A default Access Control List (ACL) set for the Service Team will automatically cascade to all its records. This can be amended at individual record level.
- EHCP Service TeamsEHCP Service Teams
A service team must be set up via Focus | Services | CSS Service Teams Administration before you can create an involvement record and it must be linked to an involvement form. You can associate an involvement form with one or more service teams.
A service team must be linked to an establishment which represents a hierarchical team structure with posts and team members. The following business rules apply:
- A service team must be linked to an establishment.
- An establishment must have at least one post.
- A post must have users.
- A post can only be in one establishment, but a user can be in more than one post.
A default Access Control List (ACL) set for the service team will automatically cascade to all its records. This can be amended at individual record level.
CSS Service Team Workload
The CSS Service Team Workload option allows Service Team members to view, edit or create Involvements and Activities for an individual or Service Team. It is accessed via the Focus | Services | CSS Service Team Workload menumenu.
The page consists of four panels:
- Service Team Structure
- InvolvementsInvolvements
This panel displays all Involvements which have been assigned to the selected Person or Service Team. For each Involvement it will show the Subject of the Involvement, the type of Involvement form (CSS Involvement Form, SEN Assessment, SEN Standalone Review, SEN Statement Review and SEN Tribunal), Status, Start and End Dates, Service Team, Caseworkers and Case File Number, Case Status and Involvement ID.
By default current/future records are shown. Use the Date Range fields and the Involvements Without Subjects check box to filter the involvements that you wish to view.
Involvements are only listed for the selected Service Team but a checkbox allows you to list a person's Involvements for all Service Teams to which they belong.
Click the Group By Status button to order the forms based on the statuses. This will help track workload and provide a simpler view of involvements based on statuses.
If the Involvement is associated with a Timeline, an icon will indicate the status of the current Timeline Activity:
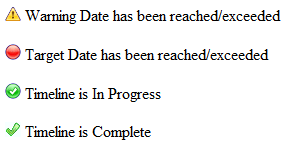
This relates to the current Timeline Activity only, whatever the status.
Items on the panel Task Bar allow you to add a New InvolvementNew Involvement (this option will not be available unless you are in a Post which is in a Team), Refresh and Delete from the list. A Subject Search is also available by entering name details.
- ActivitiesActivities
Activities can represent School, Home or other Agency visits, meetings (e.g. Panel Meetings, Case Conferences) or can represent work that a Caseworker has to do such as write up a report or preparation time.
This panel displays a list of Activities for the selected Person or Service Team. If you have selected a person rather than a Service Team, Activities are listed for all Service Teams to which they belong.
By default all activities that are currentcurrent or in the future are listed. You can restrict the list of activities or include past Activities by changing the From and To dates.
You can view or update details of an existing CSS Activity by clicking on the Activity Type. Alternatively, clicking on the New icon on the panel Task Bar will open a blank CSS Activity Details page allowing a new Activity record to be created for this individual. Other items on the panel Task Bar allow you to Refresh or Delete an item from the list.
This method of adding a new Activity can only be used for Activities that are not linked to Involvements. Activities that are linked to Involvements must be added via the Activities link on the Involvements page.
- Workflow Messages
- Service Team Structure PanelService Team Structure Panel
The Service Team Workload opens with the Service Team Structure in the form of a navigation tree.
At the top of the navigation tree is the name of the currently selected Service TeamService Team, followed by Involvements for this Team without specific Caseworkers, Admin Officers and Activities for this Team. A further option allows you to view All Involvements for the Service Team which includes Involvements with and without specific Caseworkersassigned.
Then, each for each Post associated with the Team, all the people associated with the Post are listed (whether they have any Involvements/Activities or not).
Use the Plus and Minus to expand and collapse the tree.
Selecting one of the following items in the hierarchy will cause the relevant associated items for that Team or person to be listed in the panels below:
- Involvements without specific Caseworkers assignedCaseworkers assigned.
- Involvements without specific Admin Officers assigned.
- All Involvements for the Service TeamService Team (includes Involvements with/without specific Caseworkers asigned).
- Activities for the Service TeamService Team. This list all Activities for the selected Service Team and can be filtered by date.
- People in postpost. This lists all Involvements and Activities for the person. By default Involvements are only listed for the selected Service Team but a checkbox allows you to list a person's Involvements for all Service Teams to which they belong. Activities are listed for all Service Teams to which the person belongs.
CSS Involvement Forms
- Involvements OverviewInvolvements Overview
Involvements offer great flexibility as they can be linked to individual children or people, multiple people such as a family or small groups based at a School or other Base, or can indicate a Local Authority officer’s ongoing involvement with a School or other Base in a wider sense. A history of Activities (including recurring activities) and Communications can be linked to Involvements.
An involvement can be linked to one, more than one (with one flagged as the lead) or no Caseworkers (if it is as yet unallocated). Multiple Caseworkers associated with Involvements can be maintained, multiple Reasons and Outcomes can be identified over time and a history of Involvement Statuses is automatically maintained.
As part of the flexible approach to multi-agency team working, the concept of Involvement Forms has been set up independent of Service Teams. An Involvement Form is based on a template selected from one of the following: Generic CSS Involvement, CSS Legal Actions, SEN Assessment, SEN Statement Review, SEN Standalone Review, SEN Tribunal, EHCP Assessment, EHCP Re-Assessment, EHCP Review, EHCP Standalone Review, EHCP Mediation, EHCP Tribunal (these cover the current business areas of the system which may be extended over time).
Involvement Forms must be setup before the Involvement process can be used. The setup is carried out via the Services menu. Selecting this option opens the Involvement Form Enquiry page.
- Involvement Form EnquiryInvolvement Form Enquiry
This page is opened by selecting the CSS Involvement Forms menu. The Enquiry page allows you to search for existing forms to edit or create new, for use by Caseworkers/Service Teams when creating Involvement records. Selecting an existing form will open the Involvement Form Details page in which you can edit the details appropriately. Changes will take effect immediately but will not affect existing Involvement records.
Click the New button to display the first of the Involvement Form Details pages which asks you to select a templatetemplate on which to base your Involvement Form.
Select the appropriate template and click Continue. The second Involvement Form Details page will be opened.
- Involvement Form Definition DetailsInvolvement Form Definition Details
Creating a new Involvement Form is a two stage process:
- the first page asks you to select a templatetemplate on which to base your Involvement Form. Select the appropriate template and click Continue.
- the second stage is the main setup page.
Prerequisites for setting up CSS Involvement Forms from a template involves populating the drop-down lists and selectors from the Lookups, defined in Tools | Administration | LookupsLookups. Service Teams also require setting up in Tools | Team Structure | Establishment and Posts.
Involvement Forms can be associated with one or more Service Teams. This can mean that a particular Involvement Form may not be available to a user in another Service Team. Service Teams are defined in Tools | Team Structure | EstablishmentsEstablishments. Both Establishment and Posts must be defined.
Once a template has been selected the Local Authority must give the Involvement Form a Description, a label for its CaseworkersCaseworkers and select specific User Defined Fields (UDFs) relevant only to that Involvement Form via the UDF Manager. This allows you to determine which panel specific UDFs should appear within. A Local Authority may wish to set up separate Involvement Forms for use by Educational Psychologists, Education Welfare Officers etc., each with different UDFs.
The Send to ContactPoint and ContactPoint Sensitive Service Involvement flags can be set as defaults for the form. If these are not set, defaults will be taken from the Service or as defined in the ContactPoint Console.
Involvement specific Lookup Codes are available for use in Involvement Forms such as: Involvement Statuses, Sources, Reasons, Outcomes. Other lookups will be specific to the type of template used. RAG Statuses are only available for use with a Generic CSS Involvement form.
Click the Save button makes the new form available to its target caseworkers.
CSS Administration
The CSS Administration page is accessed via Focus | Services | CSS AdministrationCSS Administration.
From here you can access the Involvement Reallocation Wizard dialogs.
Involvement Reallocation
The Involvement Reallocation process consists of five wizard dialogs to enable you to reallocate an involvement from one user to another. Permissions must be granted via Tools | Permissions | User Group Processes | User Group Processes Editor | CSS Administration.
The wizard dialogs are:
- Select User to Reallocate FromSelect User to Reallocate From
The Select User to Reallocate From is the first of five wizard dialogs that is opened from the CSS Administration page. The browse list displays a list of Caseworkers and Administrative Officers under the following headings:
- Service Team
- Post
- Surname
- Forename
- Role
Highlight a record and click the Next button to display the Select Involvements to Reallocate dialog.
- Select Involvements to ReallocateSelect Involvements to Reallocate
The Select Involvements to Reallocate dialog is the second of the wizard dialogs. The browse list displays a list of involvements under the following headings:
- Reallocate check box
- Subject
- Current Base
- Involvement Form
- Status
- Start Date
- End Date
- Service Team
- Caseworkers
- Admin Officers
- Case File Number
- Case Status
- Primary Reason
Select the Reallocate check box next to the involvements to be reallocated, then click the Next button to display the Select User to Reallocate To dialog.
- Select User to Reallocate ToSelect User to Reallocate To
The Select User to Reallocate To dialog is the third of the wizard dialogs. The browse list displays a list of Caseworkers, who belong to the same Service Team as the original Caseworker, under the following headings:
- Service Team
- Post
- Surname
- Forename
Highlight a record and click the Next button to display the fourth Involvement Reallocation Wizard dialog.
- Effective DatesEffective Dates
The Effective Dates dialog is the fourth wizard dialog. From here you must select the dates for the following two mandatory fields:
- Effective End Date of Old User
- Effective Start Date of New User – this defaults to the day after the effective end date, but it can be edited.
Select both dates from the calendar drop-down arrows, then click the Next button to display the final wizard dialog.
- SummarySummary
The fifth wizard dialog consists of summary details about the involvement reallocation. The details cannot be changed at this point; click the Back button to make any changes.
When you have verified the details, click the Finish button; you are asked to confirm that you wish to reallocate the involvement.
After you have confirmed that you wish to reallocate the involvement, the following dialog displays:
Do you want to save and print the allocated details?
Click the Yes button to display the Save and Print Reallocation As dialog. Select a location to save the summary, edit the File name field, then click the Save button; the file is automatically saved as a .XML file.
The Involvement Reallocation Summary.xml (using the file name given above) displays and can now be printed.
Click on a column heading to change the sort order, ascending or descending.
Drag any of the column headings to the top of the browse list to group the records by those criteria. Click the cross on the Group By button to return to the previous browse list.
The filter functionality is available on all columns to enhance your searches.
SEN Administration
- SEN Review Type SetupSEN Review Type Setup
The SEN Review Type setup page is accessed by the Services | SEN AdministrationSEN Administration menu option.
When this option is selected the SEN Review Type Enquiry page is opened. This will list existing codes. These codes indicate the type of Review being recorded, eg Annual Review.
To open a Review Type double click or click Open in New Window. This allows you to change the Description, the Next Review and Active flags. The Review Type Code cannot be edited.
Two fields must be completed to define new Review Type codes.
- Click the New icon
- Enter a three character code for the Review Type
- Tab or use the mouse to move to the next field and enter a Description
Next Review: this box will be checked by default. With this box checked True the system will automatically set a Statement Review for one year's time when a Final Statement date is entered and saved.
Active: this checkbox allows you to 'archive' a review type. You may wish to do this if a review type is not to be used again but has records held against it.
Once Review types have been defined these are available when recording Review records in an Involvement.
- SEN ConfigurationSEN Configuration
Each phase of a student assessment has a statutory time limit as outlined by the DCSF Code of Practice. This area allows you to enter the timescales as a default, against which the process dates of an Assessment are validated.
All Phases are defined in Weeks and Days.
Phase 1 Decision Phase 2 Assessment Phase 3a Proposed Statement Phase 3b Final Statement - SEN User DefaultsSEN User Defaults
SEN User Defaults is accessed via the Services | SEN AdministrationSEN Administration Menu. It allows you to set your own default names for SEN Assessment rolesSEN Assessment roles. Once defined, the names will automatically complete the SEN Professional fields on the SEN Assessment Involvement.
These names are specific to your User ID. It is not mandatory to define all.
To add a default name to a role click the browse icon. This will open a list of people who are assigned to the selected role. Select the required name and click OK.
To remove a default name click the Clear Selection icon. This clears the field for you to reselect, it does not deleted the person from the role table. Alternatively, clicking the Remove Defaults icon will clear all fields.
EHCP Administration
The administration pages are set up via Focus | Services | EHCP Administration.
Permissions are set up via Tools | Permissions | User Group Processes | CSS Administration Main Business Process.
There are three EHCP administration and configuration pages:
- EHCP Review Type SetupEHCP Review Type Setup
The EHCP Review Type Setup page is accessed via Focus | Services | EHCP Administration | EHCP Review Type Setup.
Permissions are set up via Tools | Permissions | User Group Processes | CSS Administration Main Business Process.
The EHCP Review Type Setup page enables the system administrator to set up the codes to indicate the type of review being recorded on an involvement:
- Annual Review
- Interim Review
- EHCP ConfigurationEHCP Configuration
The EHCP Configuration page is accessed via Focus | Services | EHCP Administration | EHCP Configuration.
Permissions are set up via Tools | Permissions | User Group Processes | CSS Administration Main Business Process.
The EHCP Configuration page enables the system administrator to define the statutory limits for each of the four phases of a student assessment, as outlined by the DfE Code of Practice. The statutory limit for the EHCP assessment is 20 weeks.
The four phases of an assessment are:
- Decision
- Assessment
- Draft EHCP
- Final EHCP
- EHCP User DefaultsEHCP User Defaults
The EHCP User Defaults page is accessed via Focus | Services | EHCP Administration | EHCP User Defaults.
Permissions are set up via Tools | Permissions | User Group Processes | CSS Administration Main Business Process.
The EHCP User Defaults page enables you to set your own default names for EHCP assessment roles, i.e. assessment officer, administrative officer, medical officer and social services and communication log sender. These names are specific to your User ID and must belong to your service team. It is not mandatory to define all professionals.
Once defined, the names will automatically populate the EHCP Professional Contacts panel on the EHCP Assessment Involvement and the EHCP Re-Assessment Involvement forms.
- EHCP Professional ContactsEHCP Professional Contacts
Professional contacts are added to the system via Focus | Services | EHCP Administration | EHCP User Defaults.
The EHCP Professional Contacts panel is included in the EHCP Assessment Involvement and the EHCP Re-Assessment Involvement forms. This panel enables you to:
- specify the professional contacts for a student
- specify to which contacts letters can be sent
The following roles can be set up as a professional contact:
- Assessment Officer
- Administrative Officer
- Medical Officer
- Social Services
- Communication Log Sender
Service Level Agreements
The Service Level Agreement (SLA) functionality allows the System Administrator to set up fixed packages of support provided by a Local Authority which are then made available to its Schools/Bases.
A Service Level Agreement can belong to none or many Schools/Bases and a School/Base can have none or many SLAs.
Each School/Base may choose to purchase one or more of the Service Level Agreements offered. It is at the discretion of individual schools/bases which package(s) they choose to purchase.
There are two functions involved in Service Level Agreements:
Maintain Service Level Agreement
- Maintain SLAMaintain SLA
The management of Service Level Agreements is carried out via Focus | Services | Service Level Agreement | Maintain Service Level AgreementMaintain Service Level Agreement.
From here you can:
- search for existing SLAs using Code or Description
- create new SLAs
- view, edit, and delete existing SLAs
- clone new SLAs from existing ones
- add free format text to SLAs
- produce quick reports and associate documents to SLAs
This opens the Service Level Agreement Enquiry.
- Service Level Agreement EnquiryService Level Agreement Enquiry
The Service Level Agreement Enquiry is opened from Focus | Services | Service Level Agreement | Maintain Service Level AgreementMaintain Service Level Agreement.
This will allow you to searchsearch for existing Service Level Agreements, using the unique Code, Description or Active status.
Clicking Search will return a list, matching the selection criteria. You may expand or collapse the panel by clicking the iconicon.
The results of the search are listed under the headings of Code, Description, SLA Type, SLA Units, Start Date, End Date and ActiveCode, Description, SLA Type, SLA Units, Start Date, End Date and Active.
Highlight a record and select Open to view the SLA details in the lower panel, you can then use the Up Arrow and Down Arrow icons to move to the previous or next item.
Double click on a record or highlight a record and click the Open in New Window icon to view the Service Level Agreement Details.
If the Service Level Agreement is not found a New one can be created. Click on New to open the Service Level Agreement Details.
An existing Service Level Agreement can be edited, cloned or deleted.
- Service Level Agreement DetailsService Level Agreement Details
This panel is opened from the Service Level Agreement Enquiry page.
A Wizard is available allowing you to move through panel by panel using:
- Previous (Alt + <) or Next (Alt + >) instead of scrolling
- Ctrl+Alt+>/Ctrl+Alt+< will take you to the last or first panel respectively.
All the fields for an SLA can be edited, apart from the Cloned checkbox. If it is a cloned SLA the checkbox will automatically change to a Tick.
If a New SLA is being created enter the following details:
Code A unique code identifying each SLA, this is a mandatory free-text field up to 6 characters Description A free-text field, up to 50 characters, mandatory SLA Type A lookup displaying the level of Service, select from Gold, Silver or Bronze, mandatory SLA Units A lookup describing the type of service to be provided, select from Reporting or Visits, mandatory Click Save when all the details have been entered. The record will not save if all mandatory fields have not been completed: appropriate warning messages will appear at the bottom of the screen.
If a unique code has not been entered a message will inform you:
There is already a Service Level Agreement using this Code.
An existing Service Level Agreement can be edited, cloned or deleted.
Click on Set ACL to define the Access Control List.
The Memo panel allows you to add a new memo or alter existing memos.
If In EPM is set to Tick the SLA will be available in Service Level Agreements within v3 EPM. A Service Level Agreement will be available in v4 if in v3 EPM In CSS is set to Tick.
- Edit Service Level AgreementEdit Service Level Agreement
Edit Service Level Agreement (Maintain SLA)
All fields can be edited, except the Cloned Cross or Tick checkbox.
Before updating a Service Level Agreement the system checks to see if the selected SLA has been assigned to any Bases. If the SLA has been assigned to at least one Base a warning message will appear:
This SLA is assigned to a base(s). Any changes will apply to the SLA for that base. Do you wish to continue?
Selecting Yes will update the SLA and all the changes will be applied to this Service Level Agreement which has been assigned to a base.
If changes are made to the Memo then an additional message will ask you:
Do you want to overwrite all memo fields related to this Service Level Agreement?
Users must use caution, as individual Schools or Bases using the SLA may have entered additional memo information which will be overwritten
Edit Service Level Agreement (Assign SLA)
The details of the Service Level Agreement cannot be changed here.
Highlight the SLA and click Edit to make any changes to the Attached Documents and the Memo.
A Wizard is available allowing you to move through panel by panel using:
- Previous (Alt + <) or Next (Alt + >) instead of scrolling
- Ctrl+Alt+>/Ctrl+Alt+< will take you to the last or first panel respectively
Click on Set ACL to define the Access Control List.
- Clone Service Level AgreementClone Service Level Agreement
An existing SLA can be cloned by clicking the Clone icon. The following is displayed:
Do you wish to clone the current Service Level Agreement?
This will copy all elements of the selected SLA to the new SLA, with the exception of the Code, Description and Memo panel.
The Cloned checkbox is automatically checked when the Clone icon is clicked.
Enter a new Code and Description. All fields are editable (apart from the Cloned checkbox) and a new Memo can be set up.
Clicking Save will add the cloned SLA to the Service Level Agreement Enquiry.
- Delete Service Level AgreementDelete Service Level Agreement
A Service Level Agreement may only be deleted where it has not been assigned to any Schools/Bases.
Click Delete to remove an item. You will be prompted with a warning message:
Are you sure you want to delete the Service Level Agreement?
If a Service Level Agreement is assigned to a Base a message at the bottom of the screen will inform you:
The selected Service Level Agreement is assigned to at least one Base and cannot be deleted.
If an SLA is assigned to a School/Base and you wish to make it unavailable for further use, the Active box can be unchecked. This will not affect the Schools/Bases where this SLA is in use, but it will remove it from the Add/Edit Service Level Agreement Enquiry so that it is not available for selection.
- MemoMemo
The Memo panel will allow you to enter any additional, relevant information to the Service Level Agreement. Such information is SLA specific.
If changes are made to the Memo via Maintain Service Level Agreement then the changes will be copied to the Memo in Assign Service Level Agreement.
Users must use caution, as individual Schools or Bases using the SLA may have entered additional memo information which will be overwritten
If the changes are made to the Memo via Assign Service Level Agreement then the changes will not be copied to the Memo in Maintain Service Level Agreement, as these are School/Base specific memos.
The Memo can be formatted by Font, Colour, Justification and bullet points can be inserted.
If changes are made to the Memo then a confirmation message will ask you:
Do you want to overwrite all memo fields related to this Service Level Agreement?
Select Yes to delete existing information and overwrite memo with new information.
Select No to retain the information already in the memo. The new information will show in Details on the Service Level Agreement Summary in Assign Service Level Agreement.
Assign Service Level Agreement
SLAs are assigned to Schools or Bases via Focus | Services | Service Level Agreement | Assign Service Level AgreementAssign Service Level Agreement. This will open the Assign Service Level Agreement page with panels for:
- Service Level Agreement EnquiryService Level Agreement Enquiry
A Service Level Agreement is assigned to a base via Focus | Services | Service Level Agreement | Assign Service Level AgreementAssign Service Level Agreement.
Clicking on the select Base icon opens the Base Enquiry. This is a mandatory field. Double click or Select the required base. In order to clear the selection click on the X icon.
Clicking Search will return a list, in the Service Level Agreement Summary, of the SLAs already assigned to the Base.
You can also search using the Service Provider drop-down and the Active checkbox. This will produce a list of all the SLAs, according to status, assigned to the Base and the linked Service Providers
- Service Level Agreement SummaryService Level Agreement Summary
The Service Level Agreement Summary is accessed via Focus | Services | Service Level Agreement | Assign Service Level AgreementAssign Service Level Agreement.
The Service Level Agreement Summary displays the SLAs that have been assigned to a selected Base, under the headings of Code, Description, Start Date, End Date, Active, SLA Type, SLA Units and ServiceCode, Description, Start Date, End Date, Active, SLA Type, SLA Units and Service.
Searching for a Base on the Service Level Agreement Enquiry (Assign SLA) without selecting a Service Provider will list all the Services that are linked to the Base.
Before a new SLA can be assigned to a Base you must select a Service Provider from the drop-down and then click Search. The Service Level Agreement Summary now lists the SLAs assigned to the Base and the Service.
To add an item to the list click on the Add icon, this will open the Add/Edit Service Level Agreement window. Clicking on the icon opens the Service Level Agreement Enquiry window. Search for and Select the required SLA. Save.
If a Service Level Agreement has already been assigned to a School/Base a message will inform you:
Service Level Agreement already exists for the selected base
Click Edit to attach a Document and make changes to the Memo. The name (Description) of the SLA cannot be edited on the Service Level Agreement Summary.
To delete a Service Level Agreement click Remove. The system will ask for confirmation:
Do you really want to remove the selected record?
The Details button will display the latest Memo that has been added/edited in Maintain Service Level Agreement | Service Level Agreement Details.
- Attached DocumentsAttached Documents
A document can be attached to the Service Level Agreement that is assigned to a particular School/Base when the SLA is first Added (assigned), or at a later date by clicking Edit. This will open the Add/Edit Service Level Agreement browse.
Click on New to open the Select a file to attach to the SLA.
To delete a document highlight it and click on Remove.
To view a document double-click or highlight it and click on Open.
Clicking on Refresh will remove all of the documents in the list.
A Service Level Agreement can be assigned to many different Schools/Bases and each School/Base can purchase a number of different SLAs.
A Wizard is available allowing you to move through panel by panel using:
- Previous (Alt + <) or Next (Alt + >) instead of scrolling
- Ctrl+Alt+>/Ctrl+Alt+< will take you to the last or first panel respectively.
Provision Charge Types
Provision Charge Types are created via Services | Provision Charge Types. Once the Charge Type has been created, it can be linked to none, one or more Service Teams. This allows the user to set specific Charge Types for a Service Team; these Charge Types are subsequently available for use by that Service Team when allocating Provision to a Student. This method allows a Charge Type to be changed and then cascaded to all Services using that Charge Type.
When this option is selected the Charge Type Enquiry page is opened.
- Charge Type EnquiryCharge Type Enquiry
This page allows you to search, by name or active type, for a Charge Type to which you can add new or edit an existing Provision costs.
Highlight a charge type and double click or click Open in New Window. This opens the Charge Type Details page.
- Provision Charge Type DetailsProvision Charge Type Details
This page is accessed by selecting Services | Provision Charge Types and displays details of the Charge Type with a Cost Summary panel listing Charge Rates applied. Each row displays a Start and End Date, Cost per Unit, Unit type eg Annual Calendar, Monthly and whether the Charge Rate is an Hrs/Week Calculation and includes INSET Days.
Such details are defined on the Charge Rate dialog opened by clicking Add or Edit. An existing Charge Rate can be replicated, to save time, by clicking Copy. Details can then be modified, such as the Start and End Dates, to create the new charge.
Any Charges edited here will cascade to all Services using the Charge Type linked to the Provision records. Details of Provision records that would be affected by the change can be seen by clicking the View Affected Provisions button.
Exclusions / Inclusions Setup
Maintain AWPU
This menu option requires you to establish the Age Weighted Pupil Units for each NCY per Financial Year. This option is located via Focus | Services | Exclusions/Inclusions Setup | Maintain AWPU
When this option is selected the Exclusions AWPU Summary page is displayed. All defined AWPUs are listed for each Financial Year with the most recent year at the top.
AWPU details per Financial Year may be seen by highlighting a row and double clicking or clicking Open in New Window.
- AWPU DetailsAWPU Details
The amounts entered here are used in the calculations for the amounts to be deducted or allocated as a result of Permanent Exclusions or Managed Moves, which may or may not be associated with an Exclusion record.
To enter AWPUs for a new Financial Year click New from the AWPU Summary page or the Exclusion AWPU Details page.
Select a Financial Year by clicking the browse icon. The Financial Year browse is populated in Tools | Year Definition.
The Start and End Dates will automatically be populated based on the selected year.
Enter NCY amounts.
Save the AWPU record.
Exclusion Defaults
This menu item is where Exclusion system default values are set.
- Base for Default Term DatesBase for Default Term Dates
The selected Base may be any Base but it must have initialised opening times.
When creating an Exclusion record the Base Name displayed will be the student's Registered Base. If the student does not have a registered Base the term dates of the default Base will be used to validate the Exclusion Start and End dates.
- Financial ImplicationsFinancial Implications
These settings are default parameters to determine amount and allocation of funding.
NCY of Leavers: Multiple NCY values may be entered (separated by commas, eg 4,6,11), which will indicate Year Groups which will normally leave their current school at the end of the Academic Year.
If an Excluded child is in one of these Year Groups, the To Date of the PFT details will be defaulted to the end of the Academic Year instead of the end of the Financial Year.
Include next financial year if after census: If this box is checked a Finance record deduction for the following Financial Year will be made if a child is Excluded between the School Census day and the end of the Financial Year.
If a child is excluded in this period, the To Date of the PFT details will be defaulted to the end of the next Financial Year. If the child will be a leaver in that year the To Date will default to the end of the appropriate Academic Year.
If this default is checked (set to Yes), and the Deduction From Date is between (and including) Census Day and the End Date of the Financial Year that the Deduction From date falls into, the System will create an additional Pupil Funding Transfer record to cover the whole of the following Financial Year
Split funding at start of Academic Year: If this box is checked and the From and To dates of a Permanent Exclusion span the start of an Academic Year the Finance record will be split at the start of the new Academic Year. The NCY and the AWPU for each finance record is calculated on the basis of the From Date.
If unchecked, splits will only occur at the beginning of the Financial Year (if appropriate).