![]()
Run a New Check
A provider can run a check on children that are known to attend one of their services. Alternatively, they can enter the details of a new child and perform an ad hoc check.
Providers and services are assigned to a user via Administration | Manage Access.
When the child’s forename and surname are used to perform an ad hoc check for 30 hours eligibility, if at any time in the future this child is added to the provider via the Headcount portal, the details of the ad hoc check (date of birth and eligibility code) are copied across to the Headcount portal. For more information, see the Early Years Headcount Provider Portal handbook.
The Local Authority can use the 30 Hours Free Childcare Configuration page to configure whether surname and forename are mandatory when performing a check.
An eligibility code that starts on the first day of term is not eligible for that term. For a check to be eligible for the term, it must have a start date earlier than the first day of the term.
The system uses the eligibility code, the child’s date of birth and the provider name to verify eligibility.
For payment periods starting on or after the 1st January 2018, Extended Hours cannot be claimed when the funding start date for a child falls within the grace period.
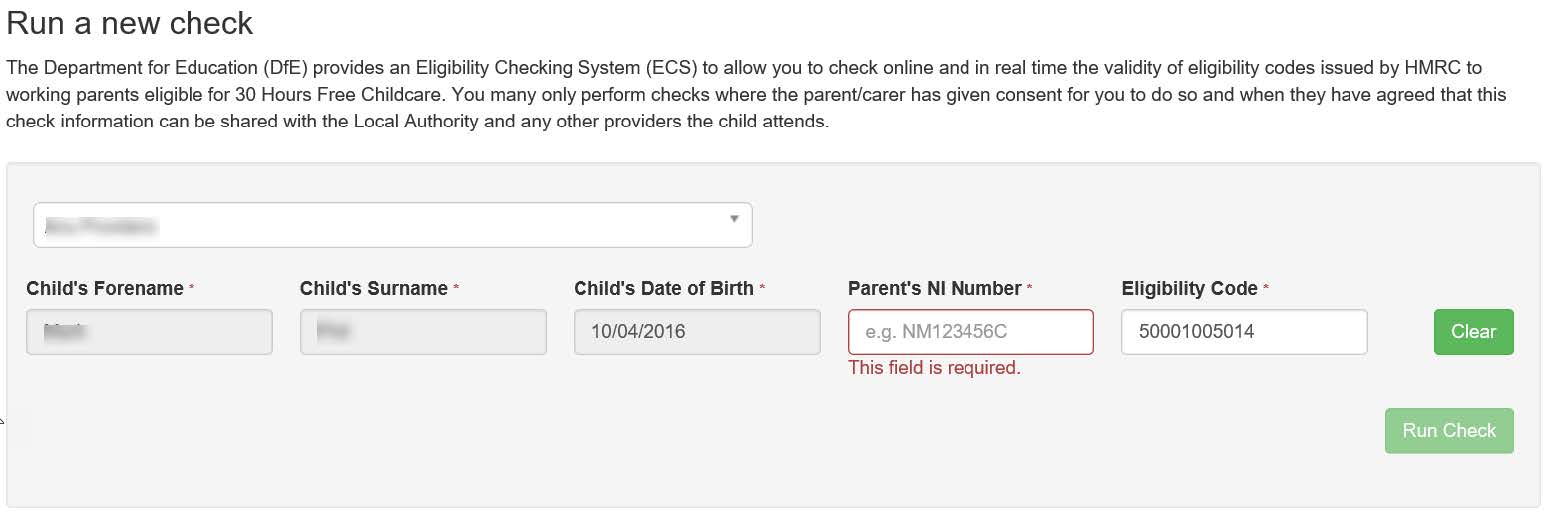
To check if a child is eligible for 30 Hours funding:
- Select 30 Hours Free Childcare | Run a New Check on the Provider Portal home page to display the Run a New Check button. Alternatively, on the Thirty Hour Entitlement Portal home page, click the Run a New Check button.
If you have access to more than one provider, the following screen is displayed:
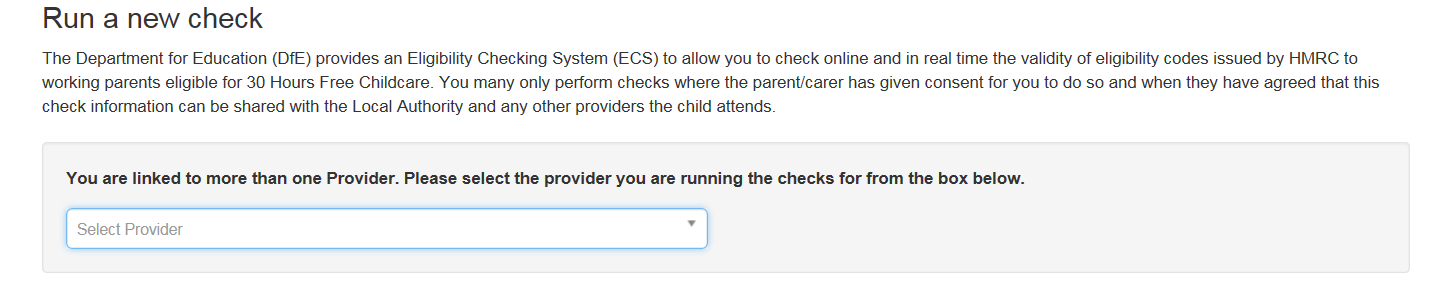
- Select the required provider from the drop-down list. After a Provider is selected the search fields to enter the Childs name will appear.
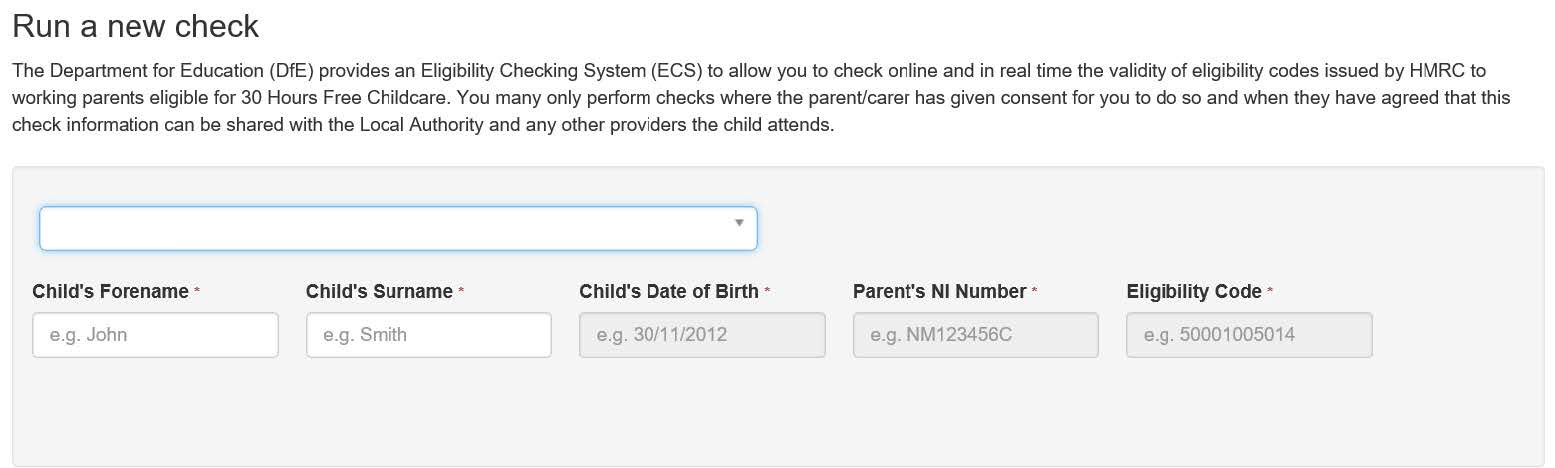
To run a check for a child already associated with the provider:
- Enter the child’s forename, surname or characters from the name to display a list of children.
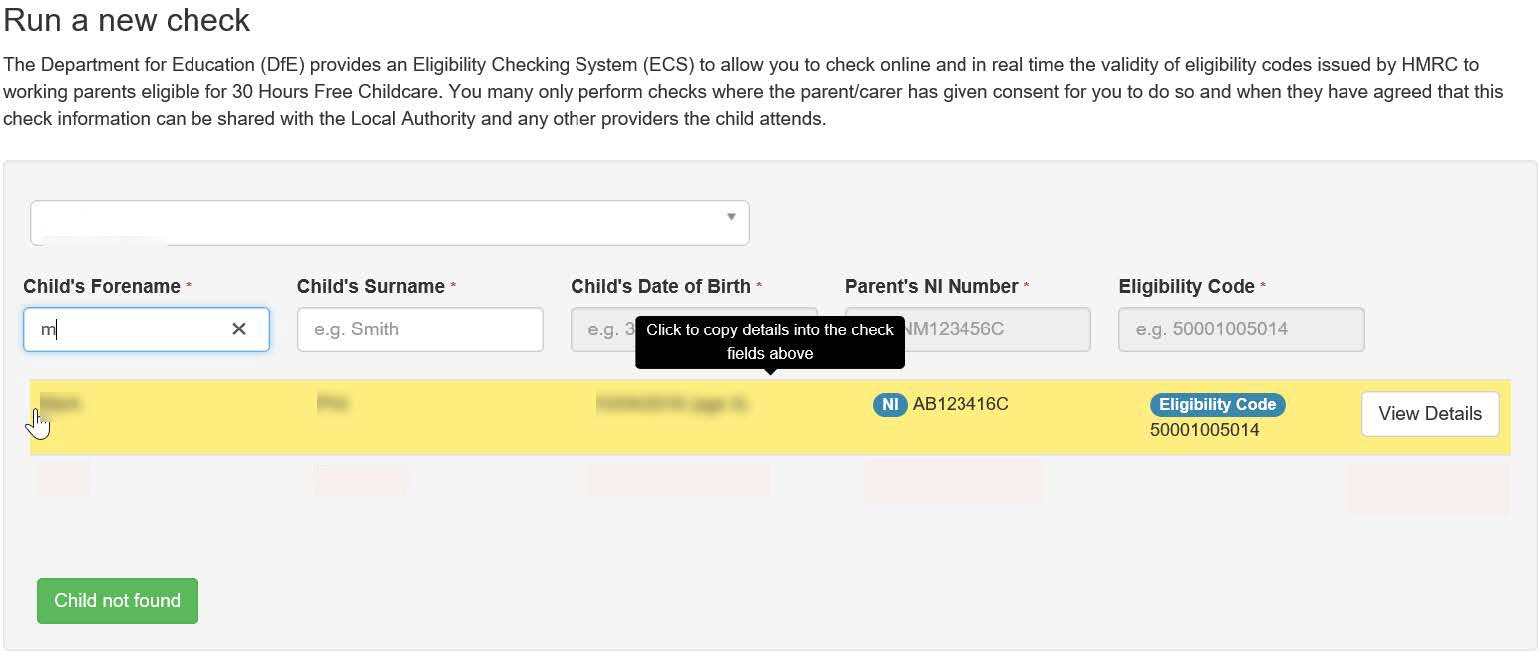
The Date of Birth, Parent’s NI Number and Eligibility Code will remain greyed out.
When the child’s name is highlighted, a tooltip displays: Click to copy details into the check fields above.
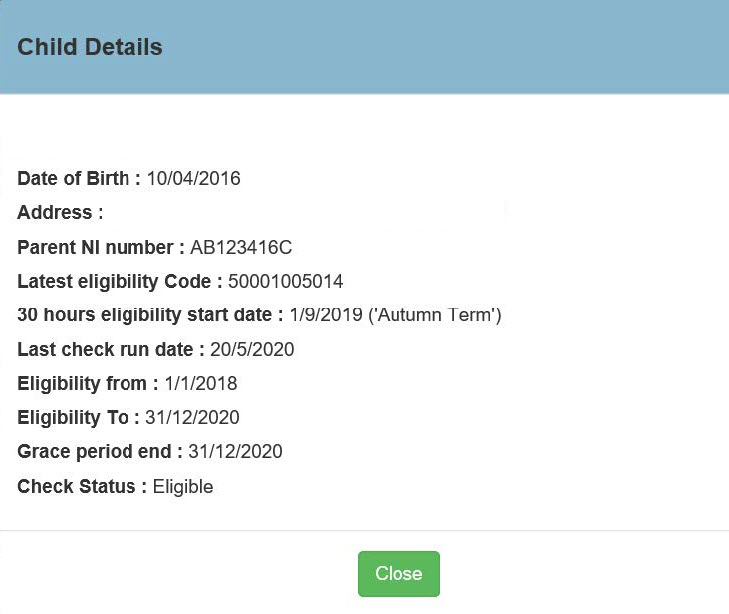
- Click the View Details button to see the full details of a Child prior to selection. Click Close to return to the search screen.
- Select the required child in the list to copy the details into the check fields.
All populated fields are inaccessible and cannot be edited. By selecting the Clear button will remove the entries in each field to restart the search
- Fill in the remaining details.
- After all details have been entered in the correct format the Run Check button is enabled and can be selected to run a check.
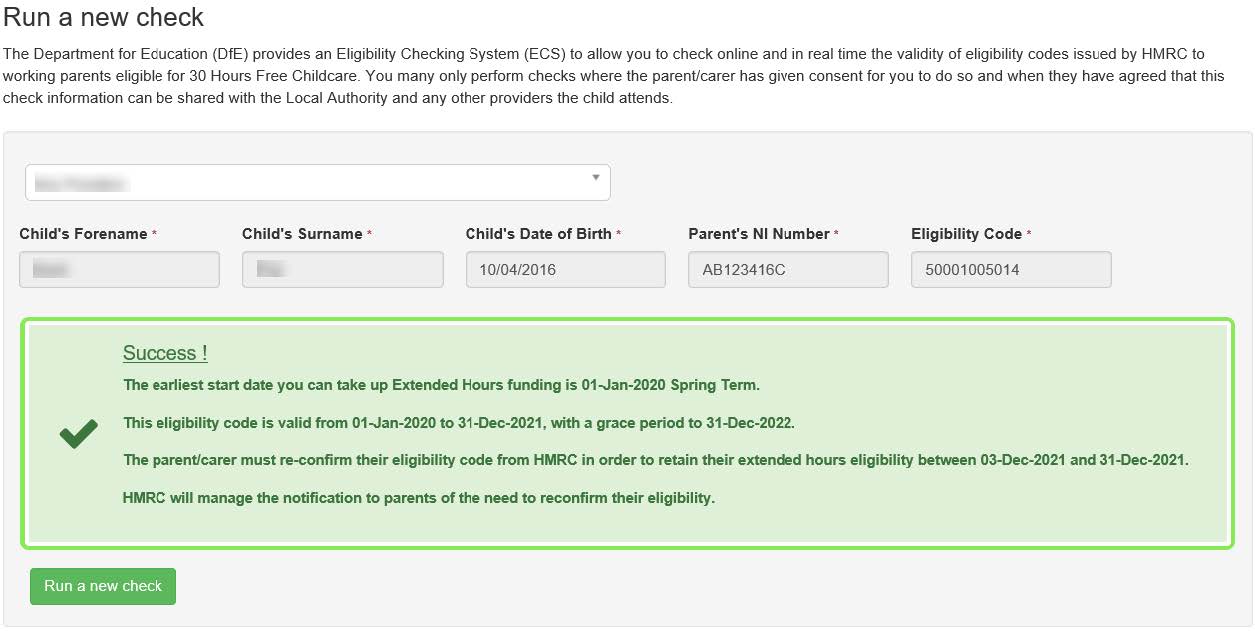
- If the check is Success!, then click the Run a new check button. All previous entries will be cleared to start a new search.
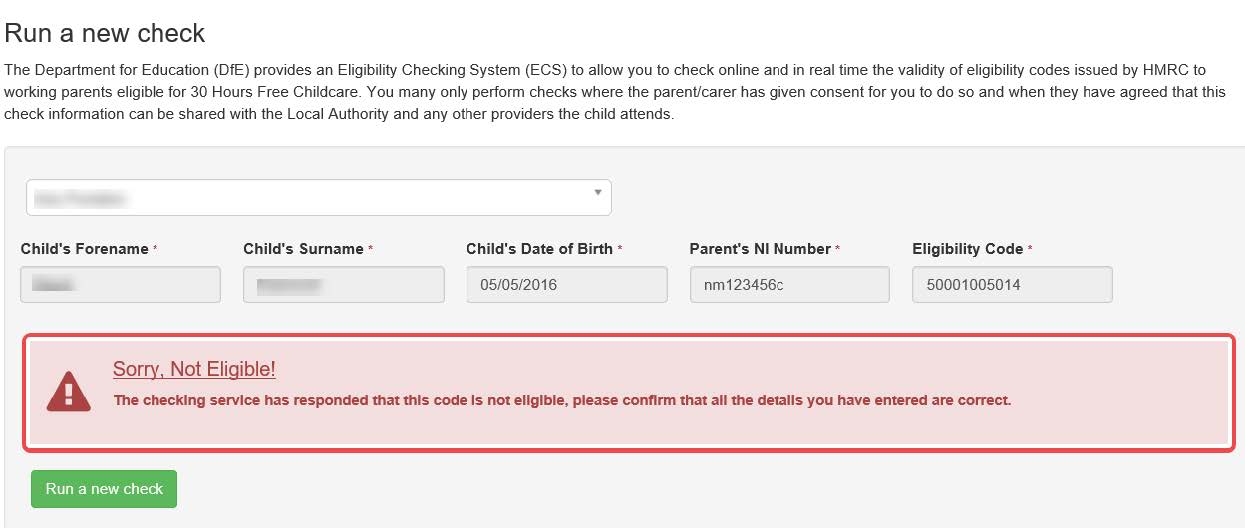
- If a check returns Sorry, Not Eligible! for a Child that is known to be eligible, check ECS Settings. This could be set to Child Not Found. Amend the ECS settings if required, and click Run a new check button to re-start the check.
- If the check returns Oh dear, something went wrong! for a Child that is known to be eligible, then check ECS Settings. This could be set to error in ECS Settings.
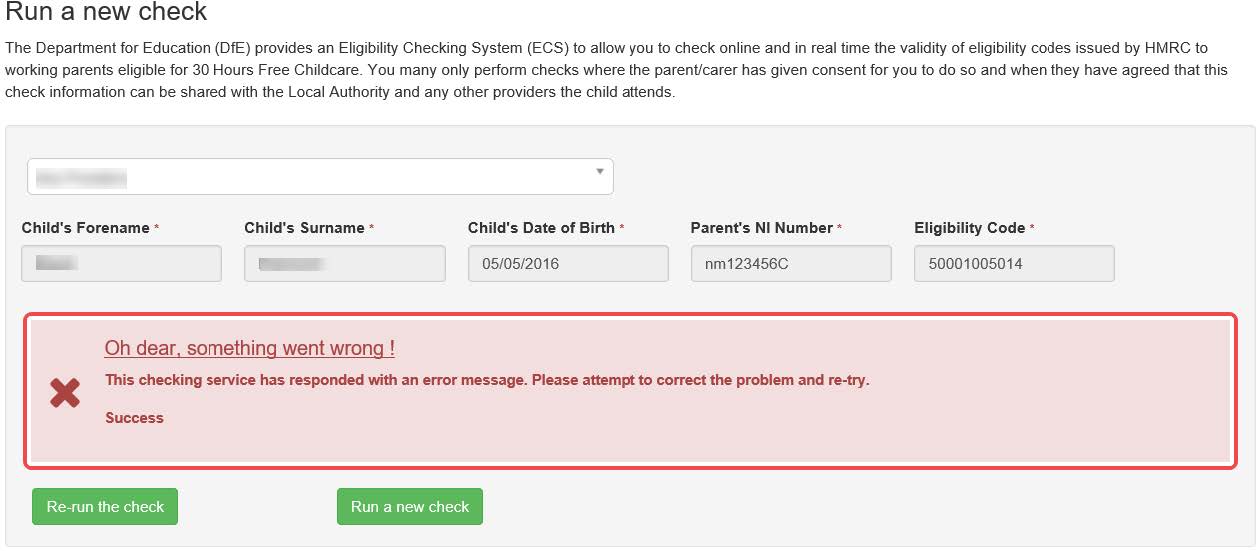
Re-run the check and Run a new check can be selected to re-run the check. Before re-running the check, the ECS settings can be changed in v4 Client without leaving this screen as follow:
- In v4 Client Focus | Early Years | Early Years Setup | EY Pupil Premium ECS Configuration.
- Scroll down to ECS Eligibility Status and change it to Eligible.
- Click on Save.
- Return to the Run A Check screen and click the Re-run the check button.
If the check still returns an error then try clearing the cache by selecting Administration | Cache from the menu, then re-run the check
Ad Hoc Check
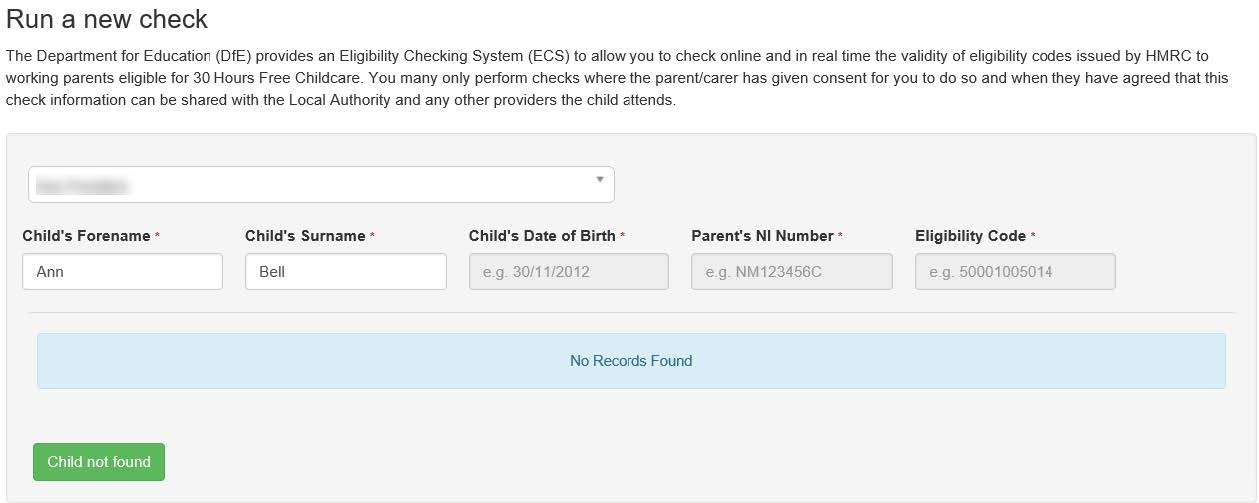
- Select a Provider from the drop down list.
- Enter the child’s forename, surname or characters from the name. The message below is displayed:
No Records Found
- Click the Child not found button.
A popup box appears to confirm you want to add a new Child.
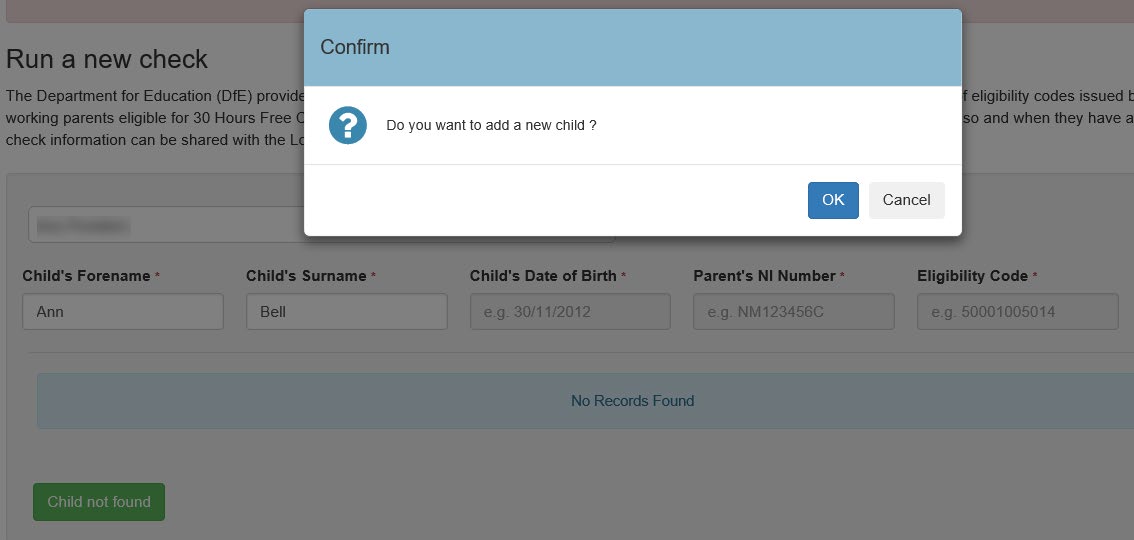
- Click OK.
- Fill in all fields using the correct format.
- Click the Run Check button.
If the check was successful, click Run a new check button at the bottom of the screen. The screen will return to allow another child’s name to be enter against the same Provider selected if required.
Change a Provider
An alert message, as shown below, is displayed if a different Provider is selected, after the details of a Child is entered in the search fields.
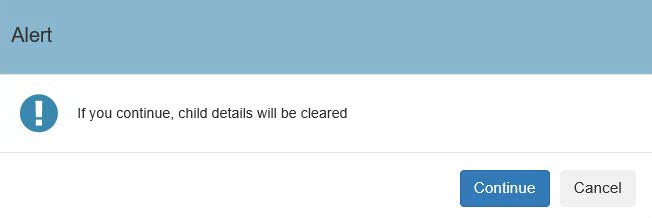
- Select Continue will clear all fields. The details for the child can now be entered against the selected Provider.
- Select Cancel will return to previous screen where you can resume with the check.
For children who are already known, the details of the check are displayed on the Student Details page in the v4 Client.