![]()
The instructions on this page were different in the following release(s):
3.76
Student Placement and Transfer
Release Notes for SEN Feature Update 3.76.001:
Placement Rank History Attendance Pattern
Use the Placements and Transfers functionality when a student with a SEN statement moves to another school. The information recorded here is a statutory requirement for the SEN2 and STATS2 returns.
- A Placement is a school that the student will attend. This can be the same school as they are already attending prior to being statemented.
- A Transfer is when the placement type (i.e. school) is a different SEN school type from the type of the school they were previously registered to, e.g. Maintained Mainstream School to Maintained Special School.
Create a Placement /Transfer
To create a placement/transfer for a student:
- In the student’s assessment involvement, click the Placement/Transfer link in the Links panel on the right-hand side of the screen to display the Placement/Transfers dialog.
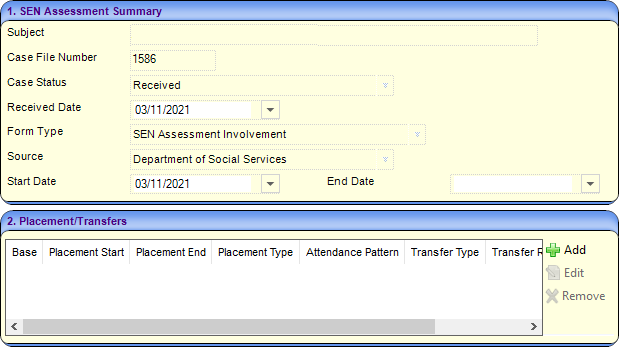
- Click the Add button to display the Placement/Transfer dialog.

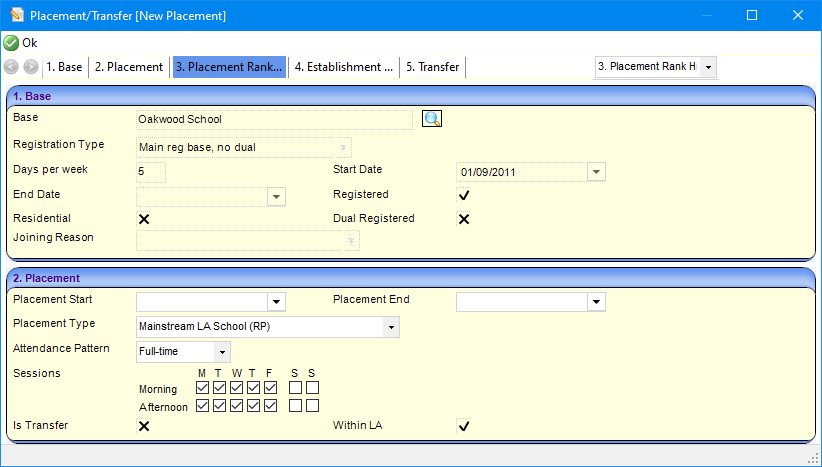
Panel 1. Base
Click the Browse icon adjacent to base to display the School History Search dialog which lists all schools in the student’s school history.
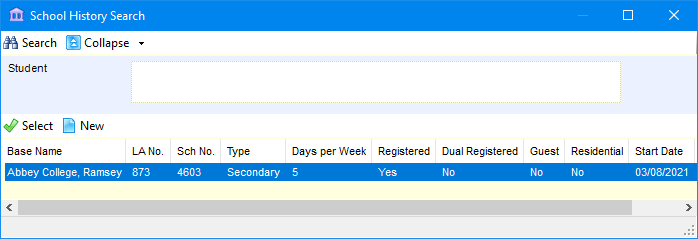
- Select the school the student is moving to.
To add an existing base, highlight a school from the list of base names then click the Select button to return to the Placement/Transfer dialog.
When the base is selected, the details are fed through from the school history record into panels 1. Base and 2. Placement.
- Alternatively, to add a new school to the school history record, click the New button to display the School History Details dialog.
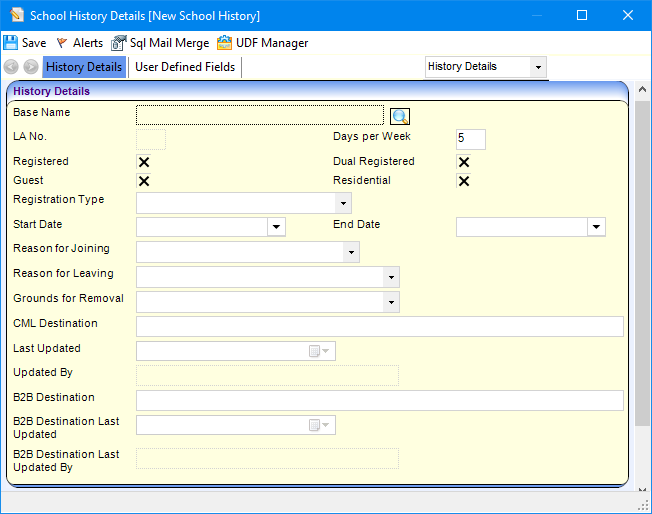
- In the History Details panel, click the Browse button to display the Base Enquiry dialog.
- Search for the new school you want by entering search criteria in the Base Enquiry panel.
- From the search results list, highlight the required school.
- Click the Select button to return to the School History Detail dialog.
- Enter the History Details panel with the new school details and the details for joining/leaving etc.
- Click the Save button to return to the Placement/Transfer dialog.
- Alternatively, to add a new school to the school history record, click the New button to display the School History Details dialog.
Panel 2. Placement
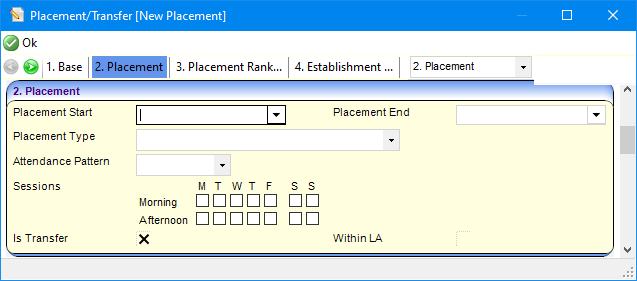
Placement Type is automatically populated by the value of the SEN School Type from the bases setup.
- Enter a Placement Start date.
- Enter an Attendance Pattern if required.
- The Sessions default to fulltime attendance at this school. Make the required changes if the student’s attendance at this school is not fulltime.
- If the student’s placement is at a school of a different type (i.e. from the previous school), select the Is Transfer check box.
If the Placement Type is different from the student's original school, the Is Transfer box is blank.
- If this school is within the student’s local authority, select the Within LA check box.
Panel 3. Placement Rank History Across All Bases
Once a base is selected, the Placement Rank history information is automatically pre-populated.

The information in this panel is reported in the SEN2 person level return.
Up to two placements may be recorded for each person. If more than two placements are used then record the two that are typically attended most in an average week or term as applicable.
if the student is attending two bases, placement history needs to have the main registered base added first. Otherwise the record for Rank 2 will not save as there is no Rank 1 record.
Placement rank must be recorded as follows:
- 1 – Primary placement
- 2 – Secondary placement
Within the same date range:
- Different schools cannot have the same rank
- The same school cannot have both rank 1 & rank 2
Panel 4. Establishment currently named on EHC plan
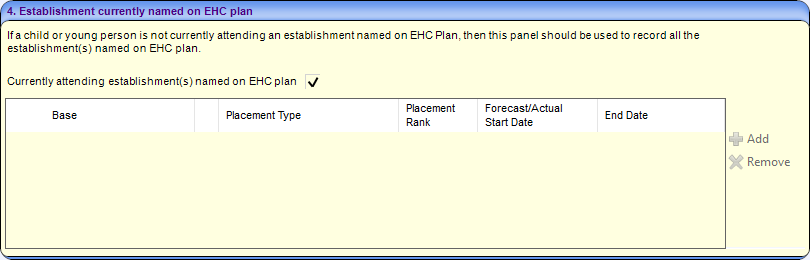
This panel allows information to be recorded when the establishment named on the EHC plan is different to where the child or young person is currently attending. This is for England only and can be reported in the SEN2 person level return.
To record a new establishment:
- De-select the Currently attending establishment(s) named on the EHC plan tickbox.
- Click the Add button.
- Enter details as required.
Panel 5. Transfer
If this placement is a transfer, select the Transfer panel and select Transfer Type, Transfer Reason and From Base.