![]()
Project Management
Projects are grouped by situation, so before create a new project, you must check that there is an appropriate situation group for it. If not, you need to create a new one. Complete the following sections as required when creating or editing projects.
Create a New Situation Group
If the situation group required for your new project is not covered by the preloaded system situation groups, you must create a new one before creating the project. You can determine the fields that are displayed in the project
- In the IYSS System Administration Client, select Client | Situation Group.
- Click the Add Value icon to display a blank Situation GroupSituation Group dialog.
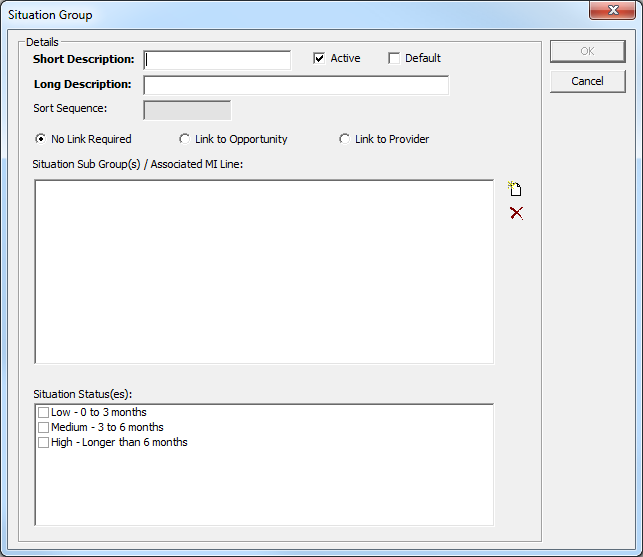
- Complete the Short and Long Description fields.
- Ensure the Active check box is selected.
- If required, select the appropriate Link to Opportunity or Link to Provider radio button.
- To add sub groups or MI lines, click the Add Value icon to display the Situation Sub GroupSituation Sub Group dialog.
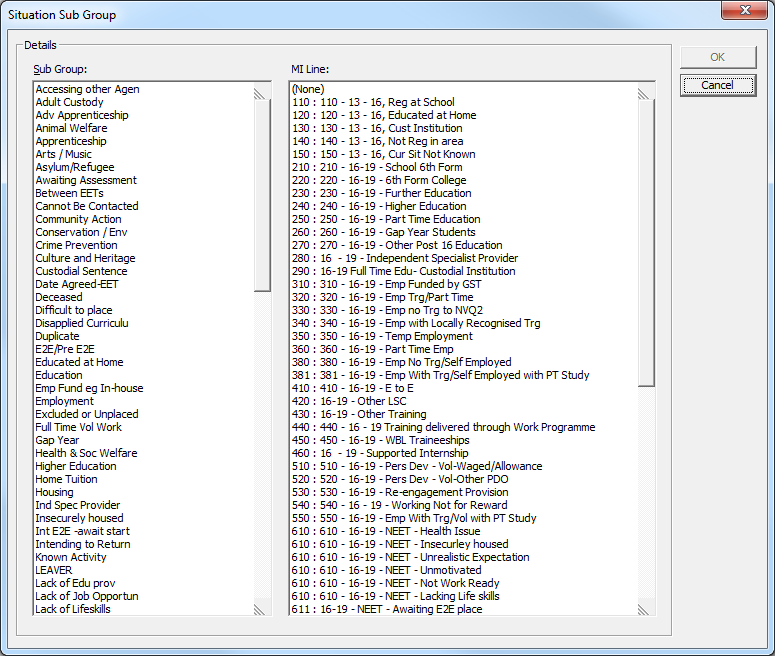
- Select the required Sub Group.
- If required, select the relevant MI Line.
- Click the OK button to display a confirmation dialog.
- Click the Yes button to save the changes and close the dialog.
- Add any other required Sub Groups as before.
- If required, select the appropriate Situation Status(es) from the list.
Situation statuses can be configured in the IYSS System Administration Client (Client | Situation Status). For help configuring situation statuses, refer to: Create Situation Statuses.
- Click the OK to save the changes and close the dialog.
- In the System Administration Client, select Client | Situation Super Group.
- Select Secondary to display the Situation Super Group dialog.
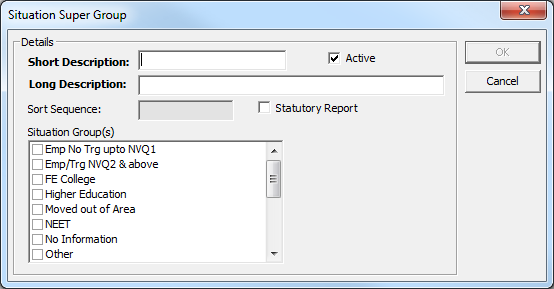
- In the Situation Group(s) list, select the situation group you just created.
- Click the OK to save the changes and close the dialog.
Create a New Project
- In the IYSS System Administration Client, select Client | Project.
- Click the Add Value icon to display a blank ProjectProject dialog.
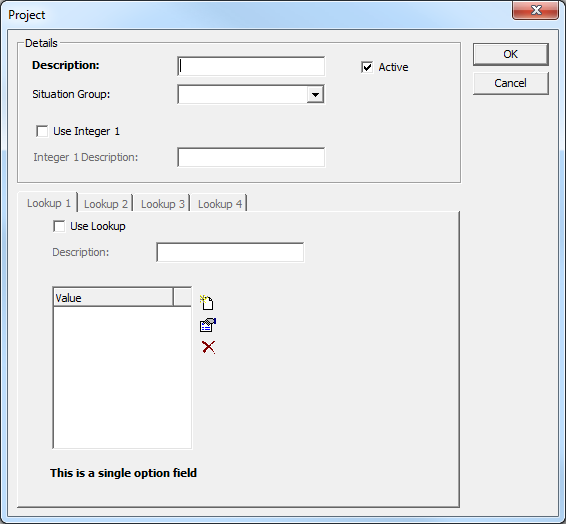
- Enter a name for the project in the Description field.
- Select the relevant Situation Group from the drop-down.
- If required, select the Use Integer 1 check box.
- If you are using Integer 1, enter the Integer 1 Description.
- Click the OK to save the changes and close the dialog.
Configure the New Project
- In the IYSS System Administration Client, select Client | Project.
- Select the required project to display the ProjectProject dialog.
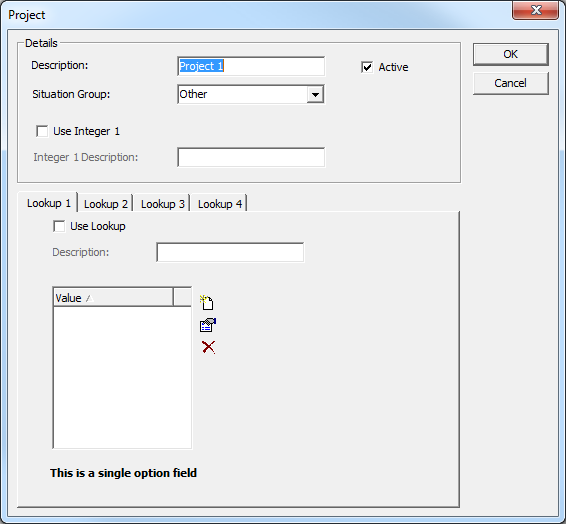
- In the Lookup 1 tab, select the Use Lookup check box.
- Enter a name for the lookup in the Description field.
- Click the Add Bean Detail icon to display the Project Lookup 1 dialog.
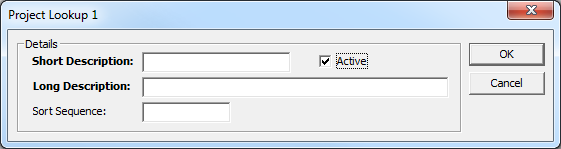
- Complete the Short and Long Description fields.
- Ensure the Active check box is selected.
- Click the OK to save the changes and close the dialog.
- Add further values for Lookup 1 in the same manner.
- As required, repeat steps 3 to 9 for Lookups 2, 3 and 4.
- Click the OK to save the changes and close the dialog.
Lookups 1 and 2 are single option fields (radio buttons). Lookups 3 and 4 are multi-select fields (check boxes)
Interaction Activities
After the project has been created and configured, you must set up three interaction activity types to enable project changes and so that clients can join or leave a project. Once the activities are created you can link them to the relevant interactions.
To do this:
Set up an interaction activity type
- In the IYSS System Administration Client, select Interaction | Interaction Activity Type.
- Click the Add Value icon to display the Interaction Activity Type dialog.
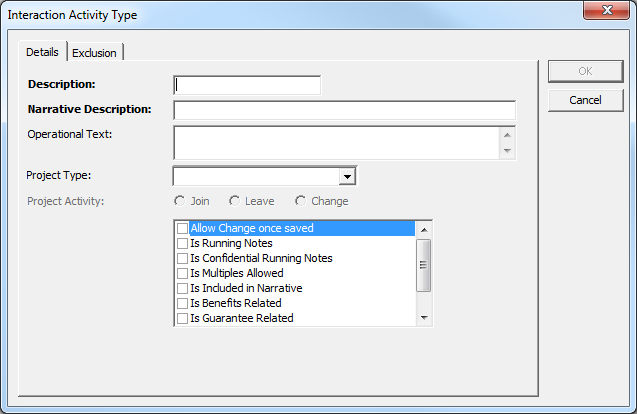
- Enter a name for the interaction activity type in the Description field.
Depending on whether the interaction activity type record you are creating is a Join, Leave or Change record, it is advised that you use the ‘[Project Name]-Join’ (or Leave or Change as appropriate) format. This makes it easier for users to locate the project and type they need.
- Enter a description to be displayed in the interaction after the activity has been added in the Narrative Description field.
- In the Operational Text field, enter an explanation of the project to be displayed as hover text on the activity in the list.
- Select the Project Type from the drop-down.
- From the list, select the following items:
- Is Included in Narrative
- Is Active
- Click the OK to save the changes and close the dialog.
- Repeat the process for the remaining interaction types until you have Join, Leave and Change activities.
Link Interactions and Activities
After you have created the three activities, you can link them to the relevant interactions.
- In the IYSS System Administration Client, select Interaction | Interaction Type.
- Select the required interaction to display the Interaction Type dialog.

- Select the Links tab.
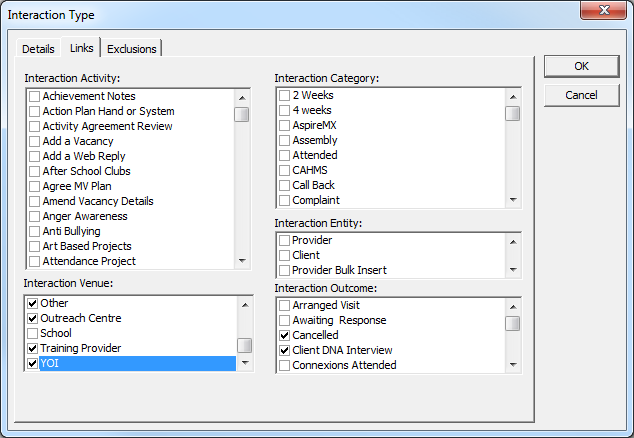
- In the Interaction Activity list, select the appropriate activities.
- Click the OK to save the changes and close the dialog.