![]()
Add or Amend a Student's information
The Students | All Students page enables you to search for a student and to view or edit some of that student’s personal details.
Edit a Student
Once a student is selected, that student's core details are displayed on the Student Summary header panel. These details can be edited if required. In addition, further student details can be viewed and edited via the Student Basic Details and Student Additional tabs.
Student Core Details
- Select a student.
- Click the Edit Student Details hyperlink in the Student Summary panel to make the selected student's Name, Gender, LA, DOB and UPN details editable.

- Make any changes as required.
If a student doesn't exist in the database a new student record can be created manually.
Add a Student
- Select Students | All Students to display the All Students page.
- Click the Search button to display the Add New Student hyperlink.
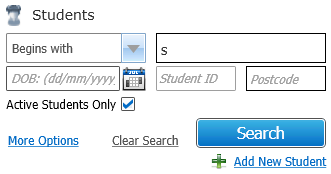
- Click the Add New Student hyperlink to display editable fields relating to student details.
Any criteria entered into the search fields (except the Student Name and UPN fields) are carried over into the details of the new student.
- Forename, Surname, Date of Birth and Gender are all mandatory.
- Enter other details as required.
- If the student is studying in a different NCY to their chronological NCY, enter the student's Offset.
The Offset is the difference In Years between the student's actual and chronological NCYs. The student's chronological NCY is calculated automatically. - Address information can be added as required.
If you cannot find the address you need, you can click the Add a new address hyperlink to add the address to the catalogue. For more information on adding addresses to the catalogue, see Adding an Address to the Address Catalogue
- Base information can be added as required.
- Click the Save button to create the student.
If the system finds any existing students with similar details, the Existing Students dialog is displayed. This dialog lists those students who have similar details. You should review the students in the dialog to ensure that the student you are creating does not already exist in the database.
If you are sure that the student you are creating is not a duplicate of a current student, click the Save button to save the new student's details.