![]()
Unmatched tab
More informationMore information
When a Student record is received from the School, the system will try and identify a match for the incoming Student. This is done as follows:
- GUID - if there is no GUID in the file or it does not exist in the database, then
- Unique Pupil Number plus three of the Student Identifiers, or
- No Unique Pupil Number then all four Student Identifiers
If a match is not found for a Student and the Add Students if Unmatched checkbox is unticked in the Rules for Unmatched Records tab (for a particular Base or Bases) then the incoming Student will be placed in the Unmatched area.
For B2B:Student the Student Identifiers are GUID, Unique Pupil Number, Date of Birth, Family Name, Gender and Given Name.
The Unmatched tab allows you to deal with student data which has been imported and held in conflict because the import process could not match the incoming student details with an equivalent student record.
When an incoming student matches an inactive student based on the criteria listed above, then the incoming student is still placed in the Unmatched tab. If an administrator has enabled the Match only Active Students system default option, when you select the student and click the Match button, a dialog displays a warning that a match for the incoming student exists but is currently inactive.
Add/Match process
Following the introduction of GUIDs, the process to Add New or Match unmatched students has been upgraded.
When there is more than one record for a student in the unmatched students tab:
- When a record has been added or matched and a GUID exists, any remaining records for that student will be automatically matched using the GUID.
- When a record has been added or matched and no GUID exists, any remaining records for that student will be automatically matched using the unique identifiers.
IMPORTANT: It is important to remember to add or match the oldest record first so that data can be correctly updated and not lost.
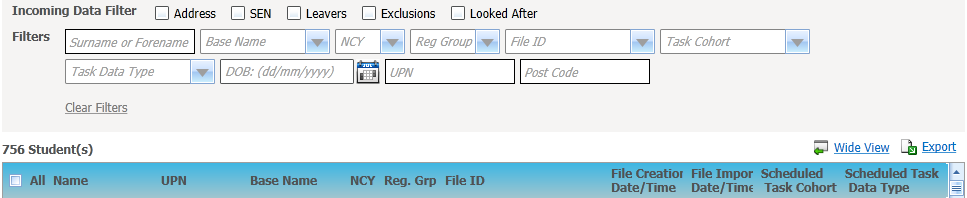
- To filter the list of students:
- Select one or more checkboxes from the Incoming Data Filters.
- Select one or more options from the Filters.
- Click the Wide View hyperlink to see the list of students in a wide view if required.
- Click the Export hyperlink to export the resultsresults.
Click the Export hyplerink to display a Save As dialog. Select a file format as required. For example:
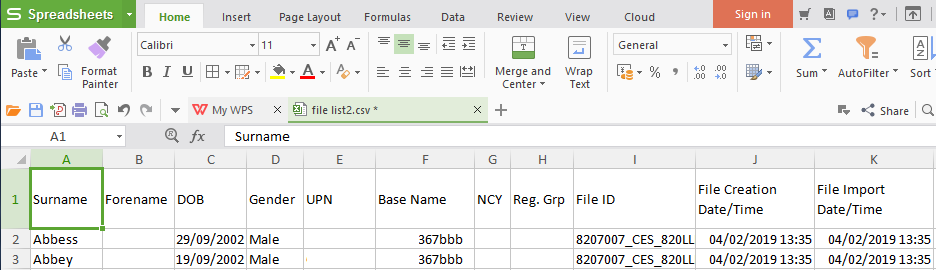
Once the results in the grid are saved in your preferred format then you will be able to modify or edit this as you wish.
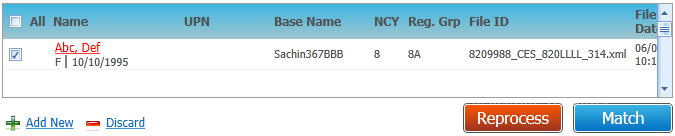
- Click the Name hyperlink to display student details from the import file.
- Select a student using the checkbox next to the Name.
Choose from the following options:- Click the Add New hyperlink to add a new student record.
This option must be carefully considered to avoid duplicate student records being created.
Therefore it is recommended that you initiate the Match first to search the system and ensure that the incoming student does not already exist.

In most cases when an incoming Student is added as a new Student then all the incoming data will also be updated and added to this Student record, regardless of the Data Processing Rules that have been defined.
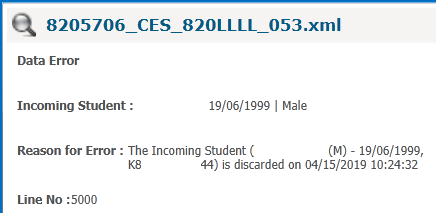
- Click the Discard hyperlink to discard the student record.

The following is an example of the message that will be written to the Error Log for each student discarded:
- Click the Match button.
This will open the Possible MatchesPossible Matches dialog allowing you to attempt to manually match the student to an existing student on the database.Clicking the Match button will open the Possible Matches For dialog allowing you to attempt to manually match the unmatched student to an existing student on the database.
When you click the Match button, an automatic search will be run using specific items of the incoming data for the student to determine possible matches. This automatic search consists of two parts:
- Search for active students using the UPN (if it exists) belonging to the incoming student
- Search for active students using the Surname of the incoming student, this will include a search of the name history for the student.
Upon completion of the automatic search, the Possible Matches displays the result of the combined automatic search.
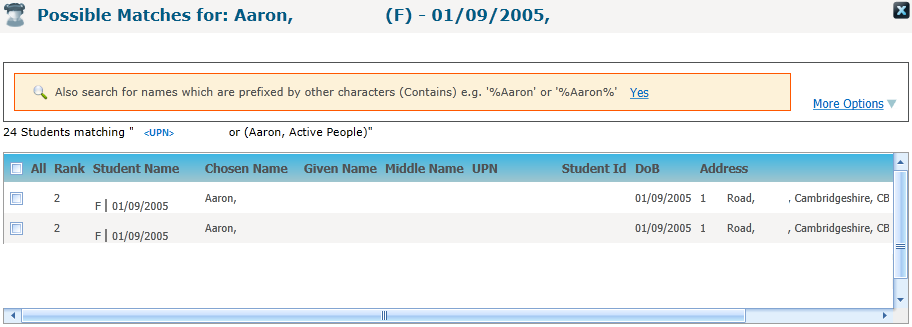
The Possible Matches for: search window will initially only retrieve the first 200 Student records, therefore please ensure that you have scrolled through the list until the last record which will page and retrieve the next 200 Student records to ensure that you can find a possible match.
Choose from the following options:
- Click the More Options hyperlink to display more search criteria.
- Hover over the Rank against the student record to view a tool tip of what the student retrieved in the list has been matched on.

How matches are rankedHow matches are rankedRank Description Rank 1 The UPN for the incoming unmatched Student exactly matches a UPN for an existing Student listed in the Search Results Rank 2 The Surname + DOB + Gender for the incoming unmatched Student exactly matches a Name + DOB + Gender for an existing Student listed in the Search Results
There must be an exact Match on the Name
The Name in the Search Results can be in any of the Name fields (Family Name, Given Name, Chosen Family Name, Chosen Given Name, Given Name 2)Rank 3 The Surname + DOB + Gender for the incoming unmatched Student partially matches a Name + DOB + Gender for a Student listed in the Search Results
There must be a partial Match on the Name, but exact match on the Date of Birth and Gender
The Name in the Search Results can be in any of the Name fields (Family Name, Given Name, Chosen Family Name, Chosen Given Name, Given Name 2)Rank 4 The Surname matches a Name (exactly or partially) that was recorded as a previous Name in the Name History for a Student listed in the Search Results Rank 5 If the file contains an Address and Postcode for the incoming Student, the House No + first five characters of the Street of the incoming Address + Postcode or
the House Name + first five characters of the Street of the incoming Address + Postcode or the Apartment + first five characters of the Street of the Incoming Address + Postcode matches any of the same combinations of the Correspondence Address for a Student listed in the Search Results.Rank 6 If the file contains a Postcode for the incoming Student, this Postcode exactly matches the Postcode for a Student listed in the Search Results Any Students fulfilling the Automatic Search Criteria, but not meeting any of the Ranking Criteria above will be displayed in the Search Results after the Ranked entries.
Once the Automatic Search has been run, it will be possible to run a subsequent Manual Student Search using the search criteria entry fields at the top of the Possible Matches Modal Window.
If a suitable match to an existing Student is found, clicking on the Select button will manually match the Incoming Student to the selected Student and will import the Unmatched Student details, subject to the Data Processing Rules set up for each Data Item/Group.
- Select the Student Name hyperlink to view details of the selected student in the list.
- Select the checkbox adjacent to a student record to select the student.
It will be assumed that these two students are the same and this student record will be moved to the Matched with Conflicts tab if there are any conflicts subject to the Data Processing Rules that have been set.
- Click the Add New hyperlink to add a new student record.
Pending Students
Students with a status of Pending are displayed in the Unmatched tab (highlighted in red text). These students might have a match in the database, but because they have a status of Pending, the system cannot match them automatically. Therefore, you can select a pending student and click the Reprocess button to try and force an auto-match. If this does not work, the student can be matched like any other student, by manually finding a match or adding them as a new student. A Pending status may also indicate that there is an error associated with the record. Click on the Name hyperlink to view a summary of the incoming data. This will give details of any error at the bottom of the summary (usually in red text).