![]()
special educational needs and disabilities
The Citizen Self Service portal, in conjunction with the Professional portal, enables local authorities to create flexible special educational needs and disabilities (SEND) form templates which parents, carers, young people and professionals can complete.
Parents, carers and young people can complete forms relating to SEND processes, as defined by the local authority. The forms are submitted to the local authority, who in turn manage the incoming forms via v4 Client | Focus | Services | SEND Portal Management.
Forms submitted on the Citizen Self Service portal or the Professional portal are available on the child’s chronology, once the SEND team has approved them.
- Complete and submit a formComplete and submit a form
All of the following screens can be edited by the local authority via General Administration | Edit Resources | Resource Configuration Title | Text Resources | SEND.
As the pages are configurable by the local authority, the graphics below are examples only.
It is possible for both parents to have a Citizen Portal account and submit the same form for a child to the local authority. After the forms are approved, they both display as an event on the child’s chronology.
To complete a Citizen Portal form, the parent, carer or young person completes the following procedure:
- Select the Special Educational Needs and Disabilities tile to display the Choose Person page.
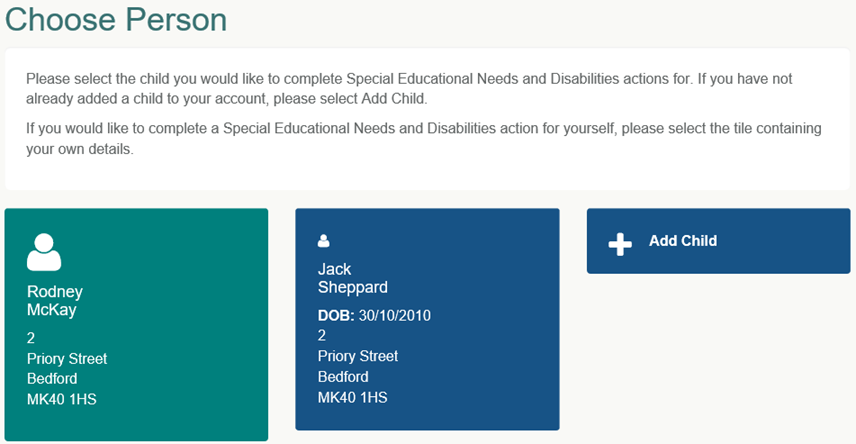
- Select the child you wish to complete a form for to display the Forms page.
If the child is not listed, click the Add Child button. - To make an application for yourself, select the tile containing your details to display the My Details page. Check your details are correct.
To change your address, click Use Another Address to display the Find Address dialog.- Search for and select the required address.
- If your address is not in the list, click the Not able to find your address? button.
Enter details as required.
- Click the Save & Continue button to display the Forms page.
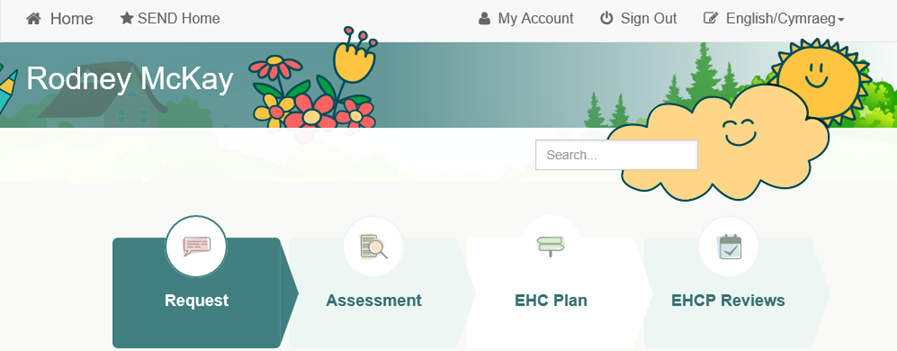
A Search all forms browse is available to enable you to search for a form at any phasephase of the SEND process.
The SEND process goes through 4 phases:
- Request
The LA considers whether to undertake a statutory assessment of education, health and care (EHC) needs. This can last up to 6 weeks. The phase ends with a decision as to whether to assess. This tile then displays the Received Date and Decision date. - Assessment
The LA asks for advice and views about the child’s education, health and care (EHC) needs. This phase can last up to 16 weeks from the initial request for assessment. The phase ends with a decision on whether to issue an EHCPlan. - EHC Plan
The LA creates a plan to meet the needs identified in the assessment. This is issued in draft, then as a final plan. The final EHC Plan is issued within 20 weeks of the initial request for assessment. - EHCP Reviews
The LA considers the progress against the outcomes in the EHC Plan.
Explanatory text beneath each stage explains what happens now. This text is configurable by the local authority when adding Form Guidance Notes
This information is linked to the EHCP Assessment Involvement in the v4 Client. Only people who have been authenticated for portal sharing can view these details. Each phase is also displayed on the child’s Chronology as events.
All forms are stored in the SEND Portal Management area of the v4 Client until a decision has been made to add the child to the system.
Below each phase, a list of any existing forms is displayed, relating to that phase. This information is taken from the Form Details | Portal Process Step.
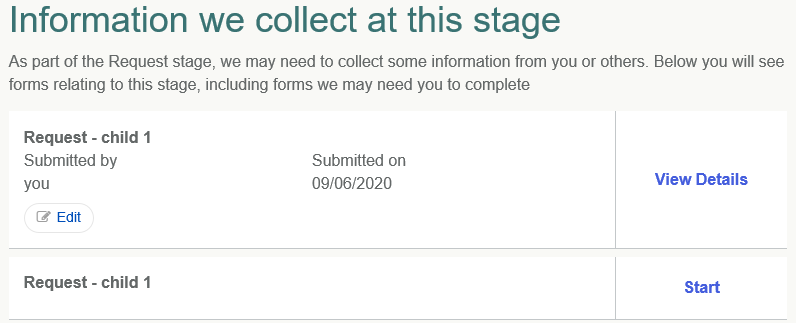
If a form requires further information, you will receive a message requesting an update.

To complete a fom:
- For a new form, click the Start button next to the form that you wish to use to display the Introduction page.
If any guidance notes were inserted when creating the form, they are displayed here.


- Click the Start button to display Step 1 of the form.
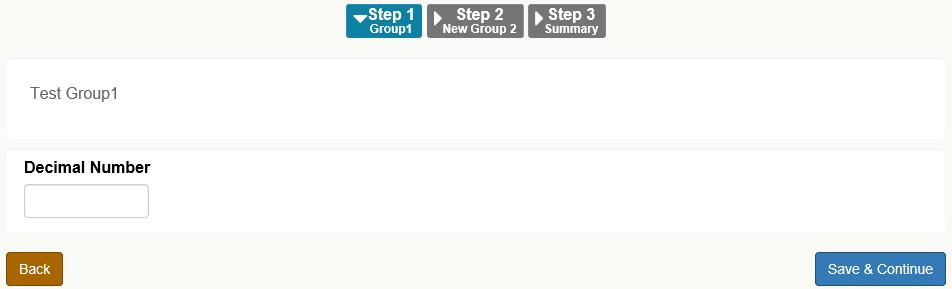
The number of steps represents the number of questions created on the form builder. - Complete all steps as required.
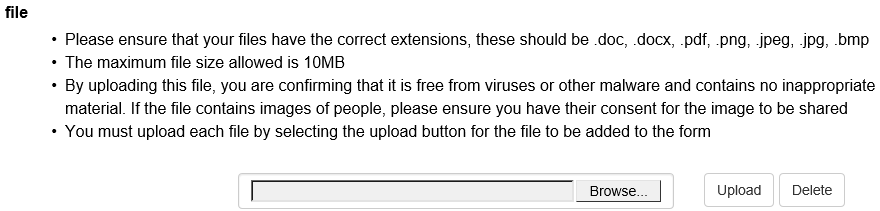
- Files can be uploadeduploaded if required.
If a form contains a file upload question, a file can be uploaded (one at a time) to the local authority.
The following requirements must be adhered to:
- The files must have the correct extensions; these should be .doc, .docx, .pdf, .png, .jpeg, .jpg, .bmp.
- The maximum file size allowed is 10MB.
- By uploading this file, you are confirming that it is free from viruses or other malware and contains no inappropriate material.
- If the file contains images of people, please ensure you have their consent for the image to be shared.
- You must upload each file separately by selecting the upload button for the file to be added to the form.
To upload a file:
- Select the required question for a file to be uploaded against.
- Browse to the file and Upload as required.
The Summary page displays the details of the uploaded file.

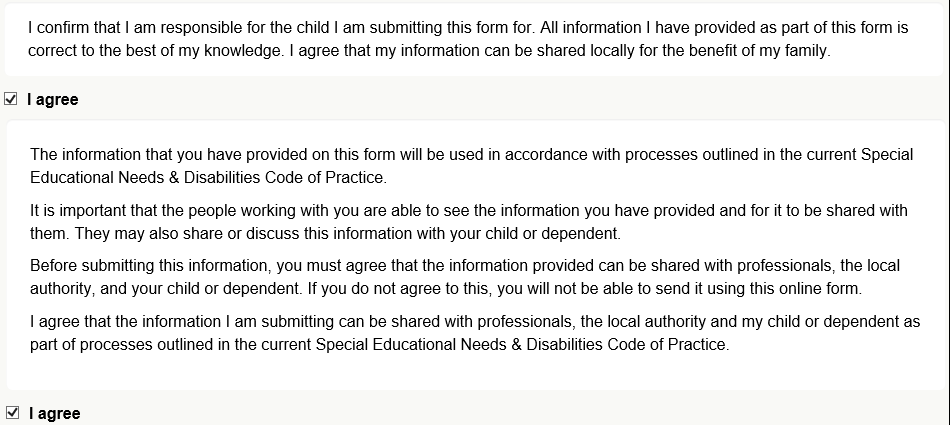
- On the Summary page, select the check boxes to confirm that you have read and agree to both declarations.
- Click the Submit button to display the Form Submitted page. This page informs you that the form has been submitted to the local authority.

Partially completed forms are not displayed on the SEND Portal Management page; only submitted forms. - Click the Finish button to move onto the next phase.
- If required, click the View Details button to see the form Summary details.

- If required, click the Edit button to make any changes to the form. The following warning is displayed:
You are editing this form – you must navigate to the final step (Summary) and Submit it again for your changes to be sent to the local authority. - Make the required changes. Click Save & Continue until the additional step Reason for Editing is displayed.
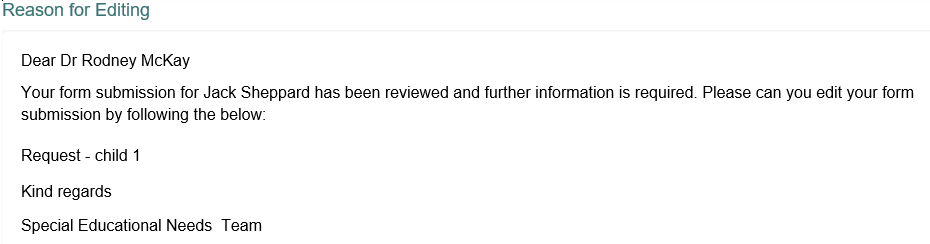
- Enter the Reason for Editing. Click Save & Continue to display the Summary step.
- Select the check boxes to confirm that you have read and agree to both declarations.
- Click the Submit button to finish a form and submit it to the local authority.
- Select the Special Educational Needs and Disabilities tile to display the Choose Person page.