![]()
Manage Help Requests
If there is a problem when a parent, carer or guardian makes an economic application, they can request help from the local authority.
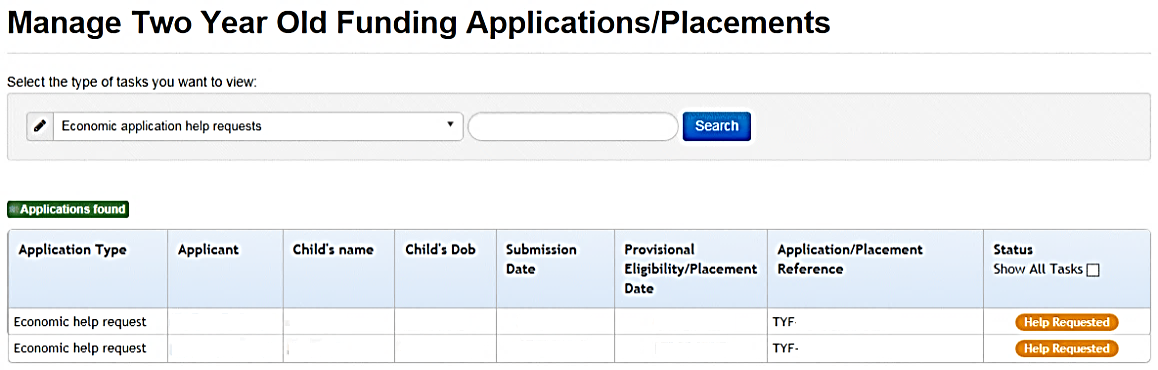
The request for help is managed via Provider Portal | Home | Two Year Old Funding | Manage Applications and Placements | Manage Two Year Old Funding Applications/Placements.
- On the Manage Two Year Old Funding Applications/Placements page, search for Economic application help requests.
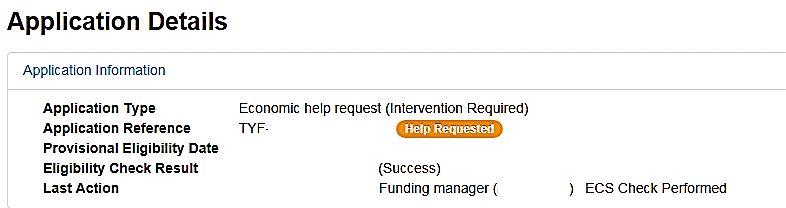
- Click the Help Requested button to display the Application Details page.
- Click the Information provided to support application link to display the help message added by the applicant.
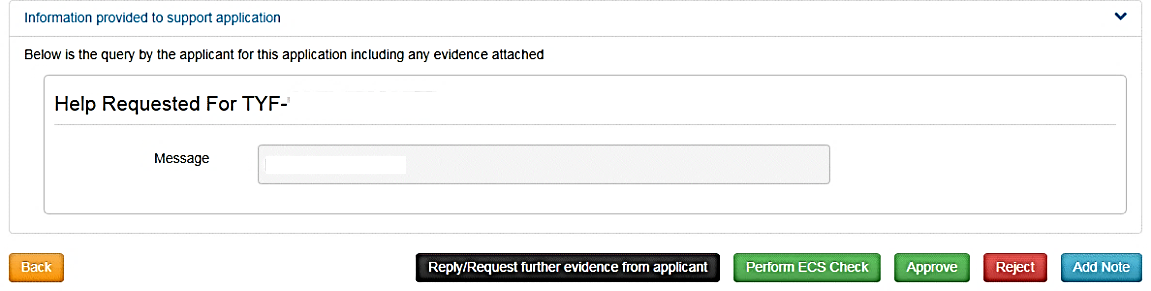
The actions below can be performed from this page:
- Click the Reply/Request further evidence from applicant button to respond to the applicant or request further information. When the message is sent, the status is changed to Awaiting Information.
-
If required, select the check box to include a private note explaining the reason for the request. The note is added to the history of the application; it is visible to other administrators but not the applicant.
A message is sent from the local authority informing the parent, carer or guardian of the status of their application. Message details are not sent directly to the Citizen Self Service portal user. A notification is sent to the user’s mailbox, informing them that they have a message in their portal account. The user must log in and authenticate with the Citizen Self Service portal, before they can view the message details.
- Click the Perform ECS Check button to verify if the application is eligible or not, according to the Eligibility Checking Service. If required, you must update the applicant’s economic information prior to the ECS check.
- Click the Approve button to approve the application. If required, select the check box to include a private note explaining the reason for the approval. The note is added to the history of the application; it is visible to other administrators but not the applicant.
If information or evidence has been received from the applicant, click the Approval check box.
Click the Approve button again to display a confirmation message containing the information below:
- Claim approved. The applicant has been notified.
- The claim will now appear as ‘Approved’ in your dashboard of tasks.
- Details of the approved application – date and time sent, name of applicant, and application reference number.
- Click the Reject button to display the Reject Application page. If required, select the check box to include a private note explaining the reason for the rejection.
Select the check box to send a rejection message to the applicant, then enter the message.
Click the Reject button again to display a confirmation message containing the information below:
- Claim rejected. The applicant has been notified.
- The claim will now appear as ‘Rejected’ in your dashboard of tasks.
- Details of the rejected application – date and time sent, name of applicant, and application reference number.
- Click the Add Note button to add a note to the application. This text appears in the history of the application; it is visible to other administrators but not to the applicant.
Refer to Request Help and Messages Section in Citizen Portal for more information.