![]()
Add or Edit Application Preferences Manually
More information on managing application preferences
- Select an application and ensure that the Application Details tab is displayed.
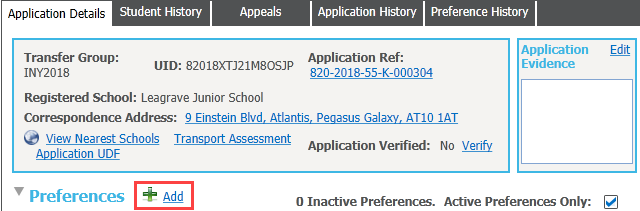
- Click the Add hyperlink to display editable fields relating to preference details.
Select a Receiver, an Offer Status and preference reasons as required.The Add hyperlink is only displayed for applications that do not yet have any preferences assigned.
If you need to manually add preference information provided by an Other Local Authority (OLA) on a paper form, record the preference information here and then add the OLA’s application reference number.
- If Preferences exist, click the Edit hyperlink to amend the Receiver, Offer Status or select View Reasons to add or amend preference reasons as required.
Updating offer status can have wide-ranging implications for the student's application, depending on the point of the application process that the student is at and the transfer group that the student is in.
Mark Preferences as Inactive
- Select an application and ensure that the Application Details tab is displayed.
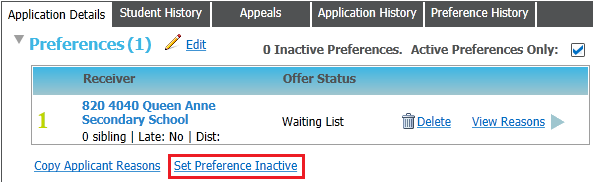
- Click the Set Preference Inactive hyperlink to display the Inactive Preference Details dialog.
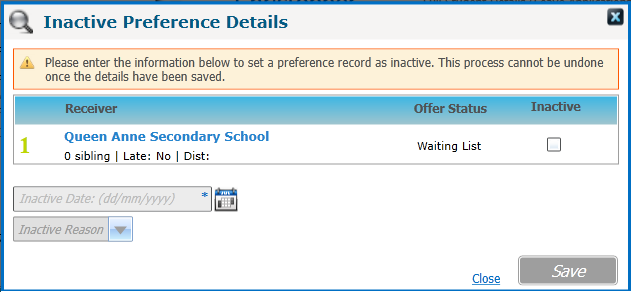
- Select the preference(s) that you wish to make inactive using the check boxes.