![]()
Desktop and My Home Page
When the system is initially executed, the desktop layout displays My Home Page. The page comprises a series of panels, each listing Completed Reports, Involvements, Activities, Referrals, Cases and Workflow Messages for Children or Young People which have been assigned to you and also for Early Years Enquiries.
These items are identified by your Login ID when you log in to the System. You may expand or collapse a panel by clicking the  icon (the arrows on the icon will invert appropriate to the next available action).
Each panel shows related summary information, for example, the Workflow Messages list displays: Name, Due Date, Assigned By, Assigned On and related Messages.
The facility to Drag and drop menu items allows you to add shortcuts to frequently used areas of the software. To do this select a menu item from the extended Focus or Tools menus and drag them to this location for quick access.
To delete a shortcut menu item, right click on the shortcut; this will display a Remove button, clicking this will remove it.
Throughout the system the Window button will display how many windows/pages you have open; My Home Page is not included in the count.
Having too many windows open at a time can reduce performance.
A Search mechanism, located top right of the page, gives quick access to the Enquiry pages for the ICS Person, Form Definition, Aspect Definition, Base, Student, Address, Establishment, Provider, Fostering/Adoption, Establishment Definition, Person and Funded Providers. This facility is available at all times. To use the quick Search enter a name (eg person, establishment or form) and click the down-arrow adjacent to the Search box and select the appropriate focus. This will open the focus Enquiry page with a completed search list. The icon next to the Search box will change accordingly:
Some of the processes throughout the system may take time to complete; a Waiting message will be displayed at the bottom of the screen until the process has completed.
My Referrals
This will list Referrals assigned to a Post for which the Duty Supervisor has responsibility. The Duty Supervisor must assign these Referrals to appropriate Social Care workers in that Post within 24 hours, after which the Referral will then be displayed in the My Cases panel of the Person to whom it was assigned. At this point a CRN (Case Reference Number) is assigned to each Case.
My Cases
This area is available to all Social Care workers and will show both their Cases and the Cases allocated to their subordinates. It provides a method of allocating or balancing Cases between subordinates and is a mechanism for Social Care workers to access the Chronology without having to go through Person Enquiry.
Each Case has a CRN which is used when adding Case Notes in the Chronology and is essential when completing exemplars. Clicking a Case will open the Chronology of the subject of the Referral. A link to this Referral allows you to view/edit details of the Referral Case.
The Subject column shows the name of the Child/Young Person and whether they are related to a general (Child), Fostering or Adoption case:
{Child: Name of Child}
{Fostering: Name of Child}
{Adoption: Name of Child}
My Cases does not allow Creation or Closure of Cases but does allow the current Case owner to be changed from one subordinate to another. Such changes will be recorded for audit purposes.
My Workflow Messages
This panel displays all active Workflow items either assigned to you personally or items which have been assigned to a Post of which you are a member. The list will show the Subject of the message, Task indicating Yes/No, the Due date, by whom Assigned By and their Post, when it was Assigned On and the related Message. If the message is a Task a hyperlink will allow you to view the entity from which the Workflow Message was initiated, eg Case Note. Alternatively, if the message is instigated from an Alert, for example, informing you of a data change, clicking on the message or subject will display a popup message providing details of the change and by whom and when it was assigned. Refresh and Delete options are available.
Individual or multiple messages can be deactivated by checking the box adjacent to the relevant messages and then click the Deactivate icon at the top of My Workflow Messages.
Messages can be reassigned by forwarding to another user or deleted by clicking the Search icon; this opens the Workflow Message Enquiry page.
Clicking Refresh will update the list which will be categorised by items Not Due, items Due and items Overdue.
My Involvements
This panel displays all Involvements which have been assigned to you. For each Involvement it will show the Subject of the Involvement, the type of Involvement form (CSS Involvement Form, SEN Assessment, SEN Standalone Review, SEN Statement Review and SEN Tribunal), Status, Reason, Start and End Dates, RAG Status, Lead Caseworker, Case File Number, Case Status and Involvement ID. The total number of records is shown.
Click the Group By Status button to order the involvement forms by status. The order is set up via Tools | Administration | System Administration | System admin | System defaults.
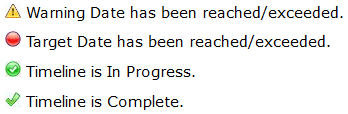
If the involvement is associated with a Timeline, an icon will indicate the current status of the timeline:
Items on the panel Task Bar allow you to add a New Involvement (this option will not be available unless you are in a Post which is in a Team), Delete and Refresh the list. A Subject search is also available by entering name details.
If it is necessary, the Add functionality allows the Caseworker to define Involvement subjects from scratch, for example, one for a whole school linked to a Base (selected in the CSS Involvement panel on the form).
My Activities
Activities are tasks assigned to you, these may be linked for example, to an Involvement, a visit or meeting and any tasks or events added via the Calendar, including recurring tasks. If a parent/carer or sibling linked to an Activity has been made Inactive and the reason is Deceased, when that message is opened a non-editable Alert will be displayed.
The panel displays, Activity Type, Start Date and Time, End Date and Time, Completed By, the Service Team, a Description of the activity, the Base relevant to the activity and the Activity Owner. The Total number of activity records is displayed at the top of the panel.
The drop-down date enables you to filter the list of activities. Selecting a date will dynamically filter the Activities; click the Refresh button to display all of your Activities. Click the New button to display a new Activity Details page; the Delete icon deletes the oldest activity.
My Completed Reports
The My Completed Reports list will show all reports which have been generated for which you have permission to view. Refresh, Preview and Delete options are available.
Unpin
Clicking the Unpin icon on any of the Home Page panels will display the contents of the panel in a new page. When this page is closed, by clicking the Close icon, the Home Page will be displayed again with the recently unpinned panel hidden. To show the panel again, click Show/Hide.
Search for …
The Search for … functionality is available at all times and gives you quick access to various Enquiry pages, eg Student, Person, Fostering/Adoption. This is located top right of the screen. The icon adjacent to the drop-down arrow will indicate the last selected Enquiry.
To use this facility enter one or more characters in the field and select the required Enquiry page from the drop-down list. When the Enquiry page opens any records matching the characters will be retrieved. Alternatively, the page will open allowing you to enter additional search criteria.
If no characters are entered the selected Enquiry page will not be displayed.
Feature Panels
Surrounding the Home Page are various feature panels which provide additional functionality. These are labelled: Offline Work in Progress, Links, Quick Reports and Help. You can switch the feature panels on/off by clicking the Show/Hide button at the top of the page. The Show/Hide button includes drop-down options allowing you to customise the desktop by selecting the feature panels you wish to show.
The size of each panel can be adjusted by hovering the mouse cursor on an outside edge of the panel, when the cursor changes shape, "click and drag" to the required size.