![]()
Early Years
Release notes for Spring 3.88
New fields added to v4 Client
Maintain Service Provision Details and Contacts
Maintain Service Provision Details
An Early Years provider may offer one or more services. The details of these services can be updated or a new service added.
Menu: Focus | Early Years | Search Service Provision
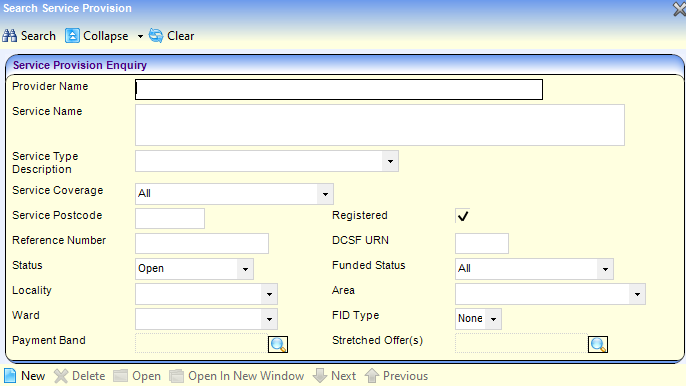
- Enter one or more search criteria and click the Search button:
- A full or partial Provider Name.
- A full or partial Service Name.
- Select a Service Type Description from the drop-down list.
- A Service Postcode.
- A DCSF URN.
- A Reference Number. Wildcards of %% can be used.
- To update the details, select the required service provsion in the results list and click the Open In New Window button to display the Maintain Service Provision page.
Alternatively, to add a new service, click the New button to display the Maintain Service Provision: New Provision page and enter the Service Name.
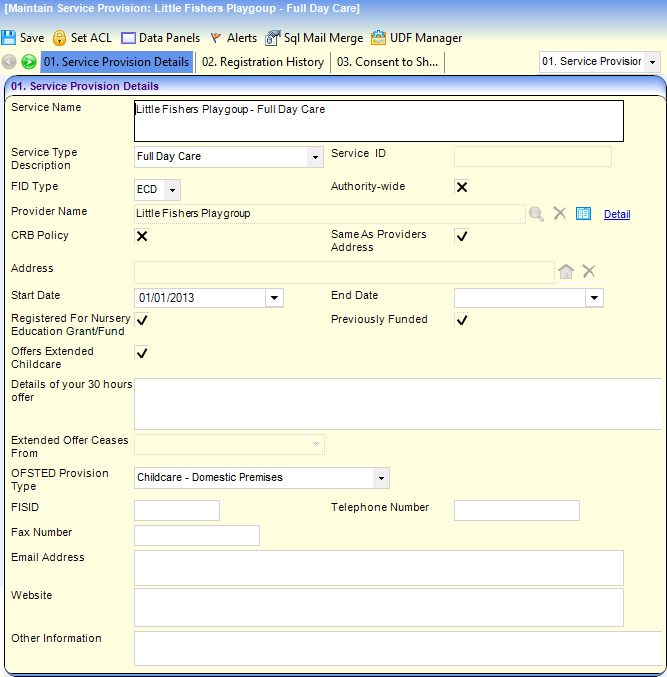
- Select Service Type Description from the drop-down list (Lookup table ID: 0423).
- Select an FID Type from the drop-down list.
- If the service is available throughout the LA, select the Authority-wide check box to display a tick.
- If the service has a CRB policy, select the CRB Policy check box to display a tick.
- If the service address is the same as the provider’s address, select the Same As Providers Address check box to display a tick.
- If required, select a service Start Date. It cannot be before the provider’s opening date.
- If the service is regisered for funding, select the Registered For Nursery Education Grant/Fund check box to display a tick. The Previously Funded check box is automatically set.
- If required, select the Offers Extended Childcare check box to display a tick. Alternatively, select the check box to display a cross and select a term from the Extended Offer Ceases From drop-down.
- Select the OFSTED Provision Type from the drop-down list.
- If required, enter an FISID (Family Information Service ID), Telephone Number, Fax Number, Email Address, Website details and Other Information.
Maintain Registration History
Details of the type of registrations that the service holds are maintained via the Registration History panel.
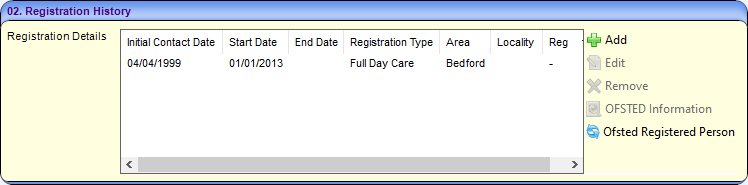
- To add a new registration record, click the Add button to display the Maintain Registration dialog.
Alternatively, to edit a registration record, highlight it and click the Edit button.
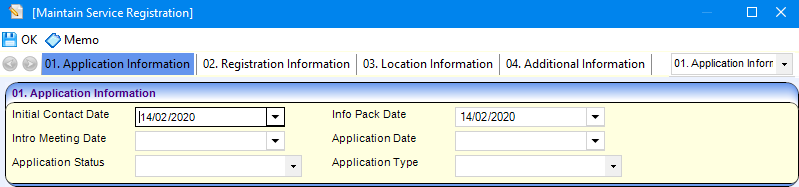
- If required, select the following dates:
- Initial Contact Date.
- Info Pack Date. This cannot be earlier than the Initial Contact Date.
- Info Meeting Date, Intro Meeting Date and Application Date. Cannot be before the Initial Contact Date or the Info Pack Date.
- If required, select an Application Status from the drop-down list (Lookup table ID: 0717).
- f required, select an Application Type from the drop-down list (Lookup table ID: 0716).
- If required, select a Registration Start Date.
- If required, select a Registration End Date.
- If required, select a Certificate Date and enter a Certificate Number.
- To link the registration to Reference Number for an imported Ofsted record:
- Click the browse button to display the Search for Ofsted dialog.
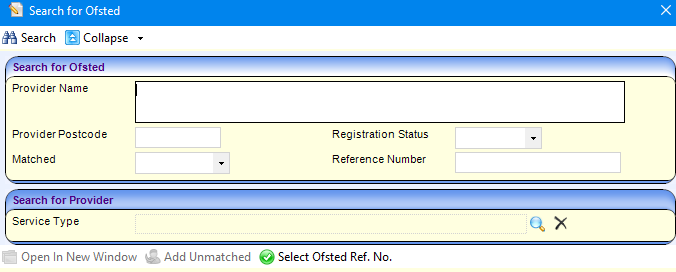
- Enter details of the provider and click the Search button to display matching Ofsted records.
- Select the required Ofsted record in the list and click the Select Ofsted Ref. No. button.
- Click the browse button to display the Search for Ofsted dialog.
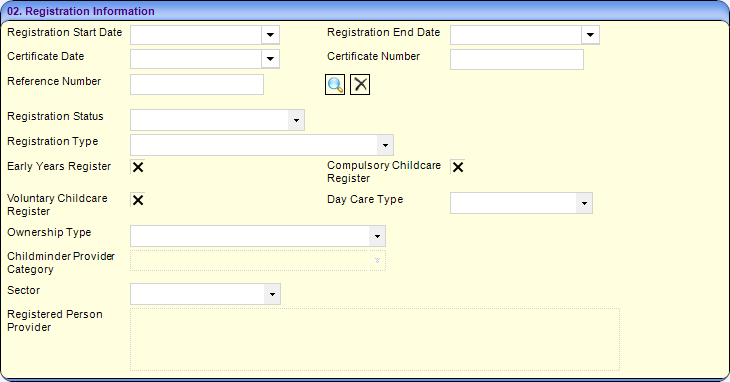
- If required, enter the following information on the Registration Information panel:
- Select a Registration Status from the drop-down list (Lookup table ID: 0718).
- Select a Registration Type from the drop-down list (Lookup table ID: 0423).
- If the service is registered on the Early Years Register, Compulsory Childcare Register or Voluntary Childcare Register, select the corresponding check box to display a tick.
- Select the Day Care Type from the drop-down list (Lookup table ID: 0732).
- Select the Ownership Type from the drop-down list (Lookup table ID: 0719).
- Select the Sector from the drop-down list (Lookup table ID: 0720).
- If required, enter some or all of the Location Information:

- Select an Area from the drop-down list (Lookup table ID: 0471). This is mandatory if you have entered a registration Start Date.
- Select a Locality from the drop-down list. This is mandatory if you have entered a registration Start Date.
- If required, select a Ward from the drop-down list (Lookup table ID: 0802).
- If required, select a District from the drop-down list (Lookup table ID: 0801)
- If required, enter some or all of the Additional Information:

- Select an Amendment Reason from the drop-down list (Lookup table ID: 0481).
- To link an income schedule to the registration, select the Create income schedule link check box to display a tick.
- Click the OK button to display the Maintain Service Registration page.
Maintain Consent to Share Information
The Consent to Share Information panel stores the provider’s preferences for sharing information about the service with the Family Information Service (FID). Some of the information is provided as part of the Ofsted import and cannot be updated.
If the Ofsted Consent Withheld is T or the Ofsted Special Considerations is set to WREF (Women’s Refuge), ANON (Anonymity Requested or MOD (Ministry of Defence), the Publish to FID displays a cross and cannot be updated. If the Base Active Status or Person Active Status displays a cross, the linked base or person is inactive and the Publish to FID check box displays a cross and cannot be updated.
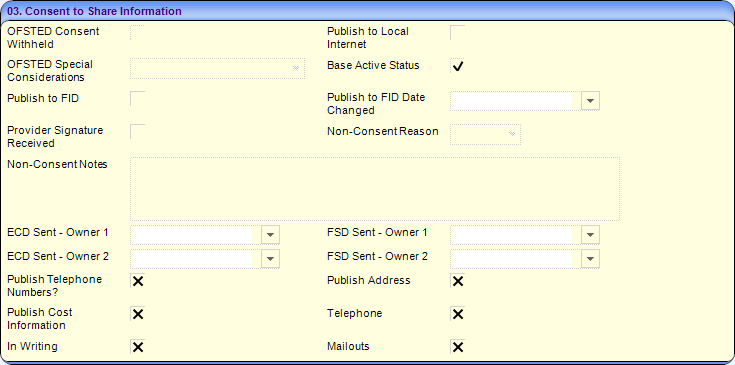
- If the provider consents to share information locally, select the Publish to Local Internet check box to display a tick.
- If the service provision details must be included in the next extract sent to the FID, select the the Publish to FID check box to display a tick.
- If the provider has given consent to share information and their signature has been received, select the Provider Signature Received check box to display a tick.
- If the service provision details are not to be sent to the FID, select the Publish to FID check box to display a cross and enter the following:
- If required, select a Non-Consent Reason from the drop-down list (Lookup table ID: 1116).
- If required, enter Non-Consent Notes.
The FID data can be sent to two locations, Owner 1 and Owner 2. The date that the service provision details were last sent to to FID Owner 1 and FID Owner 2 in ECD and FSD (Family Service Directory) extracts is displayed.
- If the provider consents to share the Telephone Numbers, Address and Cost Information for the service, select the appropriate check box to display a tick.
- If the provider consents to provide information via Telephone, In Writing or via Mailouts, select the appropriate check box to display a tick.
Maintain Contact Details
The Service Public Contact panel is used to record contact details for the service to be sent to the FID. Only one contact can be recorded.

To add a new public contact:
- Click the Add button to display the Contact Role Link dialog and select the required contact.
- To publish all of the contact information (address, telephone number and email address), select the Publish All check box to display a tick. If more than one contact address is displayed, select the Publish check box for the required address. Alternatively, to publish just one or two parts of the contact information, select the required check box to display a tick.
- Click the Save button
The Service Private Contacts panel is used to record details of other contacts for the service which will not be published on the FID
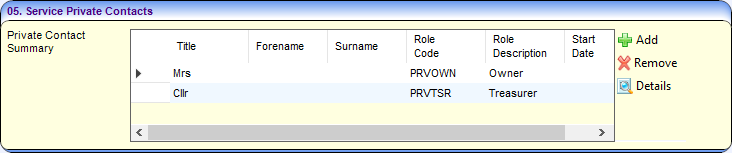
To add a new private contact, click the Add button to display the Contact Role Link dialog and select the required contact.
To remove a contact, select it and click the Remove button.
To display details of a contact, select it and click the Details buton.
To save the service provision details and contact information, click the Save button.
 Related Reference Guides: Related Reference Guides:
|