![]()
Manage User Accounts
IMPORTANT : It is essential that a process is put in place for IYSS system administrators to be notified when a user starts, leaves, moves teams or jobs or changes their name. If not, accounts could become outdated and increase potential for unauthorised access to client data. In the
In IYSS System Administration Client, admin staff can Create User Accounts, Unlock User Accounts, Reset Security Detail, Add Useful Links.
Create New User Accounts
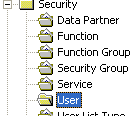
- In the IYSS System Administration Client, select Security | User to display all users in the system.
- Click the Find button to display the Find User dialog.
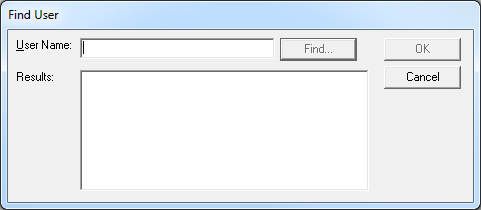
- In the User Name field, enter the name of the required person.
- Click the Find button to display a list of matching users.
- From the Results field, select the required person.
- Click the OK button to return to the User dialog.
If the user does not appear in the Results field, you should contact your System Administrator to create an account for the person.
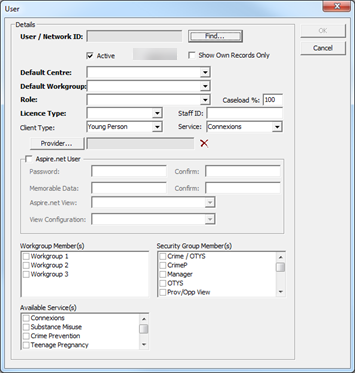
- Ensure the Active check box is selected.
- Ensure the Show Own Records Only check box is deselected.
- As appropriate, complete the remaining fields. Refer to the field-specific instructions in the tabletable.
Field Specific Instructions
Field
Instruction
Default Centre
Select the centre to which the user is attached User interactions will be assigned this centre unless otherwise indicated.
For more information, see Centres
Default Workgroup
Select the workgroup to which the user is assigned. User interactions will be assigned this workgroup unless otherwise indicated.
For more information, see Workgroups.
Role
Select the user’s role from the drop-down. This determines the lists in which they appear throughout the system.
For more information, see User Roles.
Caseload
Enter the caseload percentage the user should be allocated, e.g. 50% for a part-time user working a half week, 150% for a .lead worker with a lot of allocated clients but who has limited active contact with them.
Licence Type
Select the user’s employment status from the drop-down. This field is for reference only and has no functional use.
Staff ID
If required, enter the user’s organisational ID, e.g. payroll number. This enables the matching of IYSS data to that of external sources.
Client Type
Select the type of clients with which the user works.
Provider
If the user is a WEX School Administrator, enter the school at which they work.
Aspire.net User
To setup access to the IYSS web application, select this checkbox to activate the Password, Memorable Data, Aspire.net View and View Configuration fields.
Password / Confirm
If required, enter a password the user will use to log in to the IYSS web application the first time they access the system. The passwords entered in both fields must match and conform to organisational password policy. When the user logs in with this password, they are prompted to change it.
Memorable Word / Confirm
If required, enter a memorable word the user will use to log in to the IYSS web application the first time they access the system. The memorable words entered in both fields must match and conform to organisational policy. When the user logs in with this memorable word, they will be prompted to change it.
Aspire.net View
If the user is an Aspire.net user, select Integrated View from the drop-down.
View Configuration
If the user is an Aspire.net user, select the service for which the user works. This tailors the structure of client records to that particular service's needs.
Workgroup Member(s)
Select all workgroups to which the user belongs. Ensure the user's default workgroup is selected. Adding additional workgroups enables the user to attribute work to the appropriate team.
For more information, see Workgroups.
Security Group Member(s)
Select all security groups that hold security permissions the user needs. The user automatically gains security privileges for all groups selected.
For more information, see Security Groups.
Available Service(s)
Select all services to which the user needs access. This enables the user to update the records of all selected services without needing a login for each one.
For more information, see Services.
- If required add User to a Role.
- Click the OK button to save the record and close the dialog.
Unlock a User Account
A User account can be locked out based on the instances below:
- Login with invalid credentials multiple times.
- The user account is intentionally locked out. This can be if the user account is created but not completed, e.g. the ‘Aspire.net User’ check box has not been selected.
In both cases above, to unlock a user account is as follow:
- In the IYSS System Administration Client, select Security | User to display all users on the system.
- Double click the required user record to display the User dialog.
- Check the Active and Aspire.net User check box is selected.
- Replace the current Password and Memorable Data in order to unlock the user record.
- Click the OK button to save the changes and close the dialog.
After the account is unlocked Users will be presented with a prompt to create new credentials when they next login.
The numbers of times users can enter incorrect passwords before being locked out is configurable in the IYSS System Administration Client System | System Value | Security - Failed Login Attempts to Lock Out.
Reset Security Details
If users lock out their account or forget their password or memorable word, you may need to reset their login details. After you have assigned them a new password or memorable word, they must log in with the new details and then create a new password or memorable word.
To reset security details:
- In the IYSS System Administration Client, select Security | User to display all users on the system.
- Double-click the required user record to display the User dialog.
- To reset the password, enter one of the words below into both Password and Confirm fields:
Assistant
Mechanic
Engineer
Musician
Labourer
Waitress
- To reset the memorable word, enter one of the words below into both Memorable Data and Confirm fields:
Actress
Fitter
Barber
Porter
Driver
Tailor
- Click the OK button to save the changes and close the dialog.
Useful Links
To add new hyperlinks to the Useful Links list in users’ IYSS my homepage:
- In the IYSS System Administration Client, select System | Useful Links.
- Click the Add Value icon to display a blank Useful Links dialog.
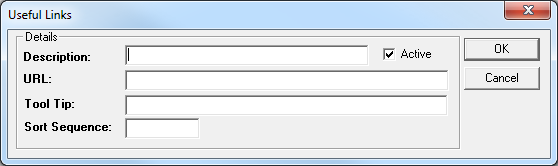
- Enter a name for the link in the Description field. This is the name displayed in the Useful Links list.
- Enter the URL of the website.
- Enter a description of the website in the Tool Tip field. This is displayed as hover text for the link.
- Enter a value in the Sort Sequence to determine the order in which the values are displayed.
- Click the OK button to save the changes and close the dialog.