![]()
The instructions on this page were different in the following release(s):
3.77
Personal Information
Release Notes for Summer 2022 (3.78)
Summary panel | Education tab
The People area enables you to manage people records and customer communications. Person records can be used to store the details of passengers, carers, drivers and passenger assistants.
The People area is split into three pages: Personal info, Driver/Assistant info and Communications & complaints.
- Select the People area.
- Ensure that the Personal info page is selected.
- Select from the following options:
Summary Panel
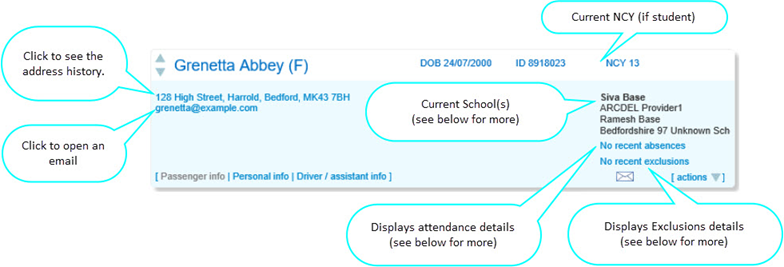
The Summary panel displays information about the selected person:
- Name
- Gender
- DOB
- ID
- NCY (if student)
- Address, phone and email
Where long addresses are selected, they will fill the entire line up to the school information. If there is no school information the address will display all the way across.
To send an email, click the email hyperlink to open the default mail client. - School(s) (if student)
- The names of all of the child's current schools are displayed (start date in the past, and either no end date, or end-date in the future).
- The name of the current main school is positioned first in the list and is in bold.
- The name(s) of all the current non-main schools are positioned after the main school in the list.
- Attendance (if student)
From the last 14 calendar days:- If any absences exists, the text displays Recent absences.
- If there are no absences, the text displays No recent absences.
- Exclusions (if student)
From the last 14 calendar days:- If any exclusions exist, the text displays Recent exclusions.
- If there are no exclusions, the text displays No recent exclusions.
This is visible throughout Transport where the passenger summary panel displays:
- Processes | Single passenger | [Search and select] | Summary Panel
- People | Personal info | [Search and select] | Summary Panel
- People | Drivers / Assistant info | [Search and select] | Summary Panel
- Operations | Contractors| | [Search and select] | Summary Panel
Personal tab
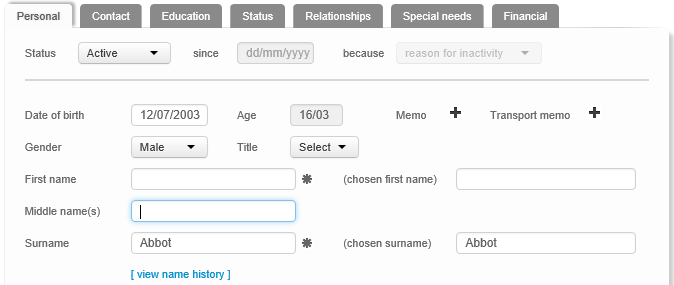
Add or edit details as required.
Information may also be entered into the following additional sections:
- Ethnicity / Religion / Culture:
Fields relating to the person’s nationality, religious beliefs, and cultural background. - Languages:
Enables you to select the person’s home language, and a different first language if required. - Deceased:
Enables you to record a date of death, if required. - UDFs:
User defined fields.
To mark a person as inactive, select Inactive from the Status menu.
Contact tab

Enter details as required.
Select a correspondence address.Select a correspondence address.
- Click the Correspondence browse to display the Address history list dialog.

- Select from the following options:
Select a correspondence address- Highlight an address and click the see address details hyperlink. Editable fields related to address details are displayed.
- Select the Correspondence check box.
This box denotes which of the addresses in the passenger’s address history is the current correspondence address. A passenger can only have one correspondence address at a time.
- Highlight an address and click the see address details hyperlink. Editable fields related to address details are displayed.
- Click the edit these details hyperlink to add or edit any details as required.
- Optionally, geocodegeocode the address.
- Click the Map & GeoLocation tab to view the address’s current geocode details and location on the map.
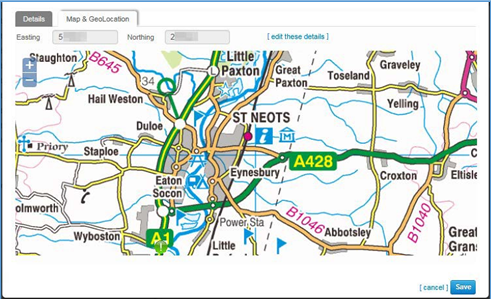
- Click the edit these details hyperlink. A confirmation dialog appears.
- Click the yes - edit address details button to close the dialog and make the geocode fields editable.
- Enter the desired Easting and Northing values. Alternatively, click and drag the address’s icon to the desired spot on the map.
The authority must have the GISv4 licence in order for you to use Transport’s geocoding features.
- Click the Map & GeoLocation tab to view the address’s current geocode details and location on the map.
- Highlight an address and then click the remove address hyperlink. A warning dialog is displayed.
- Click the Yes - remove button to close the dialog and remove the address from the person’s history.
Removing an address from a person’s history does not remove that address from the Address Catalogue.
Education tab
![]()
The Education tabEducation tab enables you to record a person’s UPN (Unique Pupil Number), ULN (Unique Learner Number) and NCY (National Curriculum Year), as well as adding the person’s School History, Exclusions and Attendance.
You can also view a passenger’s admissions information through the Education tab. To do so, click the view information from admissions module hyperlink. A report showing the passenger’s preferences and associated bases is displayed.
- UPN, Local UPN, ULN, NCY and Not following NCY
Enter details as required. - School History
- Add a school history
- Open the School History section. A list showing the schools that the person attends and has previously attended is displayed.
- Click the add school to history hyperlink to display editable fields related to school details.
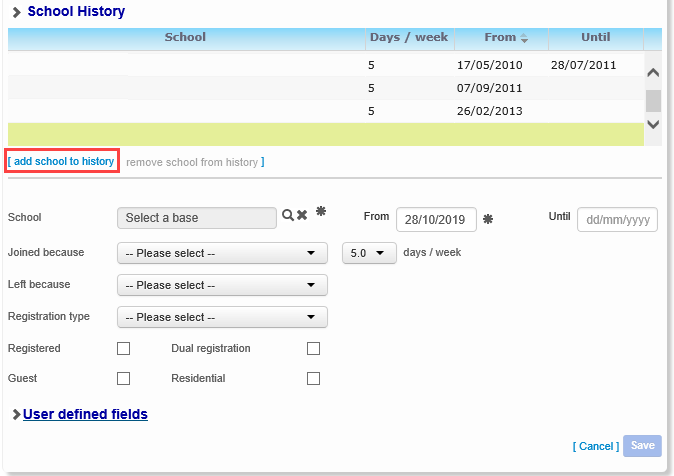
- Enter details as required.
- Remove a school history
- Highlight the school you want to remove.

- Click the remove school from history hyperlink. A confirmation dialog is displayed.
- Click the Delete button to remove the school from the person’s history.
- Highlight the school you want to remove.
- Add a school history
- Exclusions
Users can see details of a child's exclusions, so that they can account for time the child was not attending school. This is read only. - Attendance
Users can see whether a passenger has been attending school, so that they can ensure resources are being managed appropriately. This is read only.
Status tab
![]()
The Status tabStatus tab enables you to record a person as having a particular status, such as being part of a services family or subject to a care order.
- Use the Status(es) check boxes to select the required status.
- If you selected the Asylum seeker check box, select a status from the asylum status drop- down menu.
- Select the person’s Home LA and Funding LA.
- Select from the following options:
- Care Orders
Open the Public care section.- Click the add a new care order hyperlink. Editable fields relating to care orders are displayed.

Enter details as required. - Alternatively, highlight the care order you want to delete.

- Click the remove selected care order hyperlink. A confirmation dialog is displayed.
- Click the Yes button to delete the care order and close the dialog.
- Click the add a new care order hyperlink. Editable fields relating to care orders are displayed.
- Court Orders
Open the Court orders section.- Click the add a new court order hyperlink. Editable fields relating to court orders are displayed.

Enter details as required. - Alternatively, highlight the court order you want to delete.

- Click the remove selected court order hyperlink. A confirmation dialog is displayed.
- Click the Yes button to delete the court order and close the dialog.
- Click the add a new court order hyperlink. Editable fields relating to court orders are displayed.
- Care Orders
Relationships tab

A person’s carers are managed through the Relationships tabRelationships tab. You can nominate any person in the Transport database as a carer for another. A list of the people that a given person is a carer for is displayed in the Carer For section of the Relationships tab.
Click the Relationships tab. A list of the person’s carers and the people that person is a carer for are displayed.
Select from the following options:
- Cared for by
Select from the following options:- Click the add new carer hyperlink. Editable fields related to carer details are displayed.

Enter details as required. - Highlight the carer you want to remove.
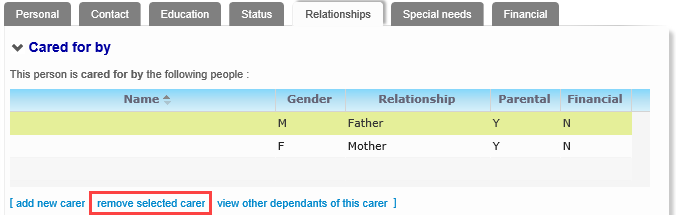
- Click the remove selected carer hyperlink. A warning dialog is displayed.
- Click the Yes button to remove the carer.
- Click the add new carer hyperlink. Editable fields related to carer details are displayed.
- Carer for
This list is read-only.

Special needs tab

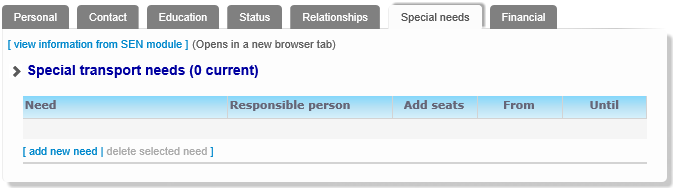
- Special transport needsSpecial transport needs
- Expand the Special transport needs section to view a list of the person’s current transport needs.
- Select from the following options:
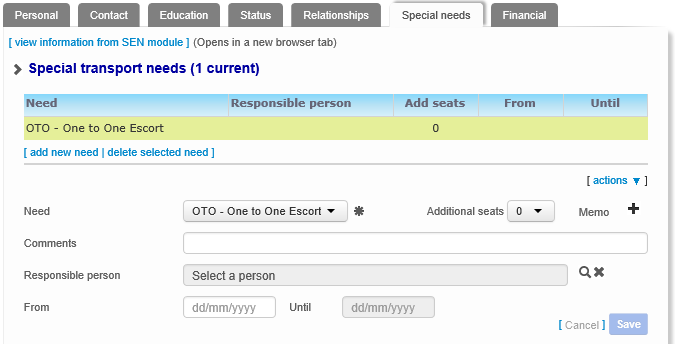
- Click the add a new need hyperlink to display editable fields related to need details.
Enter details as required. - Highlight the need you want to edit. Editable fields relating to that need appear.
Make changes as required. - Highlight the need that you want to delete.
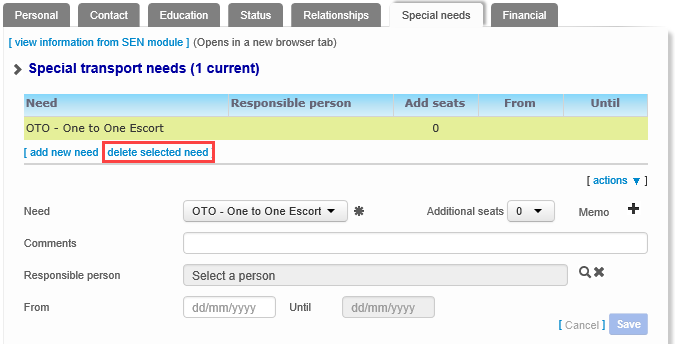
- Click the delete selected need hyperlink. A warning dialog is displayed.
- Click the Delete button to delete the selected need.
- Click the add a new need hyperlink to display editable fields related to need details.
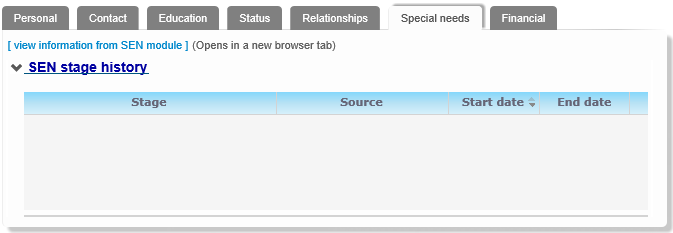
- SEN stage historySEN stage history
The SEN Stage History records for the student are displayed. The information is view only and shows SEN Stage, Source, Start Date and End Date which can be sorted by clicking on a field header.
If a person has a SEN status of S (Statement) or E (EHCP), then the corresponding status letter is displayed before their name in person search results throughout Transport. This enables you to see which people have SEN statements or EHCP plans in place without having to select them.
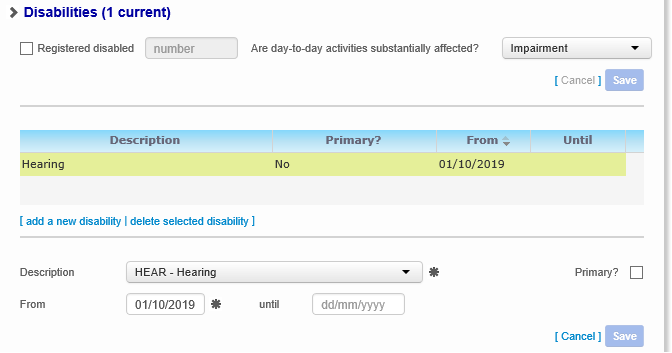
- DisabilitiesDisabilities
- Open the Disabilities section to view a list of the person’s current disabilities.
- Select from the following options:
- Click the add a new disability hyperlink. Editable fields relating to disability details are displayed.

Enter details as required. - Highlight the disability you want to edit. Editable fields related to that disability are displayed.
Make changes as required. - Highlight the disability you want to delete
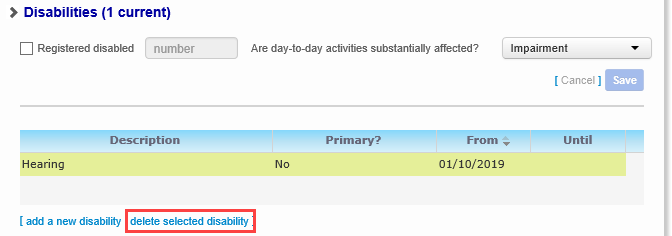
- Click the delete selected disability hyperlink. A warning dialog is displayed.
- Click the Yes button to delete the disability.
- Select the Registered disabled check box.

- If known, enter the person’s disability registration number.
- Select an impairment status from the Impairment menu.
- Click the add a new disability hyperlink. Editable fields relating to disability details are displayed.
Financial tab

You can record and edit a person’s Low Income Family (LIF) details through the Low Income Family section of the Financial tabFinancial tab. This information is used when assessing transport eligibility.
- Select the Financial tab.
- Select from the following options:
- Open the Low Income Family section.
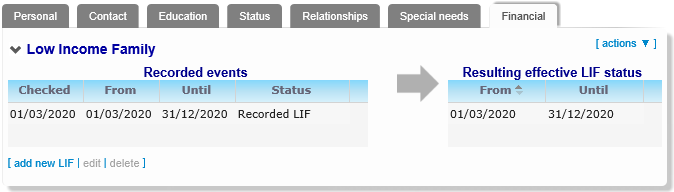
Select from the following options:- Click the add new LIF hyperlink to display the Add/Edit LIF status dialog.
Enter details as required. - Highlight the LIF event that you want to edit.
Click the edit hyperlink to display the Add/Edit LIF status dialog.
Amend details as required. - Highlight the LIF event that you want to delete.
Click the delete hyperlink. A warning dialog is displayed.
Click the Yes button to delete the record.
- Click the add new LIF hyperlink to display the Add/Edit LIF status dialog.
- Open the Free school meals section. The information is view-only.

- Click the actions hyperlink.
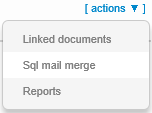
Select from the following options:- Click the Linked documents hyperlink to display the Documents linked to this Personal info financial reports dialog.

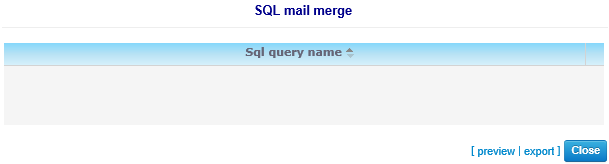
- Click the Sql mail merge hyperlink to display the SQL mail merge dialog.
- Click the Reports hyperlink to display the Which report would you like to run? dialog.

- Click the Linked documents hyperlink to display the Documents linked to this Personal info financial reports dialog.
- Open the Low Income Family section.