![]()
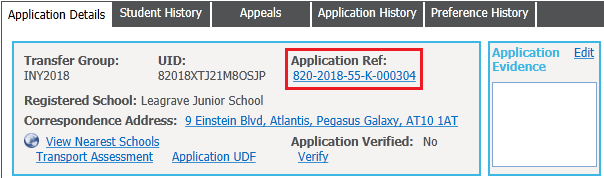
Application Details tab
| More information on Application Details | More information on Preference Reasons |
Select an application and ensure that the Application Details tab is displayed.

Click on the images above or choose from the following options:
Application Reference Numbers
Applications can have two types of reference numberreference number: Home Local Authority (HLA) generated numbers and Other Local Authority (OLA) generated numbers. You can add or edit reference numbers from the Application Details page.
More information on Application Reference Numbers
- Click the Application Ref hyperlink to display the Manage Application Reference dialog.
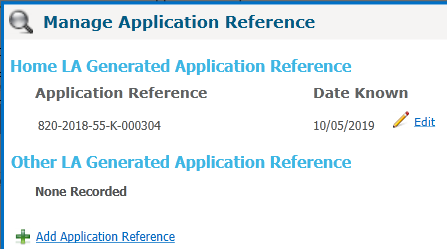
- Click the Add Application Reference hyperlink to record a new reference number.
- Click the Edit hyperlink to edit an existing reference number.
Update an Application's Feeder School
The student’s new registered base might not be a feeder for their transfer group, thereby creating an incorrect allocation. The Update FeederUpdate Feeder function enables you to correct this issue by updating the student’s current base.
More information on Feeder Schools
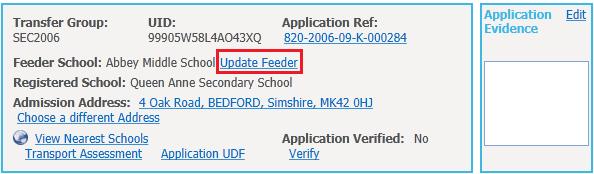
- Click the Update Feeder hyperlink. A warning dialog is displayed.
- Click the Yes button to update the application’s feeder school.
Change an Application's Admission Address
Admissions addresses are added to the database when an application’s first parental preference is added, but can be changedchanged if necessary.
More information on Admission Addresses
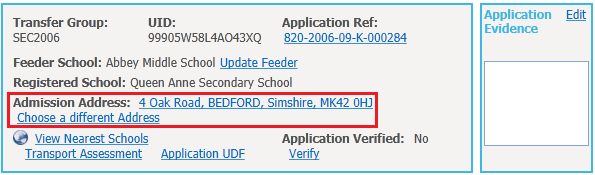
- Click the Choose a different Address hyperlink to display the Address Manager dialog.
- Search for and select an address.
- Click the Yes button to update the student's admission address.
If the applicant’s admissions and correspondence addresses are different, you can make the current correspondence address the admissions address by clicking the Copy to Admission Address hyperlink, located next to the Correspondence Address field. This link is only available where the correspondence and admissions addresses are different.
View the Nearest Schools to an Application Address
This hyperlink opens a separate window that lists the schools nearest to the address and displays them on a map. View Nearest SchoolsView Nearest Schools enables the Local Authority to respond to parents and to check whether there are any nearer schools to the student's home address which may be over the qualifying shortest walking distance. It also calculates and displays the shortest driving distance between the student’s address and school.
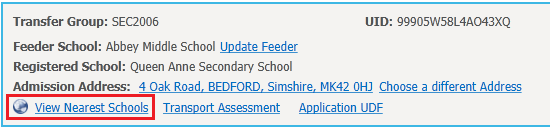
- Click the View Nearest Schools hyperlink to display the View Nearest Schools dialog.
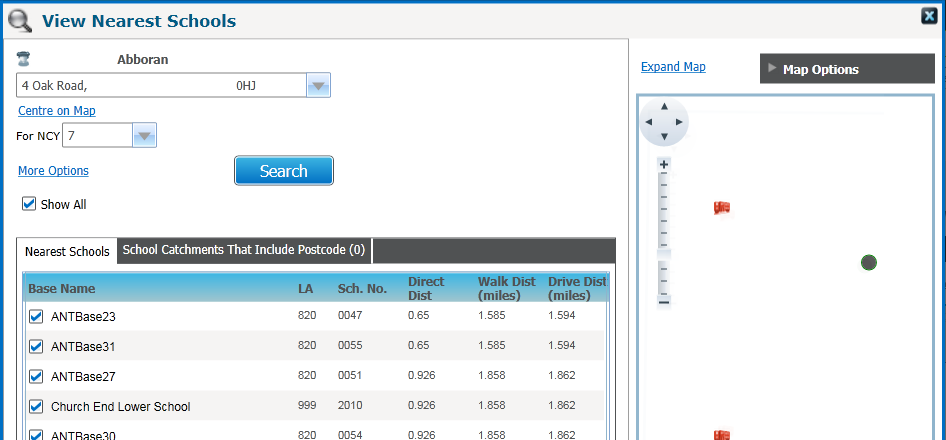
- Select the address you wish to use as a start point from the topmost drop-down menu.
You can only select the admission or correspondence addresses for the selected application. - Select an NCY from the For NCY drop-down menu if a value other than the default is required.
Only schools catering to the selected NCY are displayed. - Click the More Options hyperlink to refine the search if required.
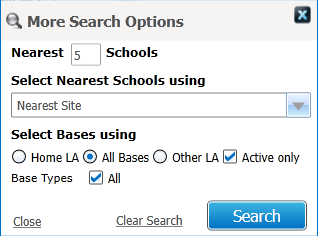
- Click the Search button to display a list of the nearest schools that match your search criteria.
The locations of the schools are displayed on the map in the right-hand panel.
To view a list of the schools whose catchments include the postcode you searched for, click the School Catchments That Include Postcode tab.
You can use the Bases | Nearest School Search page to view the nearest schools to any address (i.e. not just those addresses involved in a particular application).
Verify an Application
Verifying an applicationVerifying an application confirms that the application’s details (e.g. the student’s address and preference reasons) have been checked and confirmed. This is for information only and is not used by the offer processes.
More information on verifying an application
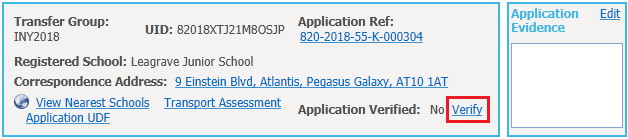
- Click the Verify hyperlink on the toolbar. A warning dialog is displayed.
- Click the Yes button to verify the application.
To unverify the application, click the Mark as not verified hyperlink, which
appears on the toolbar after verification.
Manually-verified online applications revert to an unverified state
(and therefore re-imported) if the applicant makes changes online.
However, verification status is retained if changes are made to
the application in A&T Back Office.
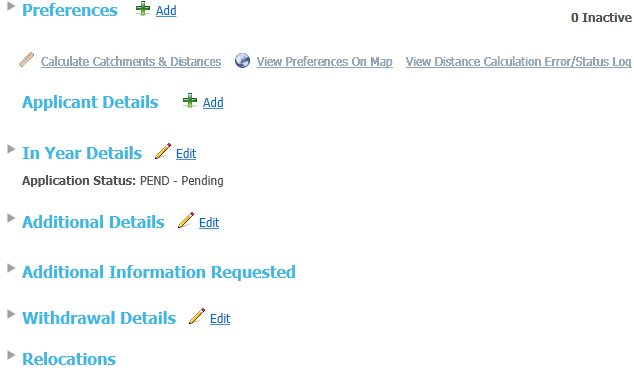
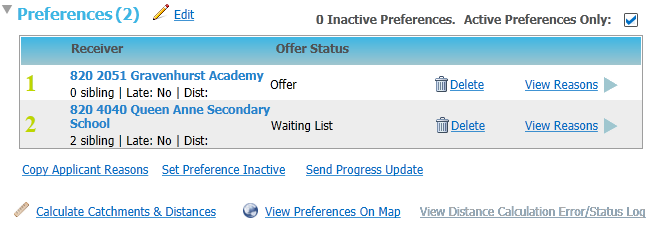
Preferences
- Add / Edit Application Preferences
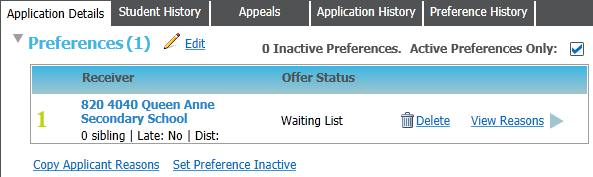
Application preferences are managed via the PreferencesPreferences section of the Students | Applications | Application Details tab.More information on managing application preferences
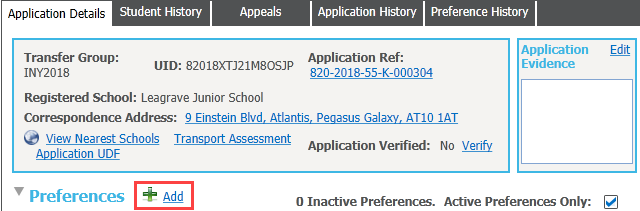
- Click the Add hyperlink to display editable fields relating to preference details.
Select a Receiver, an Offer Status and preference reasons as required.The Add hyperlink is only displayed for applications that do not yet have any preferences assigned.
If you need to manually add preference information provided by an Other Local Authority (OLA) on a paper form, record the preference information here and then add the OLA’s application reference number.
- If Preferences exist, click the Edit hyperlink to amend the Receiver, Offer Status or select View Reasons to add or amend preference reasons as required.
Updating offer status can have wide-ranging implications for the student's application, depending on the point of the application process that the student is at and the transfer group that the student is in.
Mark Preferences as Inactive
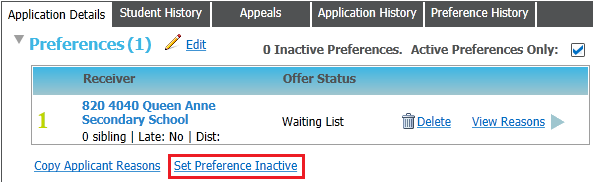
- Click the Set Preference Inactive hyperlink to display the Inactive Preference Details dialog.
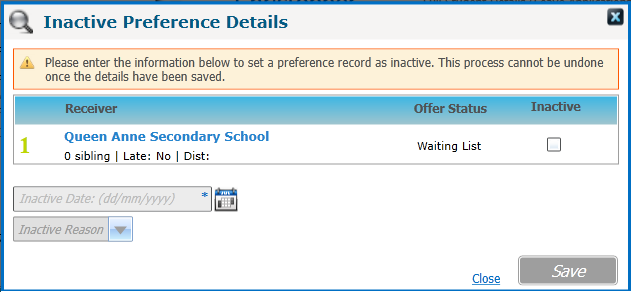
- Select the preference(s) that you wish to make inactive using the check boxes.
- Click the Add hyperlink to display editable fields relating to preference details.
- Applicant / LA Preference Reasons
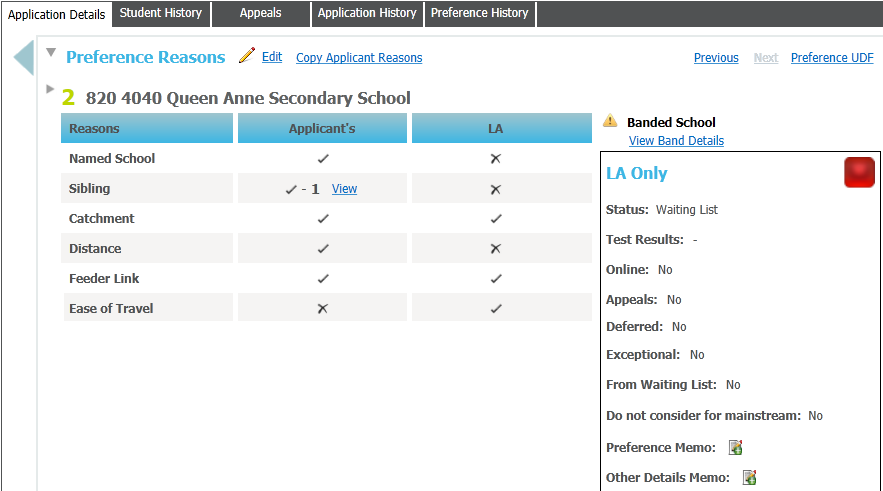
When applying for a school place (either online or on a paper form), applicants can express one or more reasonsreasons (with supporting information where appropriate), to explain why they would prefer their child to go to a particular school.More information on managing Preference Reasons
- Open the Preferences section.
- Click a preference’s View Reasons hyperlink to view Applicant and LA reasons.
Only preference reasons that have been selected are initially displayed. Click the expand arrow to view the full list of reasons.
- Choose one of the following options:
- Click the Copy Applicant Reasons hyperlink to display the Copy Applicant Reasons dialog.

You can bulk-copy applicant reasons for an entire transfer group using the Copy Applicant Reasons process.
- Select each preference that you wish to copy applicant reasons for.
- Click the Copy button. A confirmation dialog is displayed.
- Click the Continue button to copy the applicant’s preference reasons to the LA column.
- Click the View hyperlink to display the Current Sibling dialog, if a record exists.
- Click the Edit hyperlink to view editable fields related to preference reasons.
- Select the reasons given by the applicant from the Applicant’s column.
- Select the required reasons from the LA column.
- Siblings:
- Select the Sibling checkbox
- Click the magnifying glass to display the Current Sibling dialog.
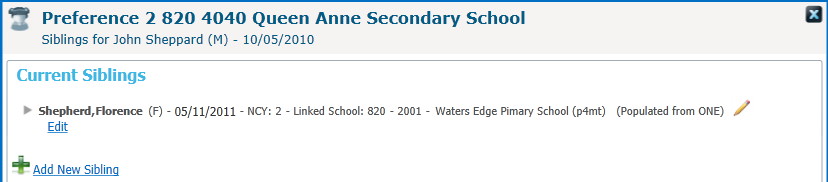
- Select one of the following options:
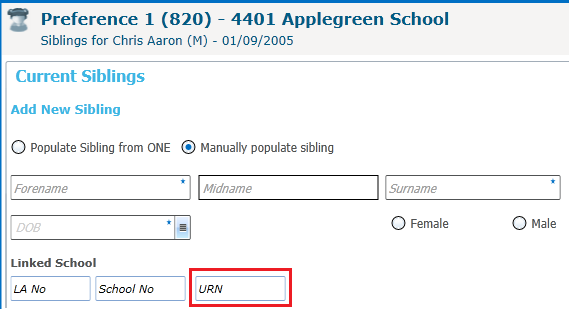
- Click Add New Sibling to add a new record
- Click Edit to edit an existing record.
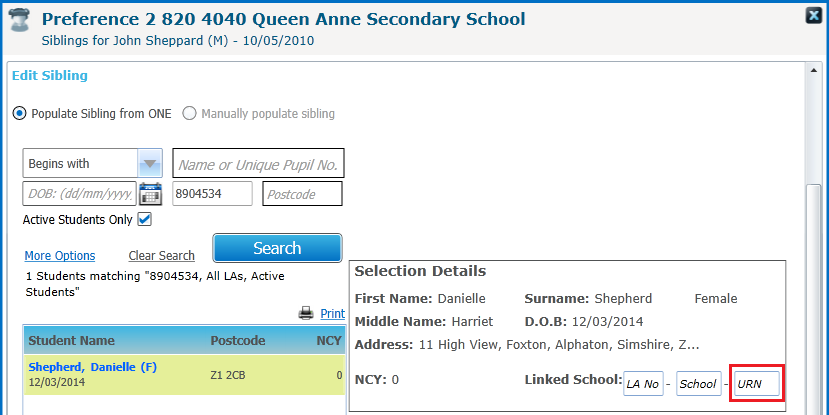 Current/Edit Siblings now records the Unique Reference Number (URN) of the Linked School for Siblings details.
- Click Add New Sibling to add a new record
- Select one of the following options:
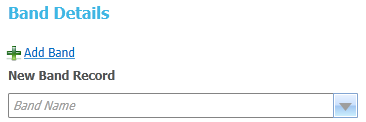
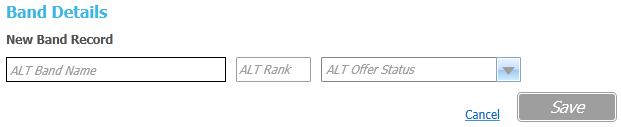
- Banding:
- Select View Band Details and choose one of the following:
- Click the Add Band hyperlink.
- Home Local Authority (HLA)
Only Discrete, Ability and Aptitude bands can be selected here; students are associated with Fair bands during the Make Offers process.
- Other Local Authority OLA)
- Home Local Authority (HLA)
- Click a band's Edit hyperlink to display editable fields relating to the student's presence in that band.
- HLA
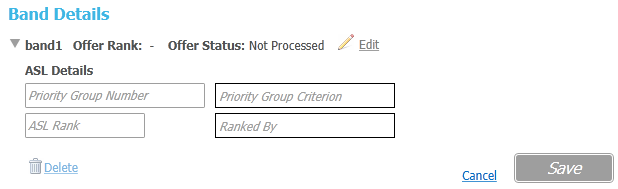
The offer rank and status are automatically entered when the Make Offers routine is run. All band details become view-only at this point. The offer rank and status are updated as they change through the allocation process.
- OLA

- HLA
- Enter details as required.
- Click the Copy Applicant Reasons hyperlink to display the Copy Applicant Reasons dialog.
- Calculate Catchments and Distances
The Calculate Catchments & DistancesCalculate Catchments & Distances function enables you to calculate the distance from a child’s address to a particular preference, thereby confirming whether the child’s address lies within the school’s catchment area.More information on Preference Catchments & Distances
- Click the Calculate Catchments & Distances hyperlink to open the Update Application Preference Distances And In Catchment dialog.

- Select the required options.
- Click the Update button to confirm your changes and update the applicant’s preferences.
- Click the Calculate Catchments & Distances hyperlink to open the Update Application Preference Distances And In Catchment dialog.
- View Preferences on a Map
Once calculated, distances and in-catchments can be viewed using the View Preferences On MapView Preferences On Map function.More information on View Preferences on a Map
- Click the View Preferences On Map hyperlink to display the View Preferences dialog.
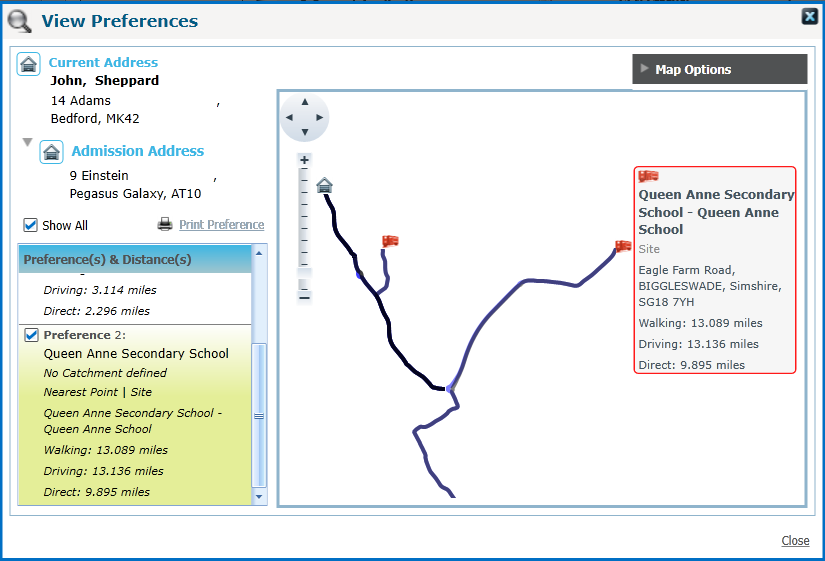
After the link is clicked, the system checks whether the preference base addresses are geocoded. If any are not geocoded, the Addresses Not Geocoded dialog is displayed. In this case, click Continue To View Map to open the View Preferences dialog. Non-geocoded addresses cannot be viewed on the map.
- Use the check boxes to select the preferences that you wish to view on the map.
- Optionally, add walking and / or driving routes to the map by clicking the Map Options drop-down box and selecting Show walking routes and Show driving routes respectively
- Click the View Preferences On Map hyperlink to display the View Preferences dialog.
- View Distance Calculation Errors and Status Messages
Errors and status messages that were generated during individual preference calculation can be viewed via the Distance Calculation Error/StatusDistance Calculation Error/Status log.More information on Distance Calculation Errors / Status Messages
- Click the View Distance Calculation Error/Status Log hyperlink to display the Single Application Errors dialog. Errors are displayed on the Application Process Errors tab and status messages are displayed on the Status Messages tab.
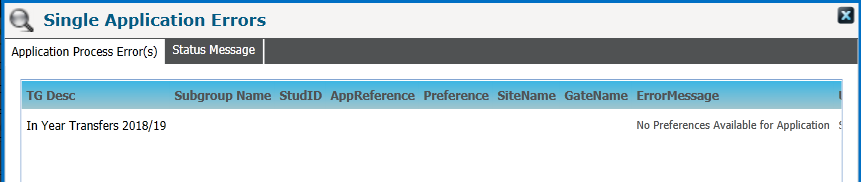
- Alternatively, click the View Distance Calculation Error/Status Log hyperlink when Calculate Catchments & Distances is run.

- Click the View Distance Calculation Error/Status Log hyperlink to display the Single Application Errors dialog. Errors are displayed on the Application Process Errors tab and status messages are displayed on the Status Messages tab.
Applicant Details
Applicant DetailsApplicant Details is a section of the Application Details tab. It displays the details of the person who made the selected application for the student, and the method by which they requested to be notified of the outcome of their application.
More information on Applicant Details
- In the Applicant Details section select one of the following options:
- Click the Add hyperlink to add applicant details.
- Open the Applicant Details section to view the applicant’s personal information.
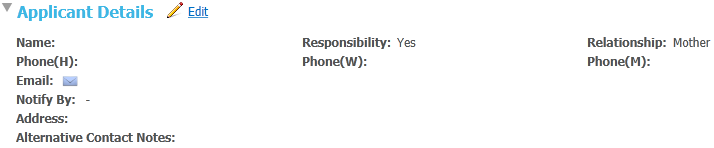
Click the Edit hyperlink to make the applicant’s personal information editable.
If no applicant details have been recorded yet, the Add hyperlink is displayed instead of the Edit hyperlink. Both hyperlinks display the same editable fields when clicked.
- Enter the applicant's Surname and Relationship to the child.
- Select the Applicant Address. You can do this in one of two ways:
Set Address from Student
Click the Set Address from Student hyperlink to copy the student's correspondence address into the applicant address.
Search for an address
- Enter other information as required.
In Year Details
The In YearIn Year details section enables you to add additional information about an in year application.
More information on In Year Details
- Open the In Year Details section to view information relevant to In Year applications.

- Click the Edit hyperlink to make the fields in the In Year Details section editable.
- Amend any details as required.
- Record any memos as reuired:
Additional Details
The Additional DetailsAdditional Details section enables you to add additional information about an application, such as the date that the application was received and the council tax reference of the application address.
More information on Additional Details
- Open the Additional Details section.

- Select one of the following options:
- Click the Add hyperlink to add any additional information to the application.
- Click the Edit hyperlink to make the fields in the Additional Details section editable.
Manage Applications from Crown Servant/Returning Service Families
Children who are from Crown Servant (diplomatic) or Returning Service families are treated as special cases by Local Authorities. For these children, the future address, rather than the current address, is used when processing applications.
Select the Crown Servant / Returning Service checkbox as required.
The Crown Servant / Retuning Service check box is selected automatically when a Crown Servant / Retuning Service application is imported. This information is included in ADT exports.
Withdrawal Details
The Withdrawal DetailsWithdrawal Details section enables you to view information relevant to the withdrawal of the application.
More information on Withdrawal Details
- Open the Withdrawal Details section to view information relevant to the withdrawal of the application. This section has two parts:
- From Procedure
When selected, indicates that the student has withdrawn from their application. - From Test
When selected, indicates that the student has withdrawn from the test part of the selection procedure, although their application is still active.
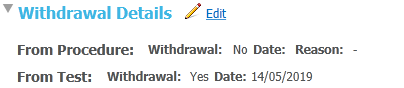
- From Procedure
- Select one of the following options:
- Click the Add hyperlink to add withdrawl infomation.
- Click the Edit hyperlink to make the information editable.
If you entered data into the From Procedure fields, then the student is allocated to the Withdrawn base, as defined in Process | Transfer Groups. This ensures that this student is included in a Withdrawal ADT file.
Relocations
The RelocationsRelocations section enables you to record relocation details and updates a student's School History accordingly.
More information on Relocations
- Open the Relocations section.
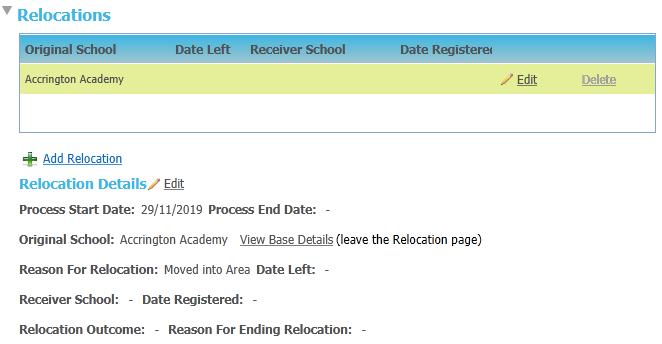
- Select one of the following options:
- Click the Add hyperlink to add any relocations information to the application.
- Click the Edit hyperlink to make the fields in the Relocations section editable.
- When a relocation is added, the Schools Approached section becomes available.
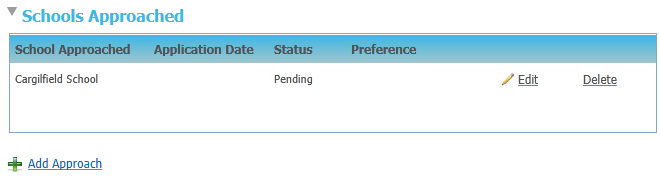
Click Add Approach, Edit or Delete as required.