![]()
Overview of Transfer Groups
A transfer group is a group of children who are applying to change school. A child must be a member of a transfer group in order for their school place application to be processed and an offer made.
The Transfer Groups page in the Process area is used to set up transfer groups and sub groups, choose selection process criteria, and define specific settings for each transfer group within Admissions and Transfers Online.
You can also set up a new transfer group, edit or delete existing groups and copy transfer groups.
Use the transfer group search to locate the group you wish to work with or click Add a New Transfer Group. You can filter the search by Code, Description (any number of characters) or Year. By default, the search only lists active transfer groups, but you can untick the Show Active Only box to include inactive groups in the list.
For each group the list shows the Code Description, Year and NCY of the transfer group, except for in year transfer groups that do not have an NCY.
Transfer Group Details
The transfer groups are listed in the left-hand panel. If required, use the search facility to filter the list. Select a transfer group to display its details in the right-hand panel.
Once you have set up a transfer group you can define its sub groups on the Process | Transfer Groups | Sub Groups tab page.
The followingfollowing fields are available in the Details area at the top of the Process | Transfer Groups page. These fields should be completed as appropriate when adding a new transfer group.
| Field | Description |
| Transfer Group Description | A description for the group code. It is useful to include information on the type of transfer e.g. Junior to Secondary and the year. This description is included in the transfer group lookup table. |
| Group Code | A code to designate this particular transfer group. Only three characters may be entered. The year is added to the code as a suffix on saving. |
| Year - Start Date - End Date | The year in which the transfer is to take effect. Select a year from the drop-down list. This list enables you to choose from the academic years defined in v4 client| Tools | Year Settings. |
| Intake NCY | The National Curriculum Year the students will enter when they transfer. This information is used by the Offer Scheme processes to compare the numbers of applications against the Published Admission Number (PAN) in order to allocate places. Intake NCY is not mandatory for an in-year transfer group as the In-Year Admissions process is not NCY dependent. |
| Student NCY | The current National Curriculum Year of the students to be transferred. The Student Selection process seeks students with this NCY in their student record to include in the transfer group. For example, when defining a group including children of nursery age, enter NCY -1 for 4-year olds. Note that if the NCY routine in ne v4 Tools | Year Settings | NCY is run to promote students to a new academic year then the Student Selection NCY should be updated. This information is not mandatory for an in-year transfer group as the In-Year Admissions process is not NCY dependent.This field is displayed only if the transfer group has already been processed. Appropriate access rights are needed to edit this field. A warning is displayed if the field is edited at the wrong time of year, since the NCY determines the cohort of children in the transfer group. Student NCY should only be changed when the NCY of the cohort changes (i.e. 1st September). |
| No. of Feeders | The number of feeder bases that have been assigned via the Feeders tab. This field is read-only. When adding a new transfer group, feeder bases can be added after the basic details have been saved. |
| No. of Receivers | The number of receiver bases assigned via the Receivers section for each sub group. This field is read-only. You only can add receiver bases when adding a new transfer group after you've saved the basic group details and added at least one sub group. |
| In Year Transfer Group | This check box indicates that the transfer group is to be used for in year admissions. Groups with this box selected can support students of different ages from multiple NCYs. Transfer groups marked as In Year display the In-Year tab, enabling you to define process periods. You can only change an existing normal phased transfer group with an Intake NCY specified to an in-year group if there are no students attached to the transfer group. Changing a normal phased group to an in-year group causes the Intake NCY and Student Selection NCY fields to be cleared, since an in-year transfer group does not have an Intake or Selection NCY. This process cannot be reversed. You cannot change a normal phased group to an in year group if that group has students attached to it. You can only change an in-year transfer group to a normal phased transfer group if process periods have not been defined for the transfer group. In year transfer groups are included in the list returned by the transfer group search but do not have an entry in the NCY column. |
| Active Flag | There can only be one active phased transfer group for a specific NCY in each academic year. The Active check box is deselected by default, indicating that the transfer group is Inactive and cannot be used in the selection and offer processes. In those areas where it is necessary to select a transfer group, the list is filtered by default such that only active groups are listed. In these cases, there is an option to display inactive groups. |
| Use GIS | If this check box is selected for a transfer group, the Catchments and Distance process uses the geocoded catchment polygons in combination with the easting and northing of the student's correspondence or admissions address (as appropriate), rather than the postcode catchments set up within Bases | All Bases | Catchment. |
| Use Admissions Address | This check box enables you to specify whether the admissions address or the correspondence address (if different) is to be used when running admissions processes that use the address information (for example, the Catchments and Distance process). If the correspondence address is the only address recorded, then this address is used even if the Use admissions address check box has been selected. If you change the Use admissions address check box for an active transfer group a warning message is displayed. The Catchments and Distance processes are not automatically updated when the Use admissions address check box is selected. As such, you should re-run the Catchments and Distances processes when you check Use admissions address. |
| System Generated Preferences Starting No. | A student can have Local Authority generated preferences as opposed to parental preferences. Local Authority preferences can be generated as follows: The GIS Catchment and Postcode Catchment processes generate Local Authority preferences based on their catchment. The catchment is determined by:
It is necessary to distinguish between the two different preference types. The starting number for Local Authority preferences is set here. As parental preferences are numbered 1, 2, 3 etc. it is suggested that you use a starting number for Local Authority preferences that avoids potential overlap (the default setting is 20). |
| Hide Application Verification | Select this check box to hide the Application Verified indicator on Students | Applications | Application Details. We recommend that the verification flag is not hidden for new transfer groups. |
| Late Application Rule (for Alternative Places) | Enables you to specify whether all of an application’s active preferences have to be late for that application to be considered late in the Allocate Alternative Places area, or whether the application is considered late if any of its active preferences are late |
| Alternative Places Preference Number | The starting preference number assigned to system-generated alternative preferences. |
The No Application, Withdrawn, No Offer and Import dummy bases are pseudo basespseudo bases to which students can be temporarily allocated during the offer processes.
| Pseudo Base | Description |
| No Application Base | This is the base to which students are assigned if they do not have a current school or where their current school is not listed as a feeder for the transfer group. You can allocate the students to a base using Application Details | Preferences. |
| Withdrawn Base | This is the base to which students that have withdrawn from the procedure (in Students | Application Details | Withdrawal Details) are allocated. Withdrawn bases are defined in the same way as dummy bases. |
| No Offer Base | This is the base to which those pupils who have expressed a preference but who still have no allocated school place are assigned by the Make Offers process. |
| Import Base | Students who are imported via ADT without a current base are assigned to this school. For example, a student who is transferring from an Independent Primary school to a Maintained Secondary might fall into this category. |
Introduction to Setting Up Transfer Groups
Transfer groups are set up via Process | Transfer Groups, either by setting up a new group from scratch or by copying an existing transfer group.
In year transfers are those in which children move from one school to another outside the Normal Phased transfer times.
To set up a new transfer group, either:
- Select Process | Transfer Groups | Add New Transfer Group to create a new transfer group from scratch.
- Select Process | Transfer Groups and copy an existing transfer group. This method saves time if the sub groups and subscription criteria do not change much from year to year.
When setting up the first in year transfer group, you should first use Copy Transfer Group to copy your previous year's primary school transfer group into the current year. You should then change this group to an in-year transfer group (by ticking the in-year check box) and amend the description and group. Using this process means that the bulk of your schools (for example primaries) are already set up in appropriate sub groups for the transfer group, thereby saving time.
You should then edit the Intake and Student NCYs, add (for example) secondary and other schools into sub groups and define process periods.
Mandatory and optional fieldsMandatory and optional fields
When adding a new transfer group the following fields are mandatory:
- Transfer Group Description and Code
- Year: the year the transfer of the children will take place
- No Application Base / Withdrawn Base / No Offer Base: pseudo bases which are to be set up in case that there is no base available to be used in certain situations.
The following mandatory fields are dependent on the type of transfer group:
Phased
- Intake NCY: the NCY of the children when they start at the new school.
- Student NCY: the NCY of the children when they are placed into the transfer group.
In Year
- In Year check box: when selected this enables the transfer group to be used for in-year admissions. In year groups support students of different ages from multiple NCYs and feature manually definable process periods.
The following are optional:
- Active: This check box makes the transfer group available for use in the Selection and Offer processes if checked.
- Use GIS: If this is checked for the selected transfer group, the Flag Catchment Process routine uses the geocoded catchment polygons in combination with the Easting and Northing of the student’s correspondence address, rather than the postcode catchments set up within Bases | Base Catchment.
- Use Admissions Address: This check box enables you to specify whether the admissions address, or the correspondence address is to be used when running admissions routines that use the address information (for example, the Flag Catchment routine and GIS Batch Processes). In most cases these are the same.
- Import Feeder Base: A pseudo base into which students are placed if their data has been imported in an Admissions Data Transfer (ADT) file and they have no current base.
The following optional fields are dependent on the type of transfer group:
Phased
- Late Application Rule (for Alternative Places): Enables you to specify whether all of an application’s active preferences have to be late for that application to be considered late in the Allocate Alternative Places area, or whether the application is considered late if any of its active preferences are late
- Alternative Places Preference Number: The starting preference number assigned to system-generated alternative preferences.
- Hide Applic. Verified check box: This enables you to specify whether or not the Application Verified indicator is displayed on Students | Applications | Application Details.
In Year
- Intake NCY and Student NCY are not normally used for in year transfer groups as the In-Year Admissions process is not NCY dependent.
Once all of the necessary information has been completed then the transfer group can be saved and become active.
Phased Transfer Groups
Phased transfers are those transfers in which children move from one stage of compulsory education to another (for example primary to secondary or lower to middle). These transfers usually take place in September, and involve a change of school.
Features of a phased transfer group:
- The children are all in the same NCY (the Admissions Online public facing software uses a child's date of birth to determine which transfer group or groups they are eligible for).
- The children are all moving from one phase of compulsory education to another (for example primary to secondary or lower to middle), usually in September.
- There are multiple phased groups per academic year (at least one per phase change).
- All offers for a transfer group are made at the same time, on the appropriate National Offer Day for that phase.
- Each phased transfer group can consist of any number of sub groups, each with different oversubscription criteria and online settings.
Adding students to a Phased Transfer GroupAdding students to a Phased Transfer Group
Students can be added to phased transfer groups by:
- Run the Student Selection process.
- Add an application manually via the Students area.
- Import an online application and match the imported student to an existing student who is not already in the transfer group.
When the Student Selection process is run:
- All students registered at the feeders and in the Student NCY select in Transfer Group | Basic Details are added to the transfer group.
- The number of students added successfully is displayed.
- If any of these students have incomplete information (e.g. no post code recorded as part of their correspondence address) then they are added to the transfer group but are also recorded in an error log.
- A Unique ID number (UID) is generated for each student.
If receivers are to be allocated on the basis of catchment areas, any postcode errors must be corrected before using pre-offer processing. Any students with postcode errors are placed within the No Application base (from where they can be manually allocated via Bases | Receivers | Preferences) when pre-offer processing is run.
Student Selection can be run more than once, for example if new students have been registered at a feeder school or if new feeders have been added to the transfer group.
Any new students are added each time the process is run, and a count of these students is displayed.
If a student is added to the transfer group after this process has been carried out (e.g. by adding an application via the Students area), their UID is generated when they are added to a transfer group manually. If the student is then added to another transfer group, another, different, UID is generated for that student within the new transfer group. This ensures that the correct transfer group is located when an applicant enters the student's UID.
Any students who reside in another LA are added to the transfer group during this process, but their applications must be made to their Home LA. LAs can advise other LAs of such students via the DfE APT (Admissions Pre-Transfer) schema file, which is generated via the A&T v3 | Inter Authority Transfer processes.
In Year Transfer Groups
In year transfers are those transfers in which children move from one school to another outside the Normal Phased transfer times.
Features of an In Year transfer group:
- The children can be from any NCY.
- The children are changing schools outside the Normal Phased transfer times (e.g. due to a house move).
- A Local Authority has one In Year transfer group per academic year.
- Offers can be made at any time. If required, process periods can be used to define mini application rounds to process In Year admissions.
- Each In Year transfer group can consist of any number of sub groups, each with different oversubscription criteria and online settings.
Student SelectionStudent Selection
Students can be added to In Year transfer groups by:
- Running the In Year Student Selection process.
- Adding an application manually via the Students area.
- Importing an online application and matching the imported student to an existing student who is not already in the transfer group.
In Year Student Selection
The In Year student selection process is carried out at the beginning of the academic year. It carries the following groups of students forward to the current In Year transfer group:
- Home LA students on a waiting list in selected Normal Phased transfer groups from the previous academic year.
- Any students with incomplete, outstanding applications from the previous year’s In Year transfer groups.
Feeder transfer groups must be selected for In Year transfer groups before the In Year Student Selection process can be run.
The numbers of students successfully added to the transfer group and the number that could not be added are displayed as hyperlinks on the Students tab. Click on either of these links to display a printable report listing the students and giving further information relating to their applications.
Before running Student Selection, ensure that as many students as possible have a correspondence address with a postcode, unless their address is flagged as Overseas.
The In-Year tab is only enabled when you have selected a transfer group with the In-Year Transfer Group check box ticked. This tab does not apply to normal phased admissions.
Process Periods
Process periods define the start and end time of the mini application rounds that can be used to process in year admissions. Periods are defined on the Process | Transfer Groups | In Year tab. Once process periods have been set up you should record school vacancy numbers for these periods as vacancies arise throughout the year. Vacancy numbers are entered in Bases | All Bases | PAN & Vacancies.
Any periods that have already been set up are listed in start date order, showing the start, end and offer dates.
Deciding whether to use One or Multiple Process Periods
You should define process periods that enable you to meet your Local Authority's In Year Admissions plans.
In order to use the Make Offers and Resolve Offers processes for in year transfer group, you must define multiple process periods. Make Offers is run once for each process period, while Resolve Offers can be run multiple times per process period. Final Allocation should only be run once for each process period.
Local Authorities who wish to manage all in year applications manually and not use Make/Resolve Offers to offer places still need to define at least one process period to cover the whole of the academic year. For example, this period might have a start date and time of 01/09/2010 00:01, an application closing date of 31/08/2011 23:58 and an offer date of 31/08/2011 23:59. This process is necessary to record vacancies for a base, since vacancies are logged against a process period.
Local Authorities who only define one process period must overwrite vacancy information each time, since only one set of vacancy information can be logged for a process period. If you plan to allocate all in year places manually we would still recommend that you define multiple process periods to reflect your Local Authority's policy on managing in year admissions within certain timeframes, enabling you to manage vacancies and allocations effectively.
Add Process Periods
A series of date and time fields open when you click Add Process Periods. These fields enable you to add the process periods for the in-year transfer group. Each in year transfer group can have multiple process periods.
The length of the periods is determined by Local Authority policy and the way that Education is used to support that policy. You could set up either single or multiple periods for the year. If you use multiple periods it is important that they are set up so that when an application closing date passes the next period starts immediately after. Setting up periods in this way ensures that applications can be made at any time.
The coordination of in year applications is most effective if the process periods for neighbouring authorities are coordinated.
The period number is an incremental number that is generated each time a new line is added to the list of process periods.
You need to enter all three dates and times - start date, application closing date and offer date. Process periods cannot overlap and dates must be entered or edited according to a set of rules. There is a default time for each item that you can change as required. If you select a time of 00:00 you are asked to confirm your selection.
Delete Process Periods
Click Delete to remove any incorrectly added process periods. You can only delete a process period if there is no vacancy data stored for it against a base. A message warns you if any vacancy data will be affected by the deletion.
Manage Transfer Groups
Copy an existing transfer group
To save time when defining transfer groups for a new year you can copycopy the details of the currently selected transfer group.
The feeder and receiver schools in a transfer group may remain fairly constant from one year to the next. To save time when defining transfer groups for a new year you can copy the details of the currently selected transfer group.
Click the grey arrow on the toolbar at the top of the screen to expand the transfer group details and then click Copy Transfer Group. A new group is created with the Year field increased by one. The new group’s details may now be edited.
The following items are copied to the new transfer group during the copy process:
- Most of the basic transfer group details.
- All sub groups, including their special reason codes and online parameters.
- Feeders.
- Coordinating LAs.
- Most of the E-Application Settings information associated with the transfer group (including memo text and the online label for the transfer group).
The following items are not copied to the new transfer group:
- The setting of the Use Admission Address check box in the transfer group basic details.
- Process periods (In Year only). These are year specific and so do not apply to the new transfer year.
- Any sub groups without receivers.
- The E-Application Settings dates.
You cannot copy a transfer group if there is an existing group in the next academic year with the same transfer group code as the group you are trying to copy. The combination of group code and year must be unique.
Delete a Transfer Group
A transfer group can be deleteddeleted if it has been added in error or if the information is out of date and no longer needed.
Click the grey arrow to expand the transfer group details and then click Delete.
A warning message asks you to confirm the action. You are warned if any transfer records are associated with the group.
When you attempt to delete an in-year transfer group the system carries out a check to make sure the group does not have any Process Periods set up (on the In Year tab). A warning message displays if there are process periods configured for the group. The transfer group cannot be deleted until the process periods have been deleted.
Sub Groups
Sub groups enable Local Authorities to coordinate all available school places at all admissions authorities. LAs can sub groups to define oversubscription criteria, special reason codes and some online parameters for individual schools or groups of schools within their transfer groups.
For example, an LA might use a sub group to manage Voluntary Aided schools. Voluntary Aided schools are the responsibility of another admissions authority, and might have different criteria to those schools for which the LA is the admissions authority.
It might be useful to create a separate sub group for each receiver school that uses banding or is its own admissions authority (OAA). This enables each school to set its own oversubscription criteria, special reason codes and sub group online parameters.
Sub Groups Tab
The Sub GroupsSub Groups tabs enable the coordination and resolution of all student places within the Local Authority, including those that are the responsibility of Other Admissions Authorities (OAA) such as foundation and voluntary aided schools.
In order to handle the coordination of all available school places at all admissions authorities, the Local Authority can define oversubscription criteria for specific sub groups of schools within a transfer group (e.g. Voluntary Aided schools, which, being the responsibility of another Admissions Authority may have different criteria to those schools for which the Local Authority is the Admissions Authority). These sub groups are assigned to a set of schools as receivers (a sub group can have single or multiple receivers) rather than allocating receivers for the transfer group as a whole.
The Sub Groups tabs enable the coordination and resolution of all student places within the Local Authority, including those that are the responsibility of Other Admissions Authorities (OAA) such as foundation and voluntary aided schools.
Each sub group must have its own set of oversubscription criteria and special reason codes defined. In addition, the appropriate receivers must be assigned.
Click Add Sub Group to open a modal window.
Enter the name of the sub group, select all the check boxescheck boxes that apply to that sub group and then click the Save button.
Maintain Waiting List
Select the Maintain Waiting List check box to specify that the selected sub group and all receivers associated with it can maintain a waiting list should they be oversubscribed.
Edit Rank
Select the Edit Rank check box to specify that the rank of students who have expressed preferences at the receiver bases for this sub group can be edited (ranking is edited on Manage Allocation | Offer Scheme). This indicates that a base is the responsibility of an Other Admissions Authority (OAA) and is recognised as such.
For users of the School Admission portal who are mapped to OAA bases, only Applicant preference reasons will be shown for Catchment, Feeder and Distance when Edit Rank has been ticked.
For users of the School Admission portal who are mapped to non-OAA bases, only LA preference reasons will be shown for Catchment, Feeder and Distance when Edit Rank has been ticked.
Use Feeder Link
Select the Use Feeder Link check box if you wish to use the Feeder Receiver process to support allocation within the sub group.
Use Flag Catchment
Select the Use Flag Catchment check box if you wish to use the GIS Catchment process or Postcode Catchment process to support allocation within the sub group.
Do Not Include in Offer Processing
The Do Not Include in Offer Processing check box enables you to set up a sub group for applications to receivers that need to be processed manually. This process enables out of phase applications (i.e. normal time applications, as opposed to Casual Applications) for schools that would not normally be included in the transfer process (where it is not the normal intake year for the receiver base). For example, an Infant school might normally feed into a Junior school, but some parents may apply for their children to go into a primary school instead, joining at a time part-way through a child’s normal time at the primary.
In some cases a primary school might allocate a certain number of places for this situation and can be treated as a normal receiver, in which case Offer Processing can be used. The Do Not Include in Offer Processing check box enables you deal with applications to primaries that don’t normally allocate places in this way.
If this check box is selected:
- The Make Offers routine does not allocate places to any receivers in this sub group.
- The Resolve Offers and Final Allocation routines do not include these receivers when resolving offers to 1.
- The PAN is ignored, so the Make Offers routine does not return an error message if no PAN is available for the selected NCY.
- The applications must be processed manually.
Using "Do Not Include in Offer Processing" for In Year Transfer Groups
This function applies more to normal phased transfer groups than in year groups. However, Do not include in offer processing can be used if you need to exclude certain bases from an in-year group. Bases excluded using this function are excluded for all NCYs, as it is not possible to exclude a base only for certain NCYs.
If the Do not include in offer processing check box for a sub group is selected for normal phased admissions, the option may not also be applicable for in year processing. You may wish to deselect Do not include in offer processing unless you want to exclude the base(s) in that sub group (for all of their NCYs) from the in-year offer processing.
Hide in School Admissions Portal
Select the Hide in School Admissions Portal check box so that when a Portal user who is mapped to a base which is part of this Sub Group logs in, they will not be shown any active applications for this base.
The Sub Groups tab now includes the newly added sub group. Click View Details where you can view and edit the associated information.
Sub Group Details
This Sub Group DetailsSub Group Details section includes the flags for Maintain Waiting List, Edit Rank, Use Feeder Link, Use Flag Catchment, Do Not Include in Offer Processing and Hide in School Admissions Portal.
Application Statuses Displayed to Schools
When viewing applications in the School Admissions Portal, the Receiver Summary panel displays offer statuses once the Show Offers to Receivers date is reached. If the Show Offers to Receivers date is not populated, then this is only available on and after the Transfer Group Publicise date.
The Receivers section of Sub Group Details indicates the number of receivers already chosen, if any. You can add or delete receivers by clicking on Edit.
A receiver can only be associated with one sub group for each transfer group.
If no receivers have yet been chosen, a complete list of All Bases is displayed. You can filter this list by Home LA or Other LA bases or search for a specific Base Name, School No., Base Type or Base Control.
To select multiple bases from multiple searches, select one or more records from a set of search results and then click the Freeze & Search button. This button preserves your existing selection whilst enabling you to carry out and select from further searches.
Any receivers that have already been selected are listed first, followed by all the other available receivers for the sub group (depending on the filters you have chosen). These two sets of receivers are separated by a brown line so you can easily tell them apart.
If you click Show Available First, all receivers that have not been selected for this or any other sub group within the transfer group are listed first. Click Show Sub Group Receivers First to re-order the list again.
Select the check boxes for the receiver names you need include in the group. A check box at the top of the check box column enables you to select or deselect all the bases in the filtered list.
It is necessary to rank students' preferences against oversubscription criteria for bases that are oversubscribed. For transfer groups that use the Offer Scheme these criteria are held against receivers via the sub groups with which they are associated. Any oversubscription criteria that have already been selected for this sub group are listed in the Oversubscription Criteria section of Sub Group Details. If you need to add or edit the reasons, click Edit to open a complete list of criteria. Select the criteria you want to use and type in the priority order number for each criterion. The priority order must start at 1 and use consecutive numbering.
A separate list of oversubscription criteria should be defined for each sub group. Setting up criteria is not mandatory for the admissions process.
If the oversubscription criteria result in a situation where there are more children with an equal right to admission to the school than the number of places available, the Parental Preference criterion is used as a tie-breaker to resolve the matter.
Amending the oversubscription criteria after the offer routines have been run can reset the allocations. For an in-year transfer group, amending the criteria only resets the allocations for students who have an application status that is not CLOS (Closed/Completed).
The Make Offers process uses the oversubscription criteria for each sub group to rank the students. Up to three special reasons can be used as oversubscription criteria. Within each special reason a group of codes can be chosen, such as a list of medical reasons, all with weightings assigned. Ranking proceeds first by special reason and then by the weighting of the codes within the reason, with a weight of 1 being the highest priority. Special reason codes are defined on the Administration | Applications | Special Reasons tab and assigned to sub groups on this page.
If you expand the Special Reasons section by clicking Open, any codes already selected for special reasons are listed. If a code is available for use in Admissions and Transfers Online then its online label and description is displayed.
Click Add Codes to open the Choose Special Reason Codes window. All codes that are not currently used for the sub group are listed, along with their code, description and weighting. Select the check boxes for the codes you wish to use. If you want a special reason code to be available online for applicants to select, select the View O/L checkbox.
If you have made any of the codes available online, click Edit and enter a label and clear description to enable the online applicants (who in most cases will be the parents of the students) to understand and select them. You should avoid the use of any jargon, internal codes or abbreviations. Parents are able to select codes from a drop-down list if there is more than one code for a given special reason. It may be appropriate to include information on how to select codes in the description.
Special reasons are configured in four steps:
- Select up to three special reasons as oversubscription criteria via Process | Transfer Groups | Sub Groups | Sub Group Details | Oversubscription Criteria.
- Define the special reason codes and allocate them to the master list for each special reason via Administration | Applications | Special Reasons.
- For each special reason that has been selected as an oversubscription criterion, add codes from the master lists via Process | Transfer Groups | Sub Groups | View Details | Add Codes. These codes are available for selection during the application process.
- For each special reason that is available to online applicants, add a label and description to enable those applicants to choose the most appropriate code.
This section of the Sub Group Details page enables you to set the sub group specific options that are available for an Admissions Online user who is in the process of selecting a receiver from a sub group. These options include explanatory memos and preference reasons. The Other Reasons memo is not included here, as it is always available online in order to enable applicants to express their wishes in text format.
Memos
This section enables you to add or edit sub-group specific explanatory memos that aid the applicant when selecting preference reasons. There are four memos that can be added:
- Medical Question: Explains the Local Authority’s policy on medical reasons and informs applicants that they may need to supply extra evidence.
- Other Reasons Supporting Text: Explains that the applicant can select other reasons if their reasons for preference are not covered fully by the onscreen options and informs them that they will be able to explain their reasons fully on the next page.
- Oversubscription Criteria: Gives an overview of the oversubscription criteria and explains how applicants should select them.
- Sibling Question: Displays the question that asks an online applicant whether or not their child has a sibling at the preferred school. Further text explaining your Local Authority’s definition of who is considered to be a sibling for school admissions purposes should be included.
Example: “Does your child have a sibling who will still be attending the school when your child starts?”
Preference Reasons Displayed Online
These reasons determine whether or not the preference reasons are available on screen for an applicant to select. The following options are displayed:
| Sibling | Religion | Medical |
| Selective School | Specialist School | Catchment |
| Feeder Link | Social | Distance |
| Ease of Travel | School Gender | |
| Do not consider for mainstream | Staff Child |
These reasons correspond to the Applicant Reasons displayed in Students | Applications | Application Details | Preferences | View Reasons.
Click Edit and select or deselect the check boxes to make changes. If a check box is selected, then the appropriate label and check box or selector is displayed online. All the check boxes except Staff Child are selected by default.
The Do not consider for mainstream check box is shown only for bases that use either ability or aptitude banding. If an applicant selects this option but has not indicated a Specialist School (for aptitude banding) or Selective School (for ability banding) as a preference reason then the following warning message is displayed:
“You have indicated that you do not wish to be considered for Mainstream, but you have not indicated Selective / Specialist reason. Please amend the details below.”
Named School is not available as a preference reason because this information is derived from the fact that the parent claims that their child has a statement. The Other Reasons memo box is always available for use online.
Any other online parameters are set for the Local Authority as a whole and should be entered and selected on the Administration | Applications | Online Parameters
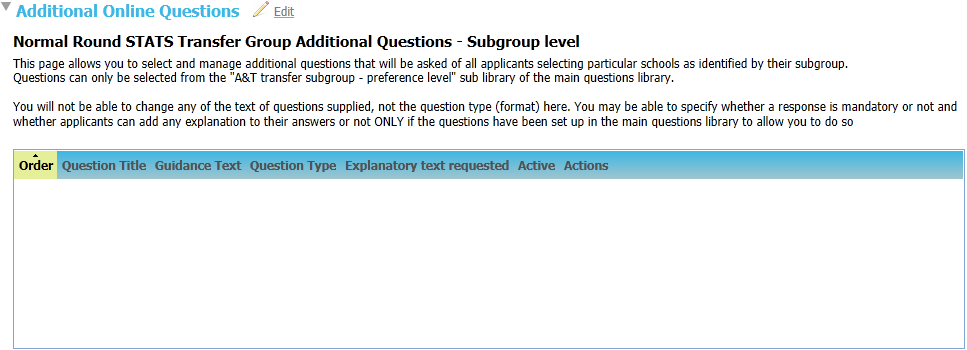
Additional Online Questions
The Additional Online Questions tab enables you to select a set of questions to be displayed to applicants when applying for receivers in the selected subgroup.
Only questions stored in the A&T subgroup level library can be selected for use on this tab. For more information on configuring question libraries, see the Configurable Question Library section of the School Place Administration Citizen Portal handbook, available from the Publications website.
To make changes to the flags, click the Edit link and select the check boxes as required.